

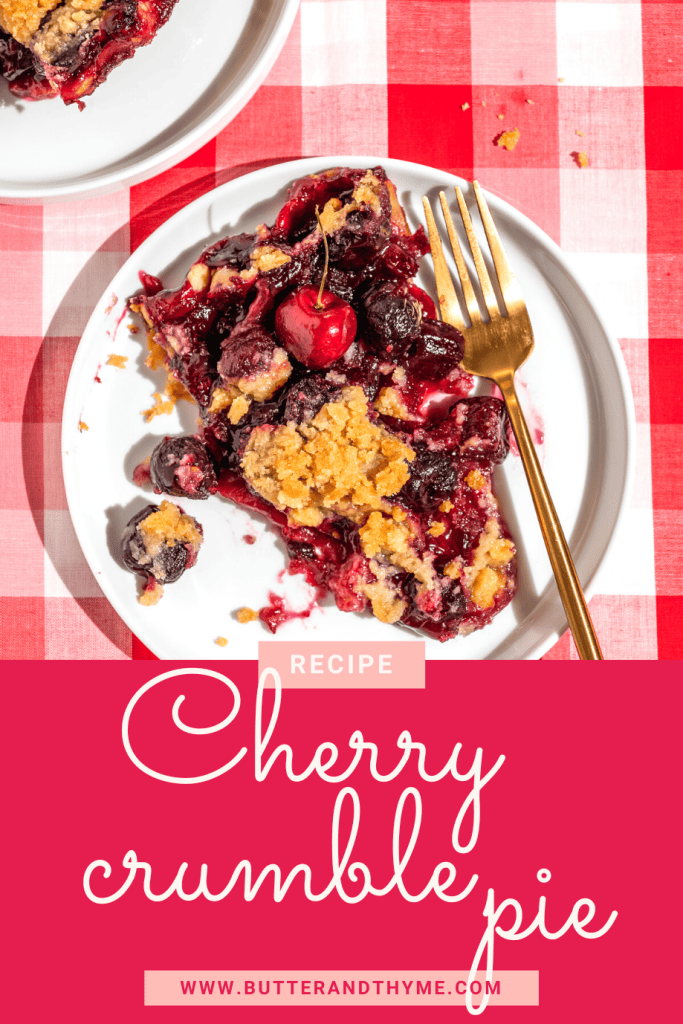
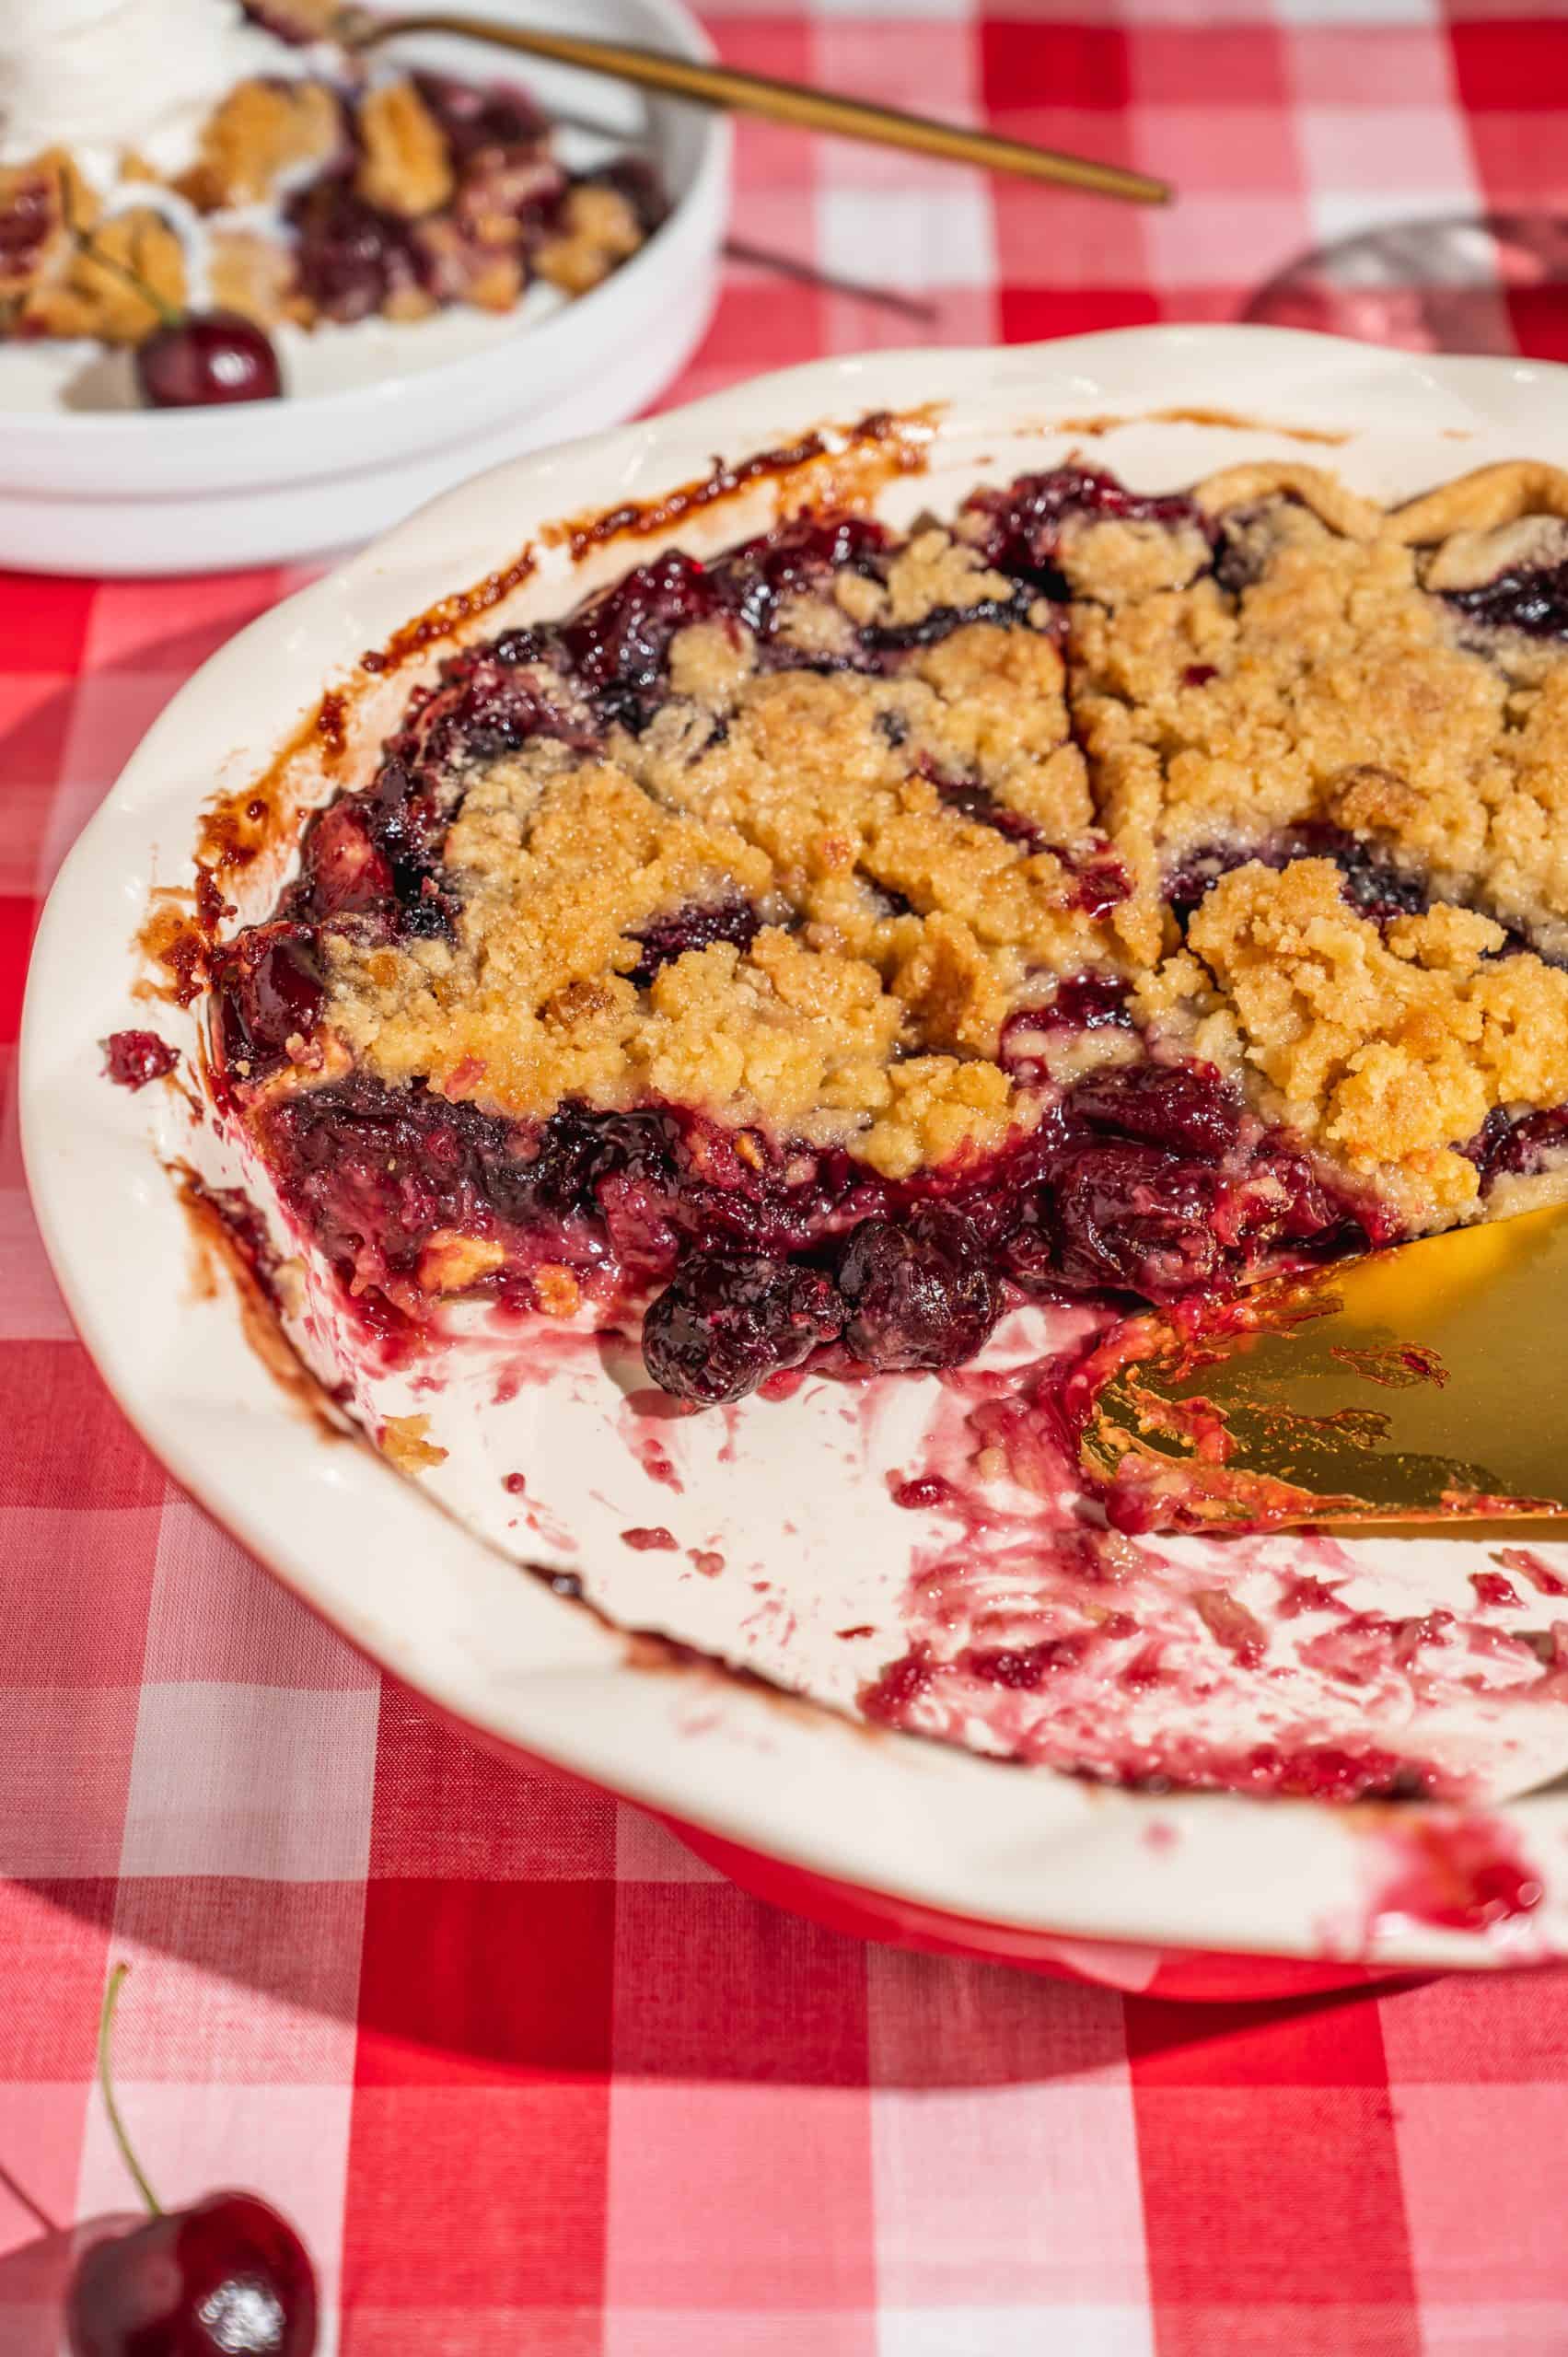
This delicious cherry crumble pie recipe has the smooth syrupy texture of a canned pie filling, but a fresh cherry taste that can only be homemade!
I use a simple crumble for the top layer because it’s way less fussy than rolling out a pie crust. I also love the combination of textures that comes from the flaky bottom crust and the crunchy golden crumb topping.

Cherry pie is my dad's favorite dessert, so we make it a lot! He grew up eating a store-bought filling and loves it for its sweet taste and syrupy texture. My goal with this recipe was to make a sweet cherry filling with those same qualities but use more whole cherries for a fresher, less artificial taste.
Since it’s homemade, this cherry pie recipe only uses natural ingredients and no preservatives. Not saying this is healthy by any means (it still has a lot of sugar!) but it’s better than canned, and it tastes better too!
I think of cherry pie as a summery dessert since cherries are in season in warmer weather, but you can make this year-round with frozen cherries. We love to make it for Thanksgiving (along with Grandma's Apple Cake!) It’s also a great Christmas pie because of the beautiful bright red color.
With the crumb topping, it's similar to Marie Callender's Cherry Crunch Pie recipe. If you're a fan, try my Marie Callender copycat Chocolate Satin Pie too- another one of my favorite holiday pie recipes.
Jump to:
Why You'll Love This Recipe
- The cherry pie filling has the smooth, syrupy consistency of canned pie filling, but it's bursting with fresh cherry flavor.
- You can make this recipe with fresh or frozen cherries and with tart/sour or sweet varieties. I noted how to adjust the recipe based on what type of cherries you use in the recipe card at the bottom.
- The simple crumble topping is easier than a rolled-out pie crust and gives a delicious variety of textures!
Ingredients
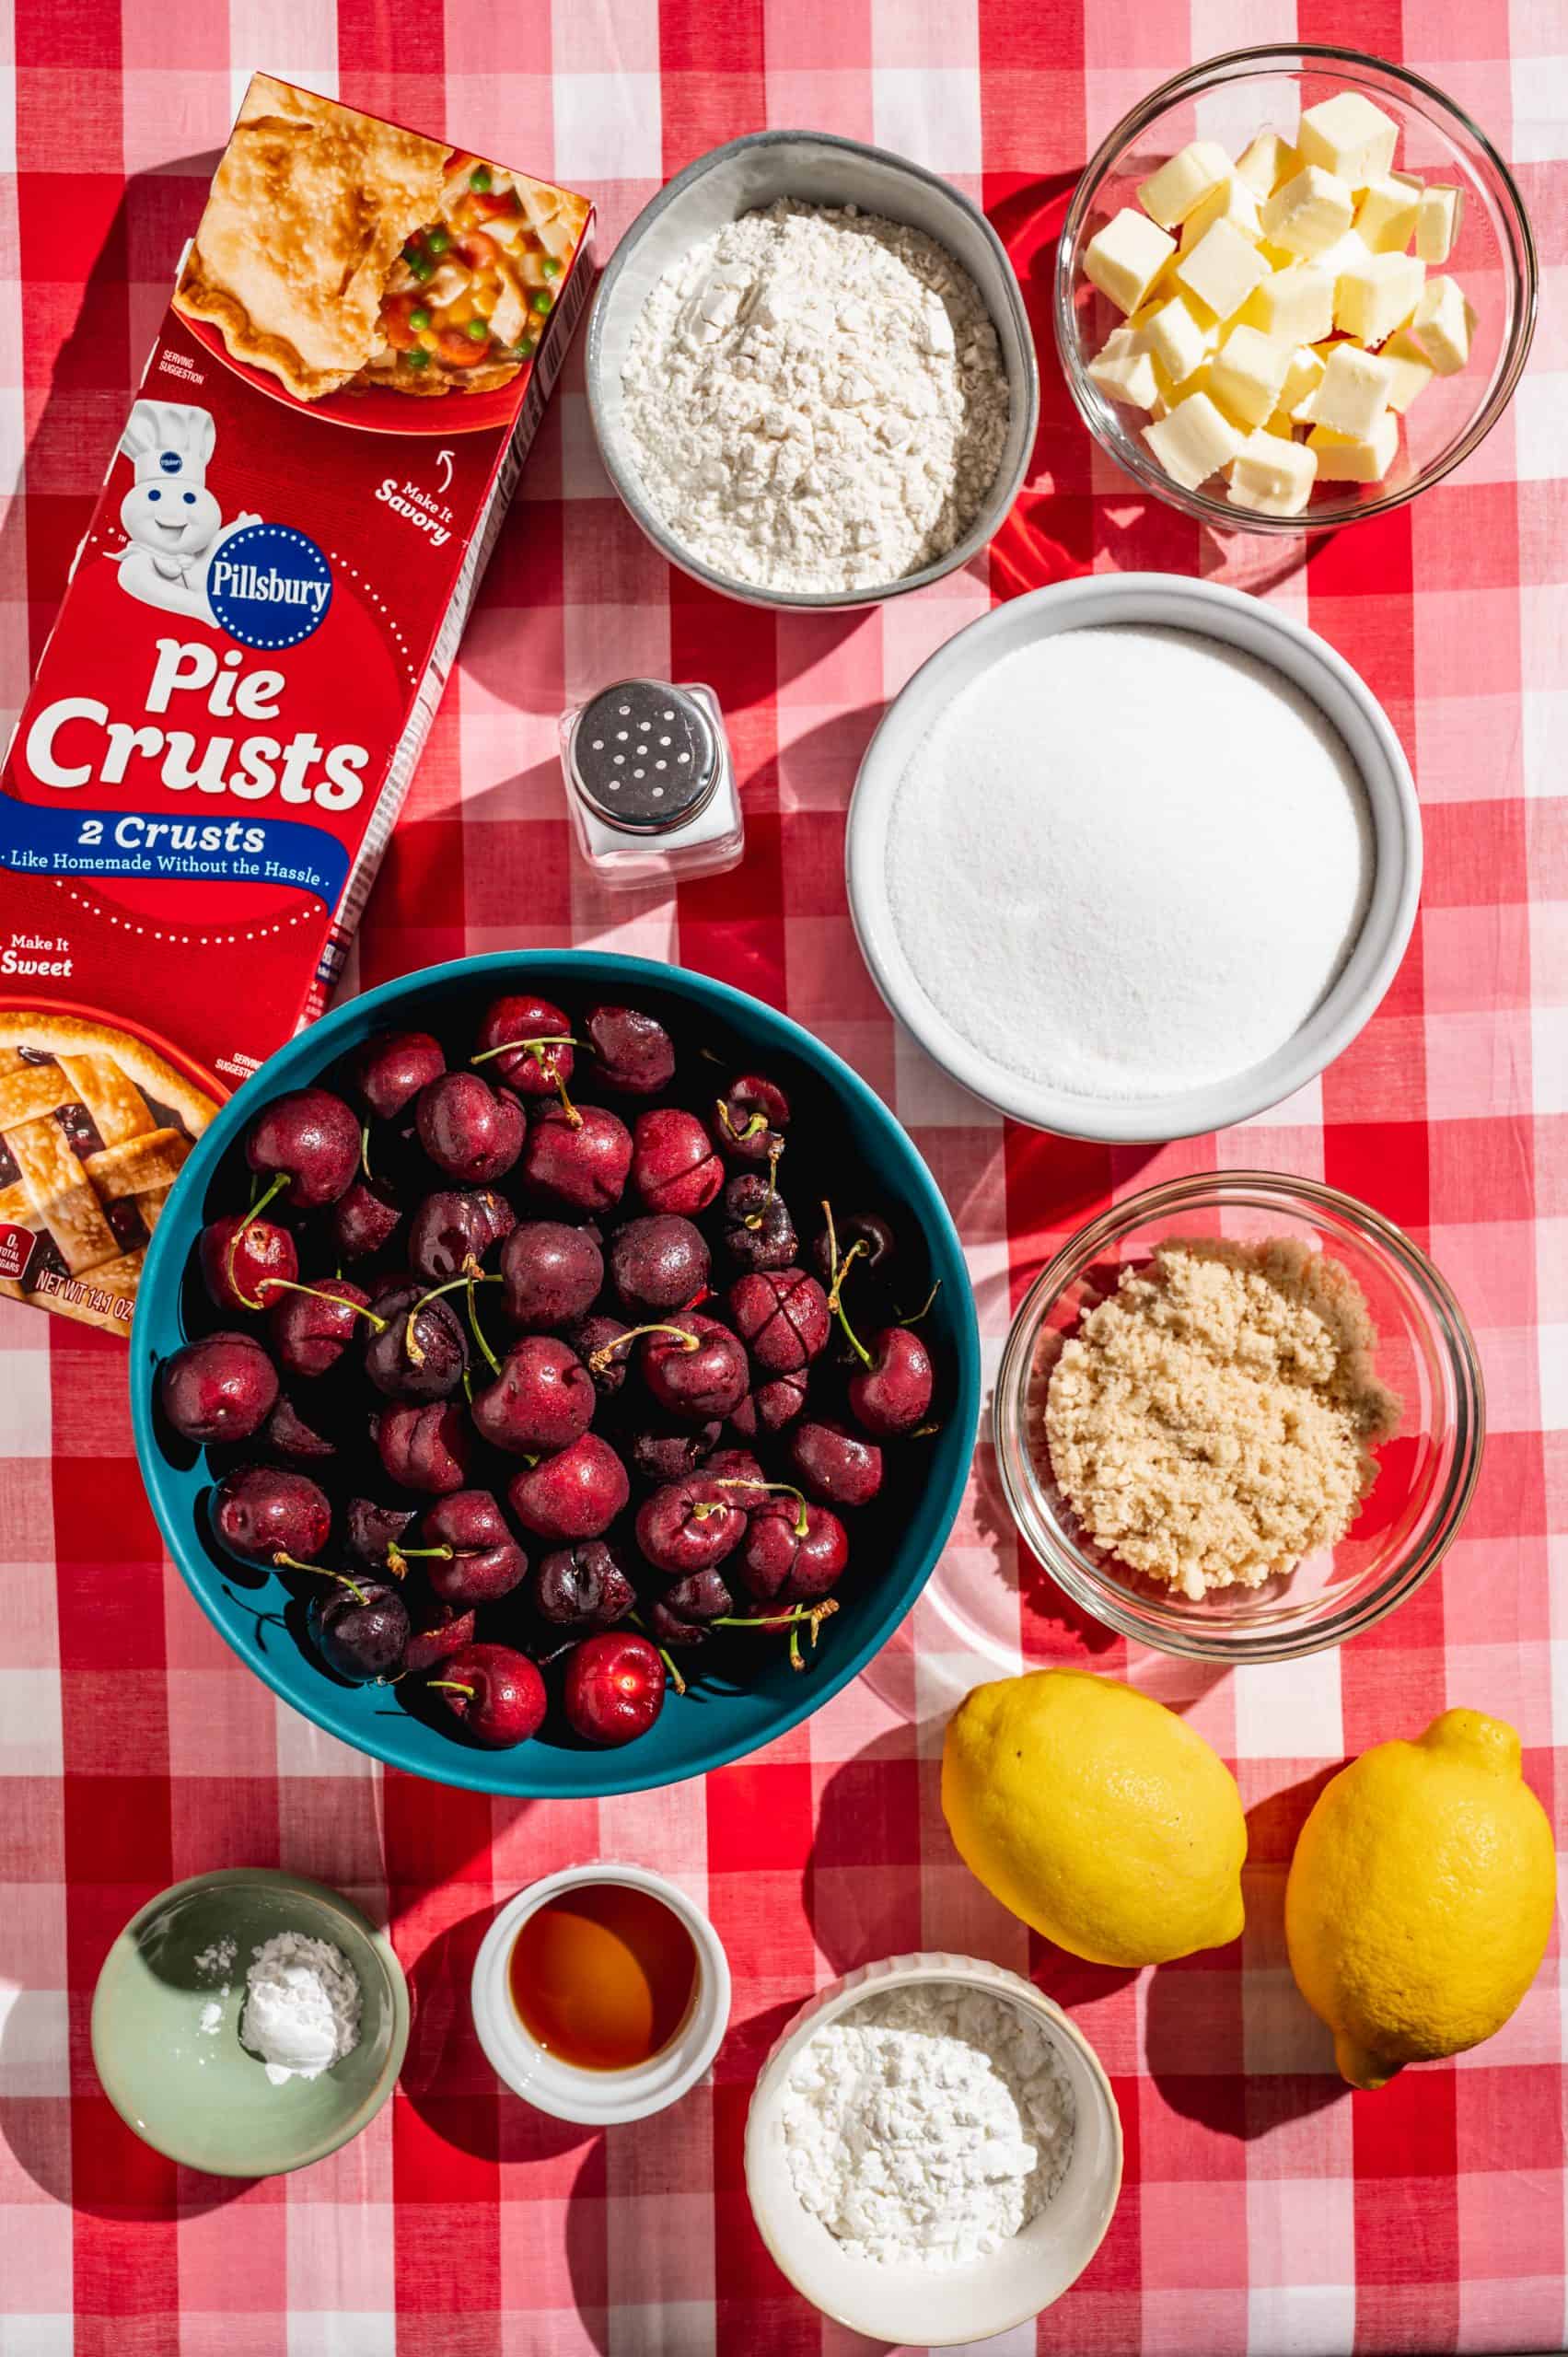
- Cherries- frozen or fresh, usually available tart or sweet. I recommend tart or fresh sour cherries if you can find them in season, because I add a lot of sugar to balance out the tartness. If you use sweet cherries, you may want to reduce the sugar by about ⅓.
- Vanilla extract
- Almond extract- did you know almond extract mimics the taste of cherries? Weird, but it’s true! It doesn't taste nutty, it just brings out the flavor of the cherries. But you can leave it out or replace it with extra vanilla if you prefer.
- Cornstarch- this is what thickens the juices of the pie and makes it more gelatinous. You can use any starch-based pie thickener here - tapioca or all-purpose flour also work.
- Sugar - granulated.
- Lemon juice - adds acidity to balance out the filling so it's not overly sweet. Lemon juice also contains pectin which helps thicken fruit juices to make jam (or pie filling).
- Flour - all-purpose, or substitute almond flour for extra almond/ cherry flavor.
- Light brown sugar
- Baking powder - contributes to a lighter, more tender streusel topping.
- Salt
- Butter - cold and diced, to incorporate into the crumble.
- Pie dough - use your favorite single pie crust recipe. Or refrigerated store-bought pie dough, already rolled out, makes it super easy. Either way, you want to start with raw pie dough pressed into a pie plate. Something like a premade graham cracker crust won't work well because it will overcook.
See recipe card for quantities.
How to Make Cherry Pie Without Top Crust
If rolling out pie dough isn’t your thing, you can top this cherry pie with crumb topping instead. Much easier and even more delicious in my opinion!
Start by making the cherry pie filling, then make the simple streusel while the filling cools:
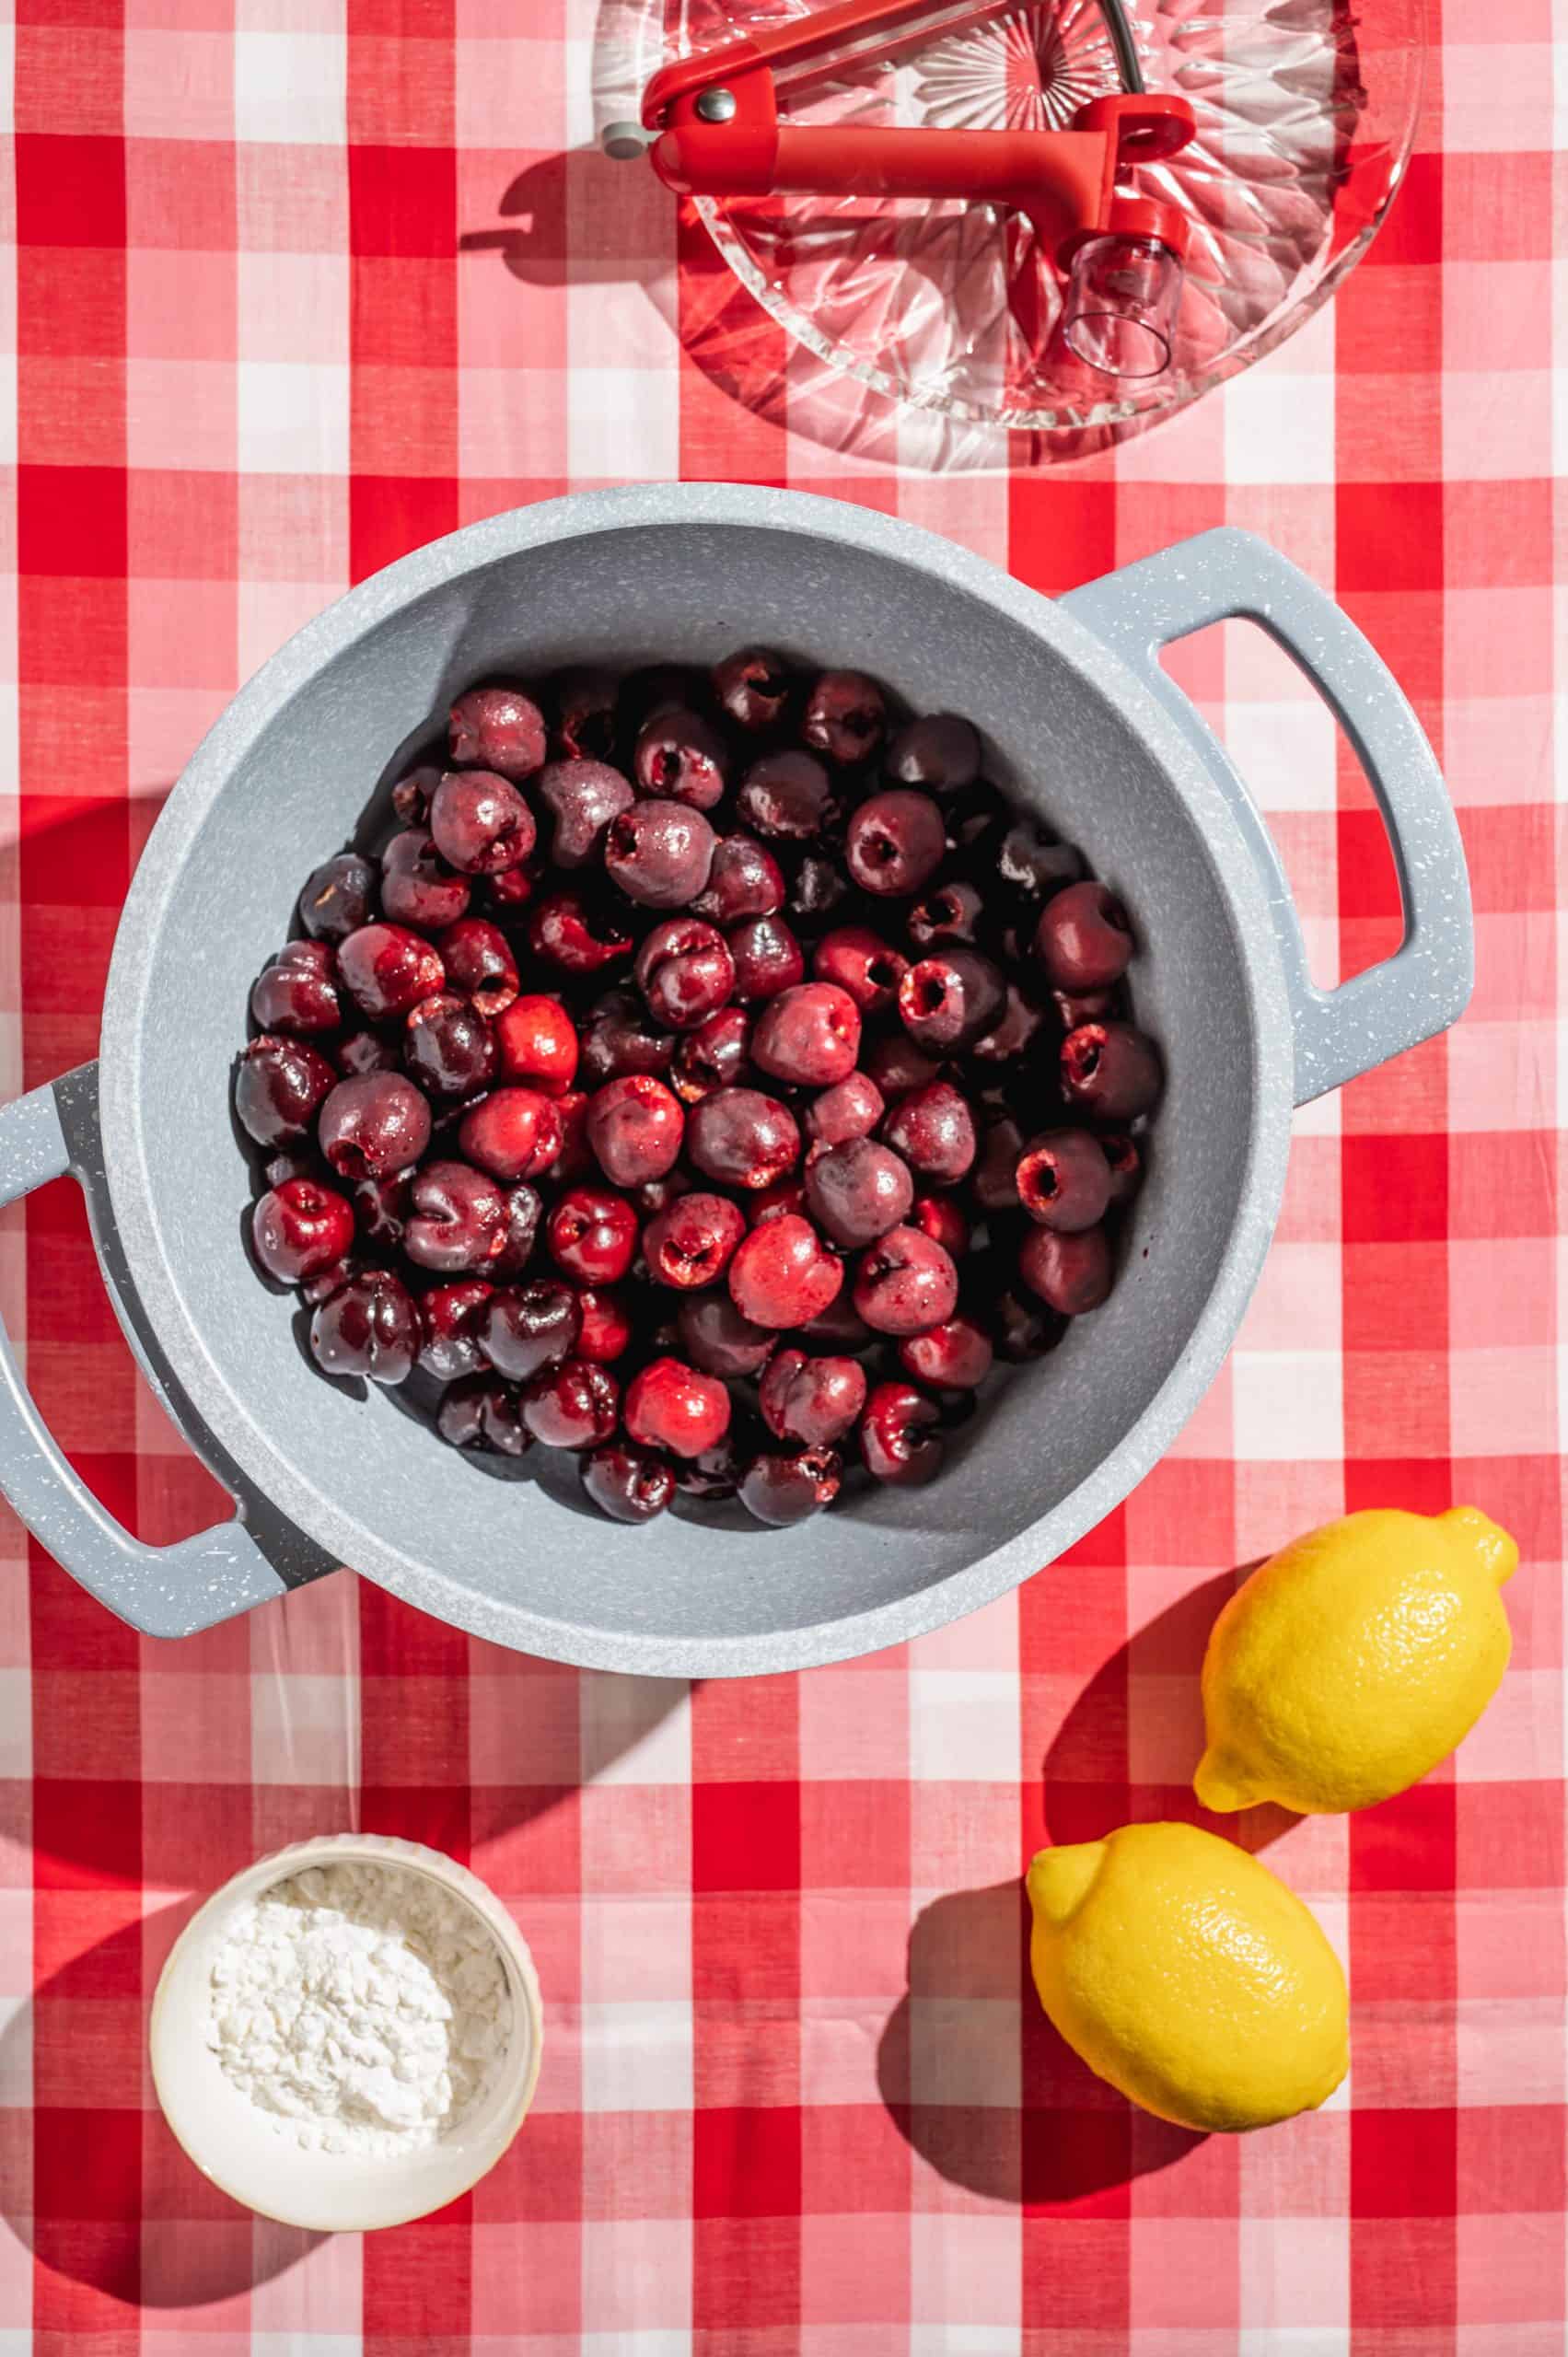
First, place the pitted cherries in a large pot. Add water, sugar, and extracts, and cover with a lid. Then set the pot over medium heat for about 5 minutes until the sugar is dissolved.
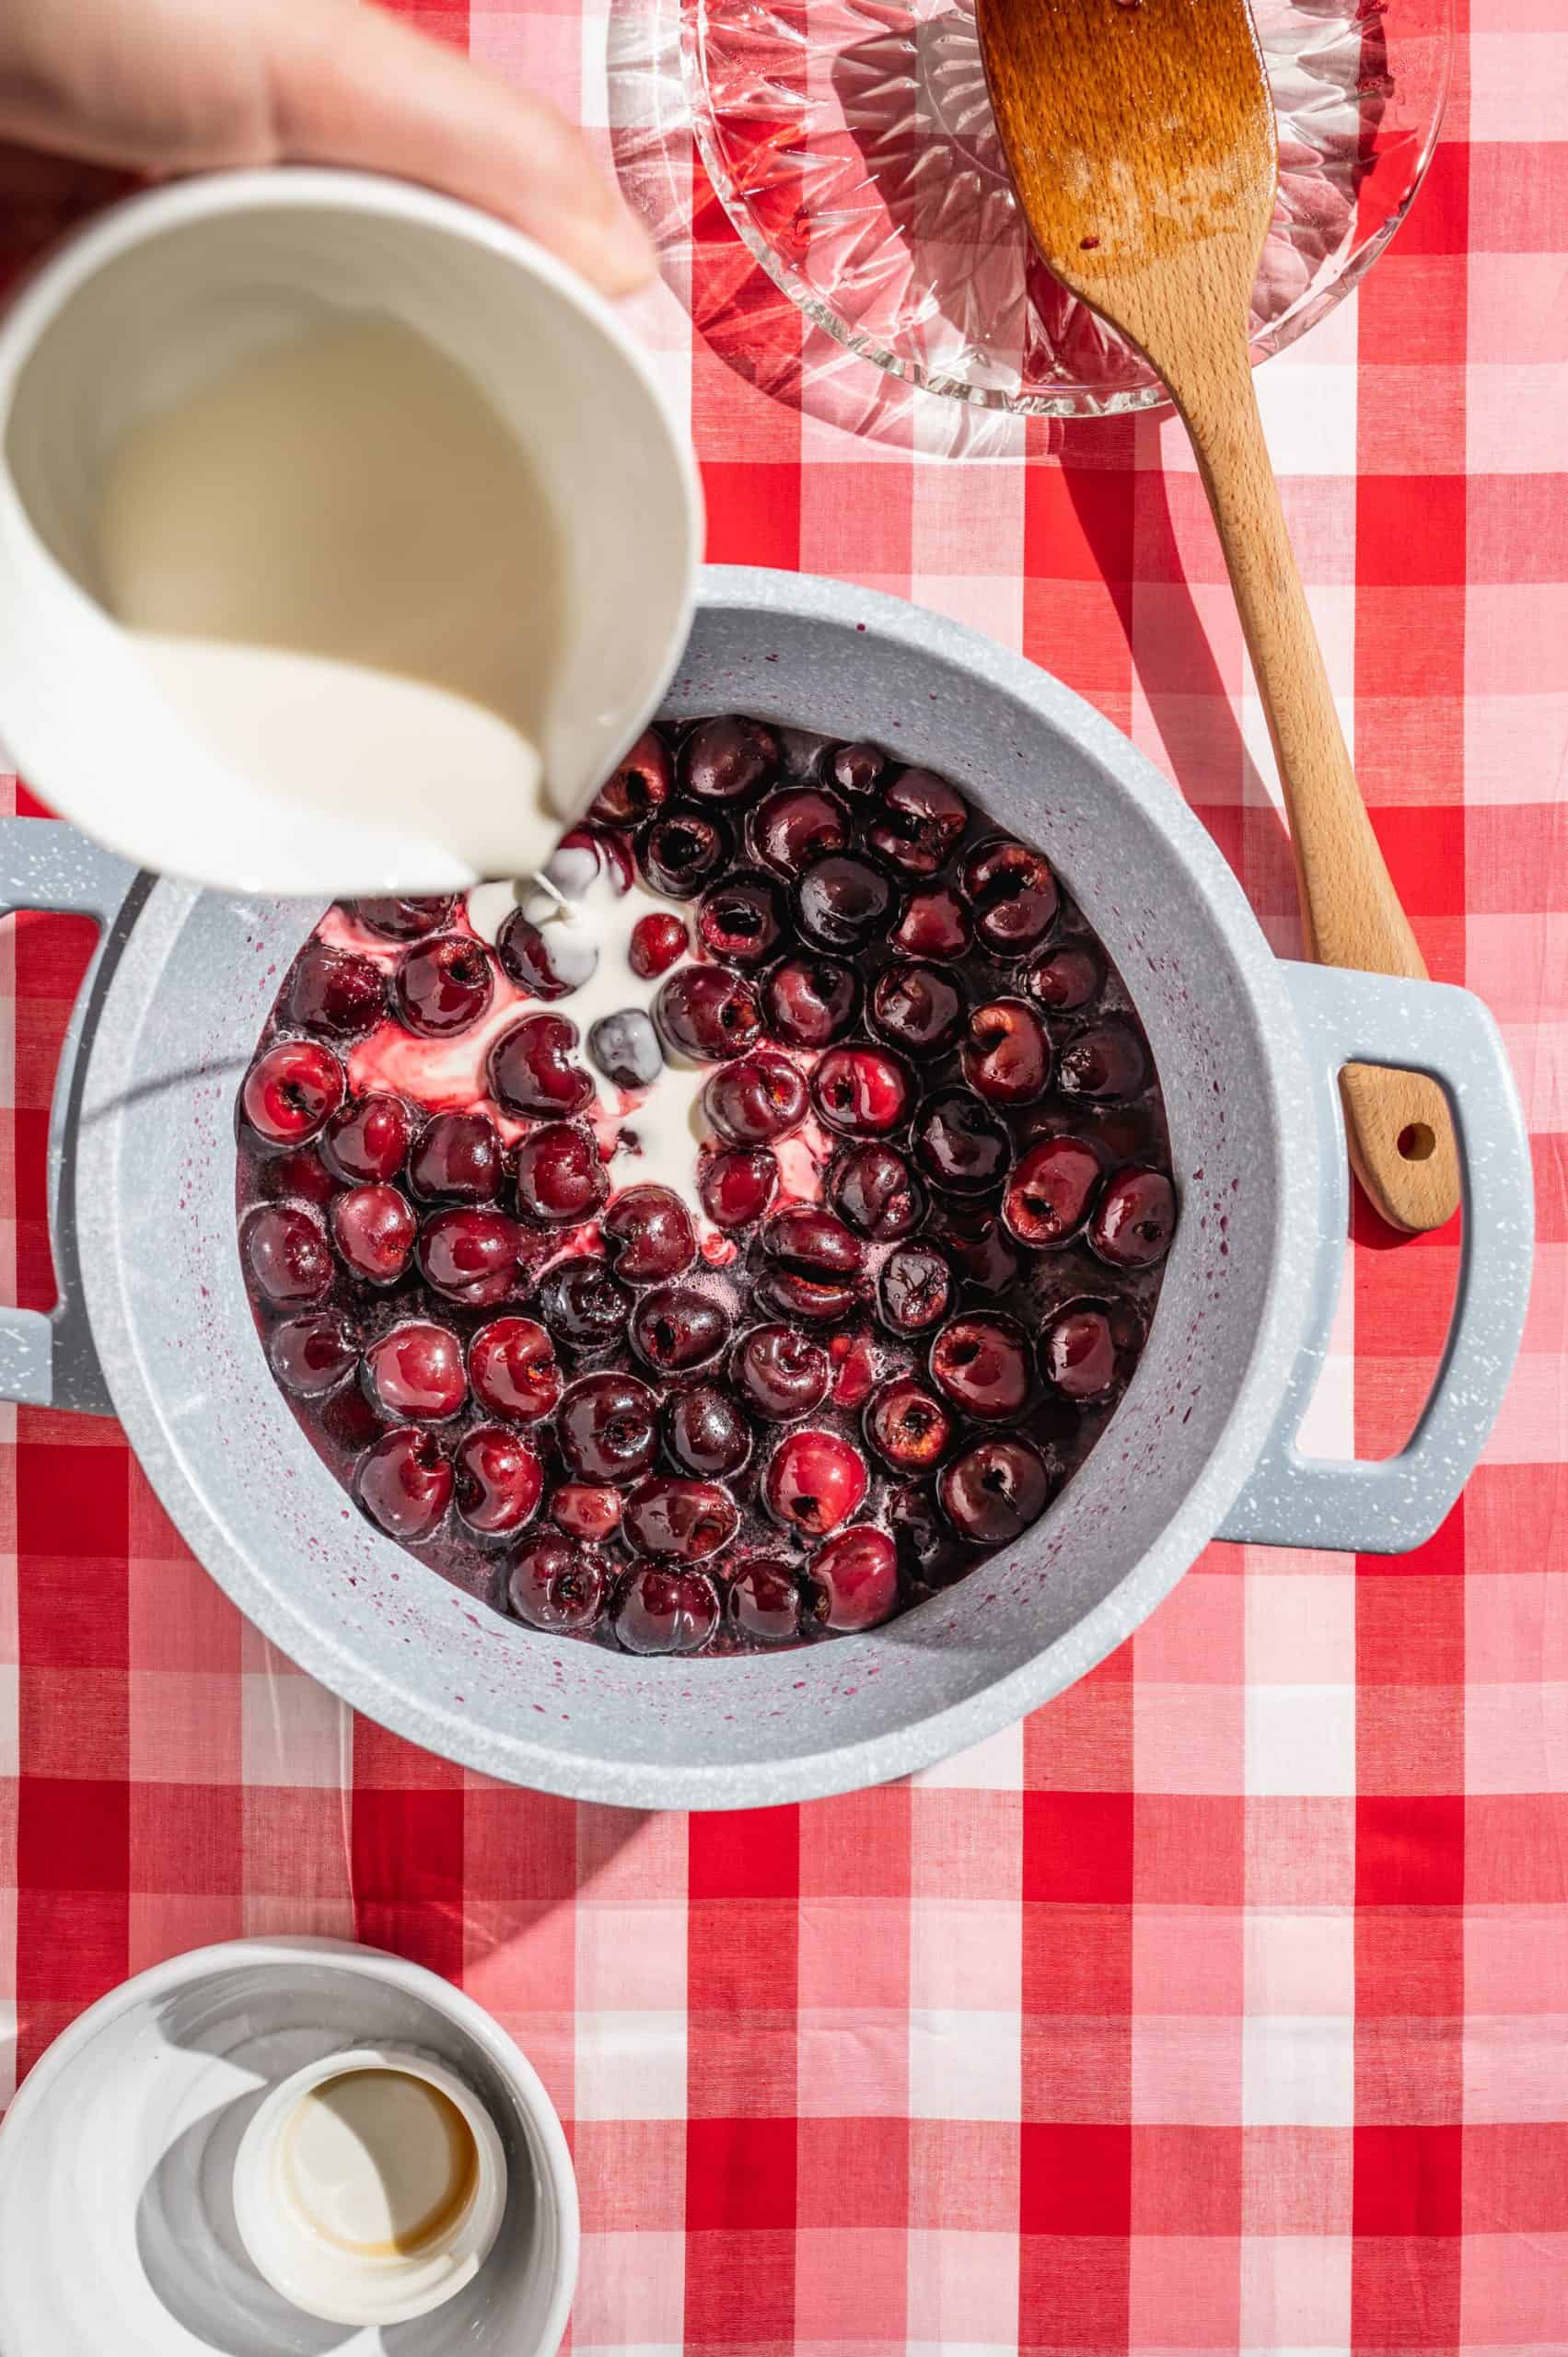
Mix cornstarch and lemon juice in a small bowl (do this using your finger to make sure the cornstarch is fully dissolved). Add the cornstarch slurry to the pot and stir to combine.
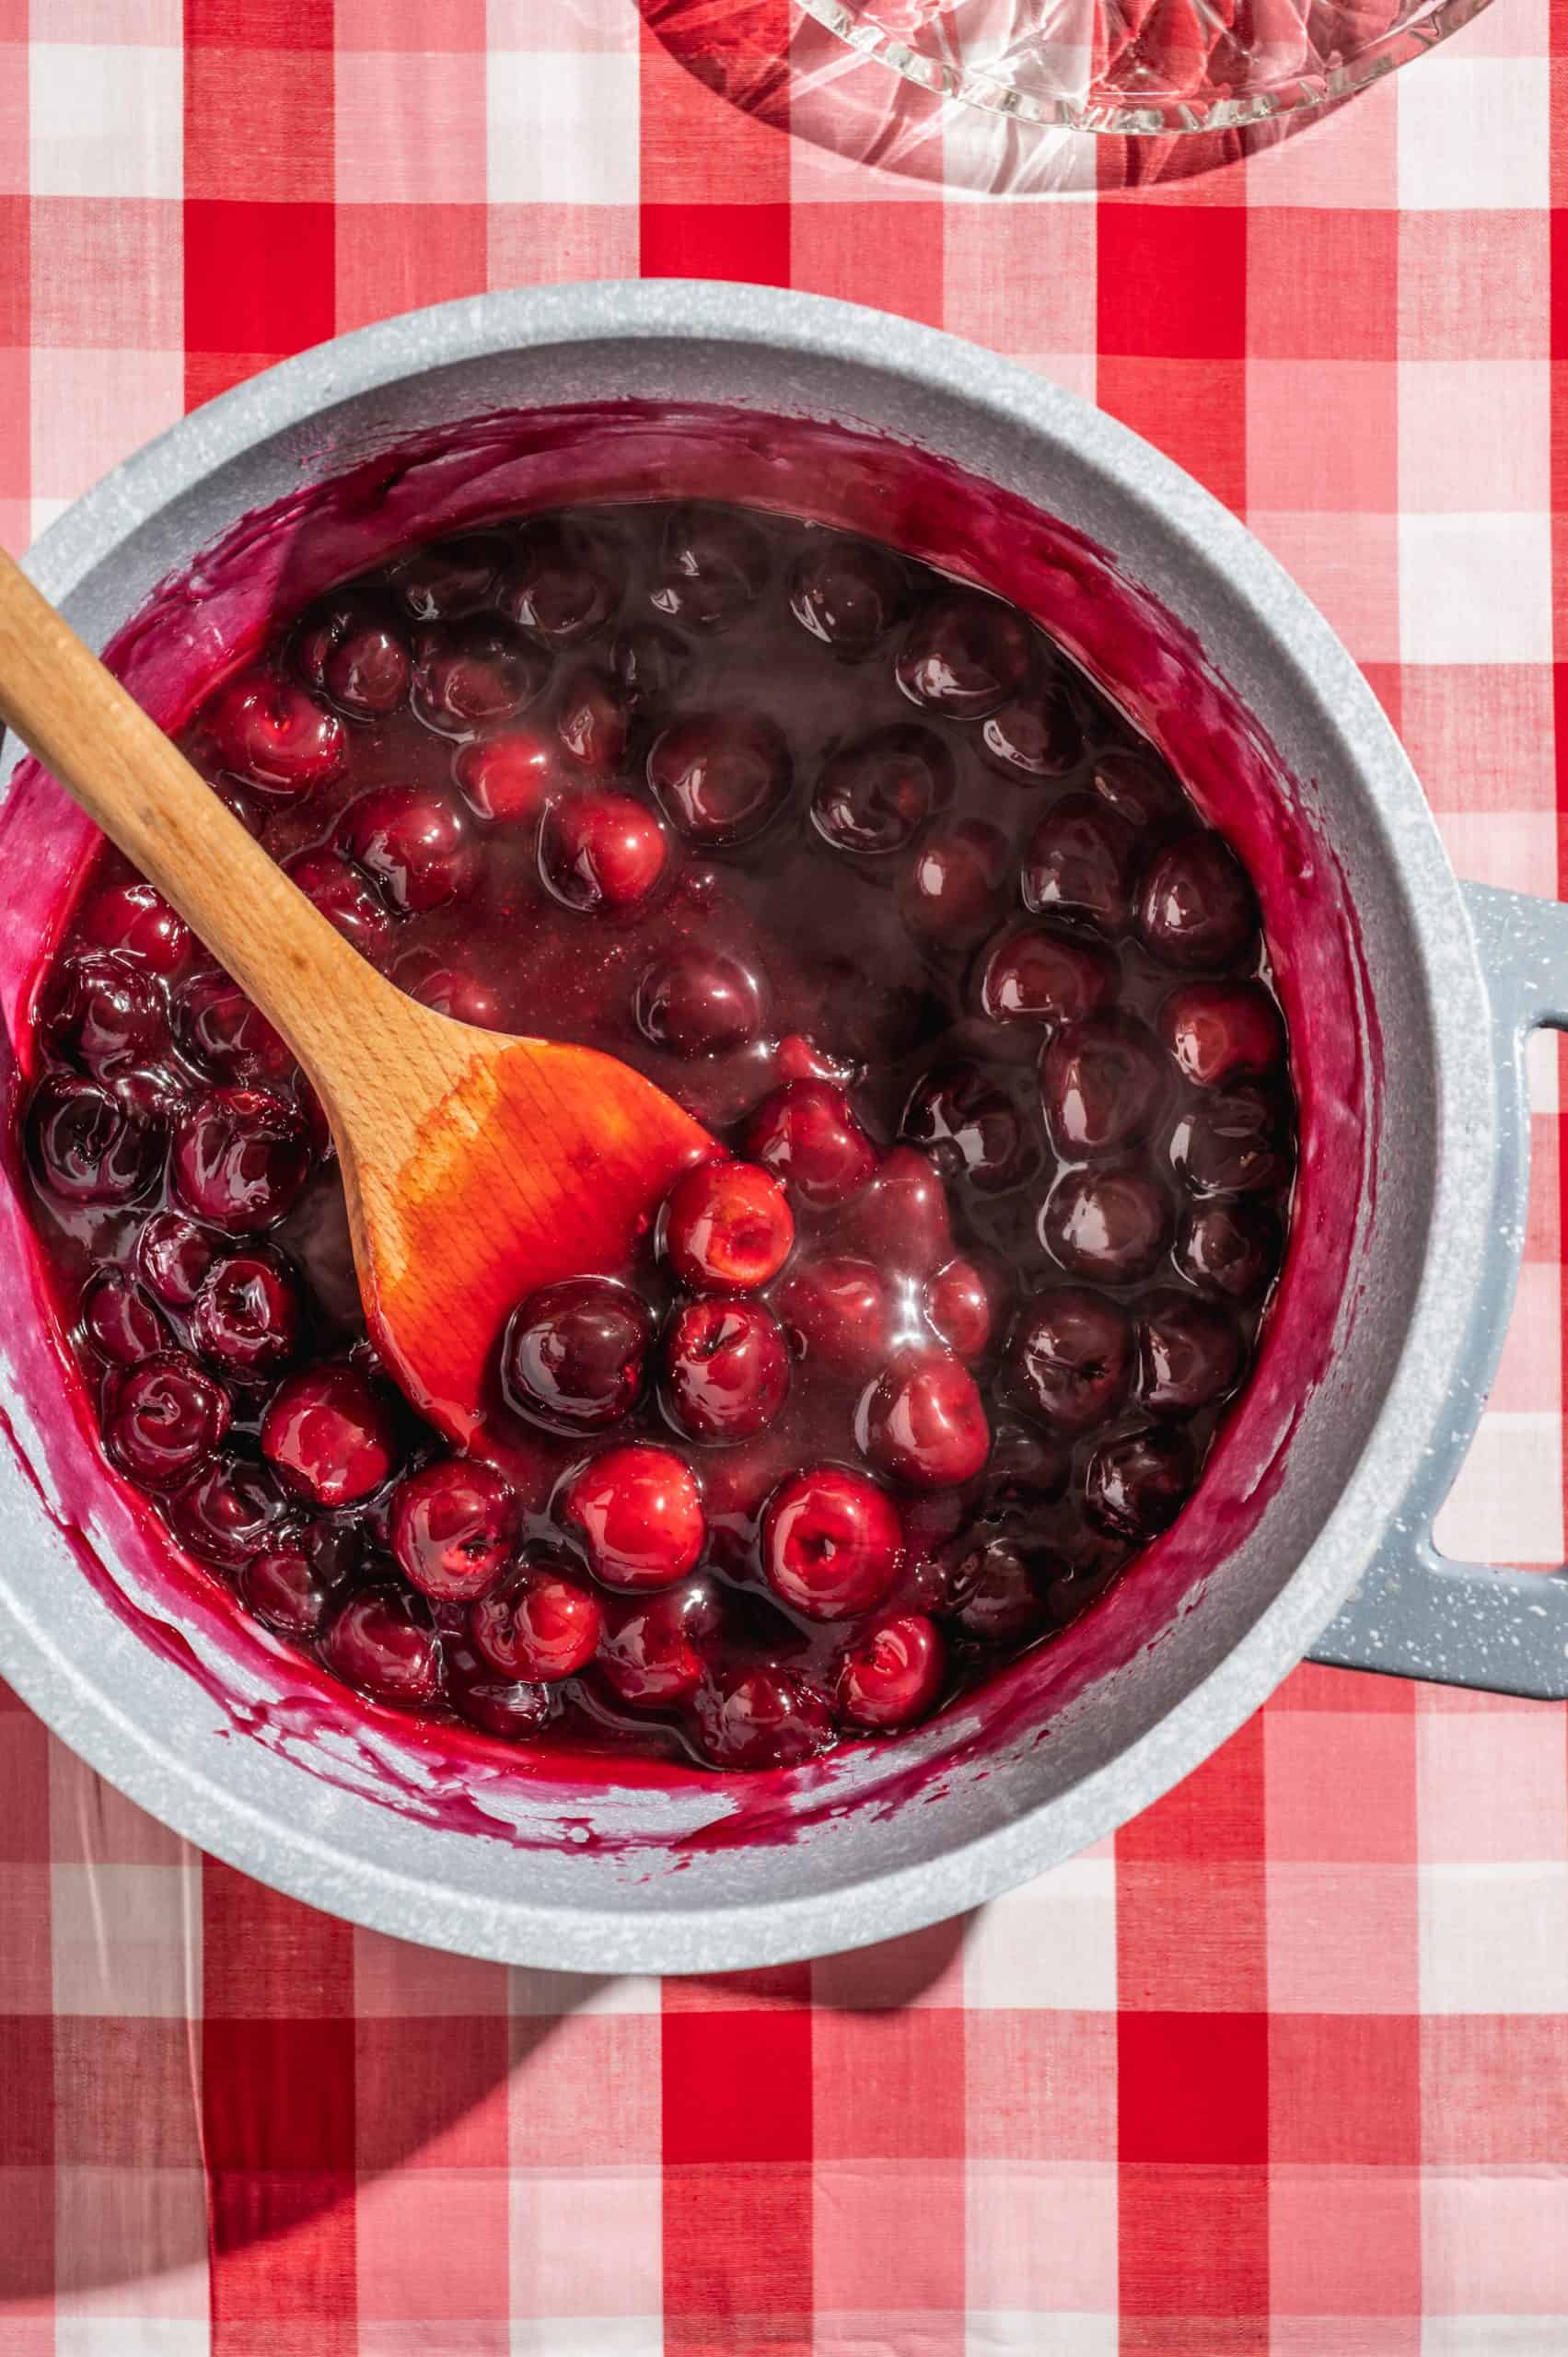
Turn the heat to medium-high and continue to cook until bubbly and thickened (about 3-5 minutes, stirring frequently). Then remove the pot from the heat to let cool slightly.
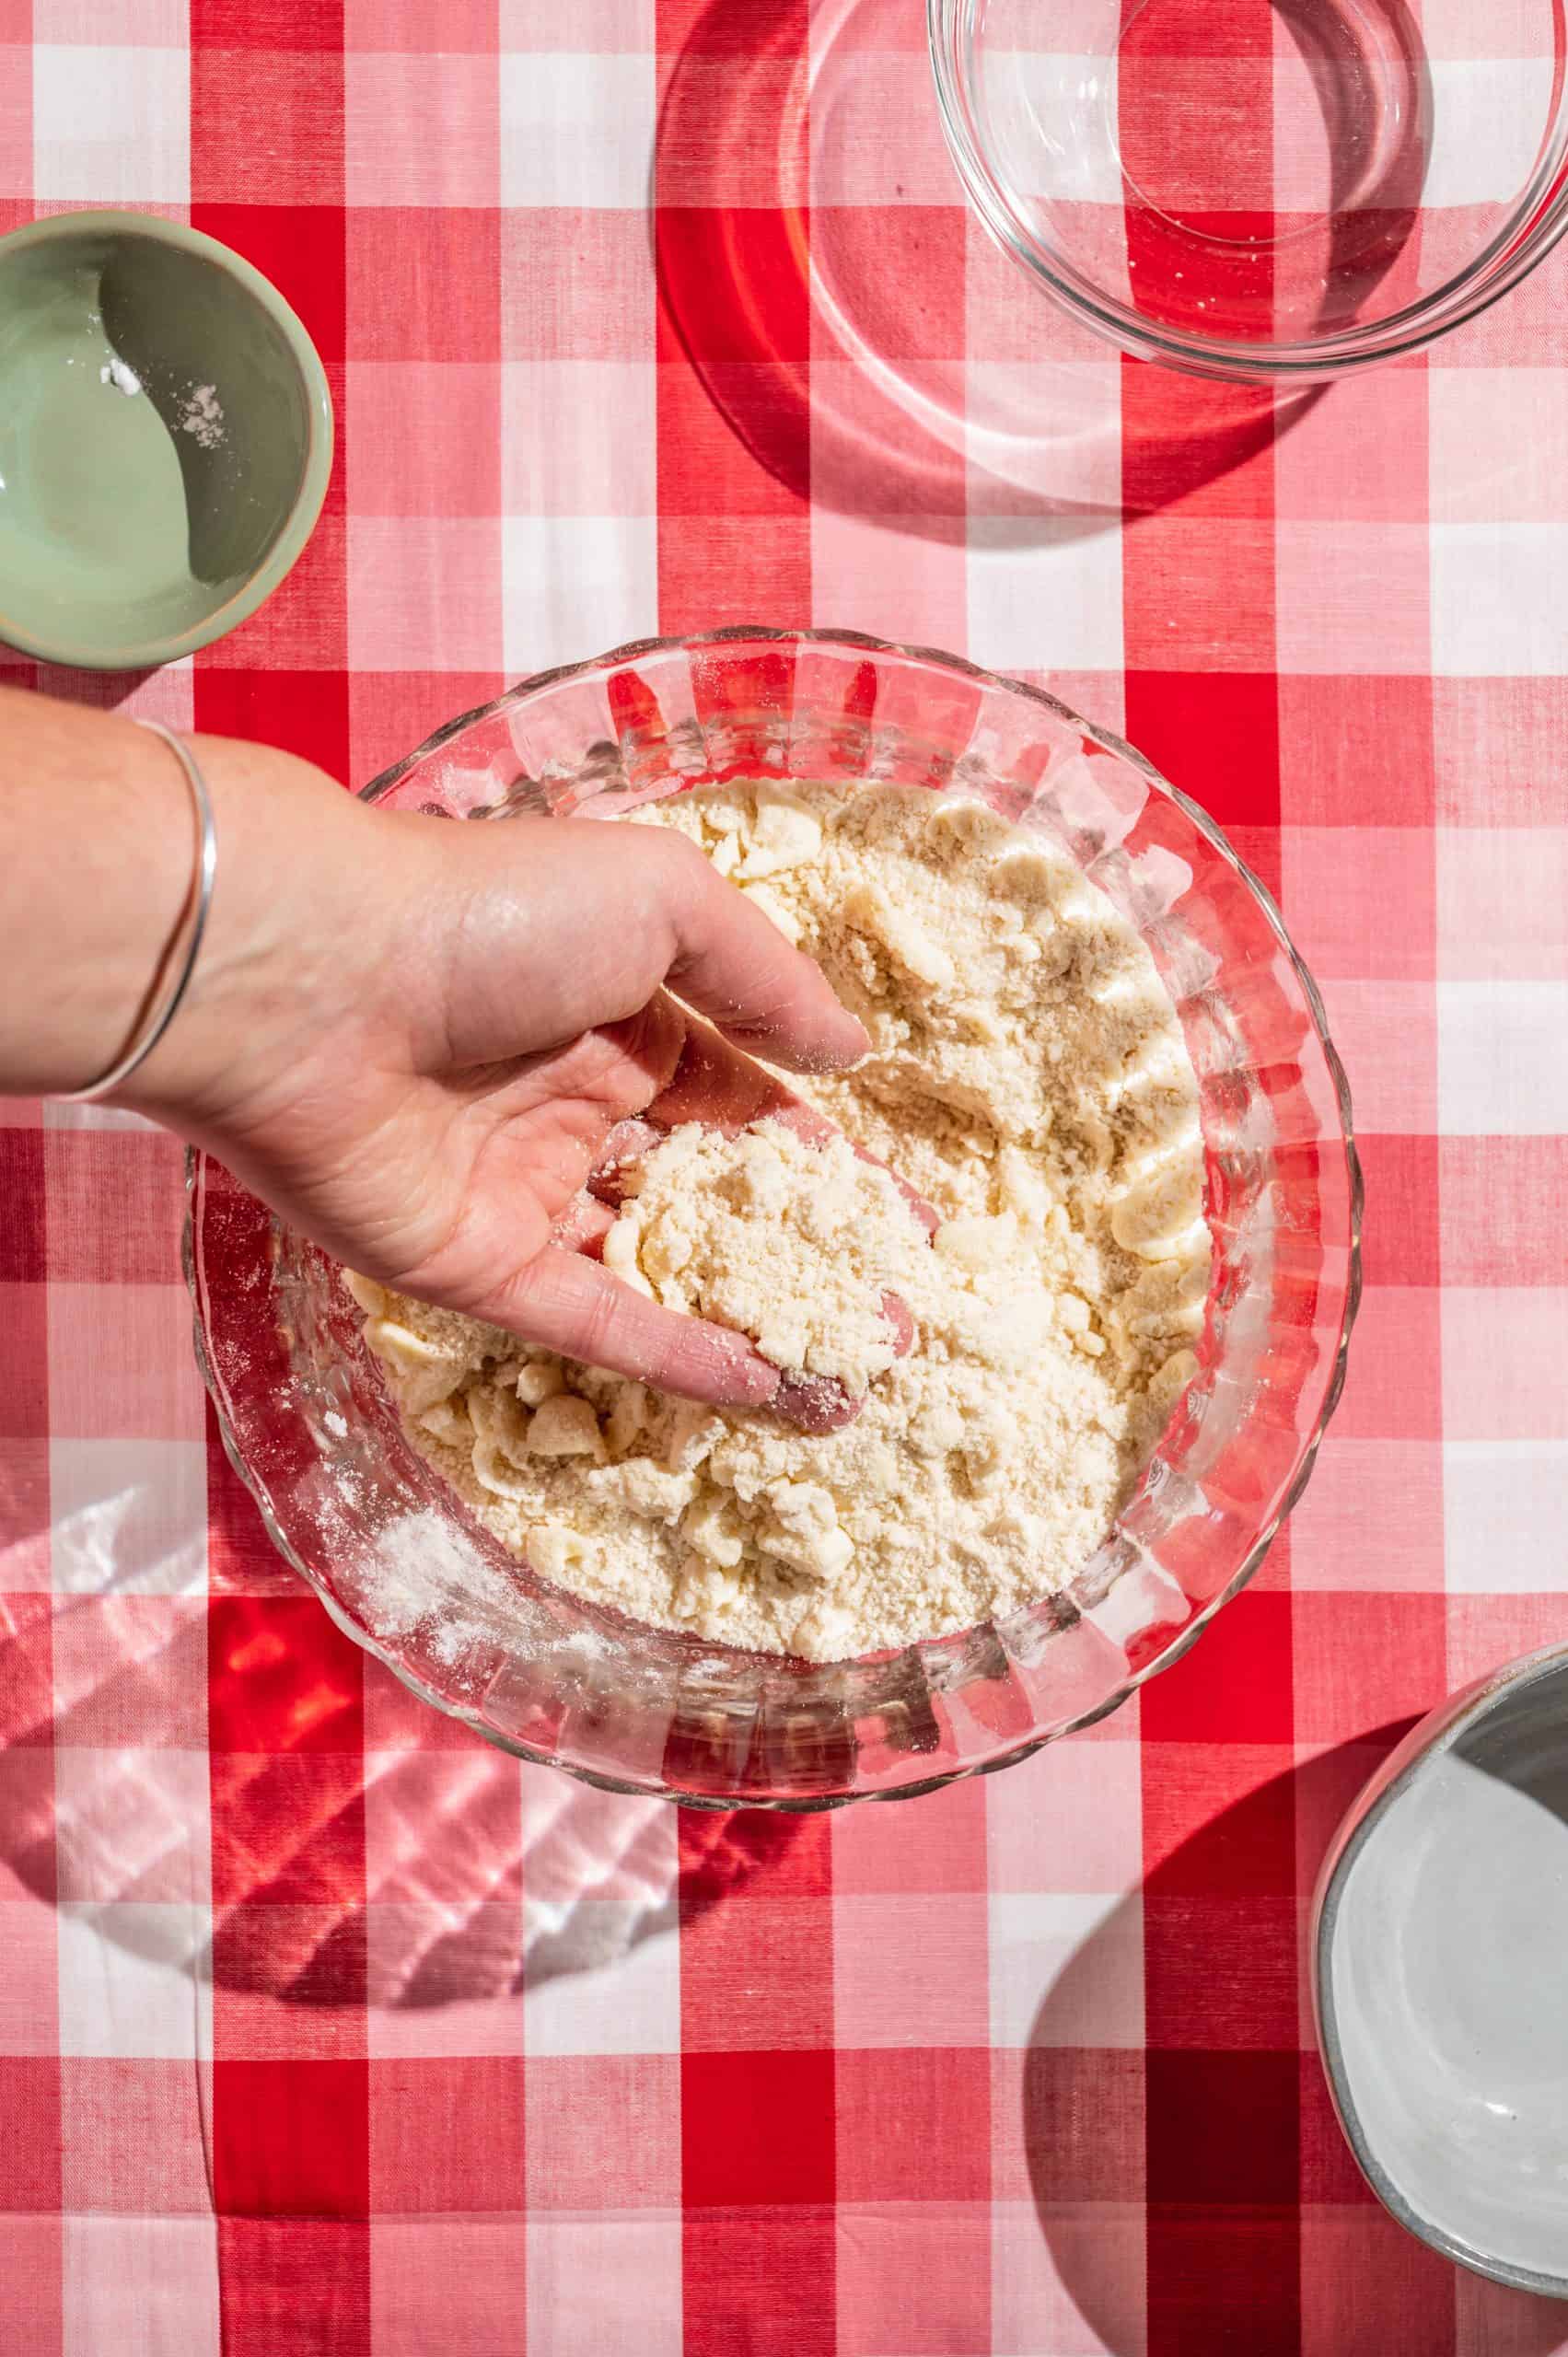
While the cherry filling is cooling, make the crumble topping: Combine flour, sugars, and salt. Then add diced butter and cut in using a pastry blender or your hands. The mixture should be crumbly.
How to Assemble Cherry Crumb Pie
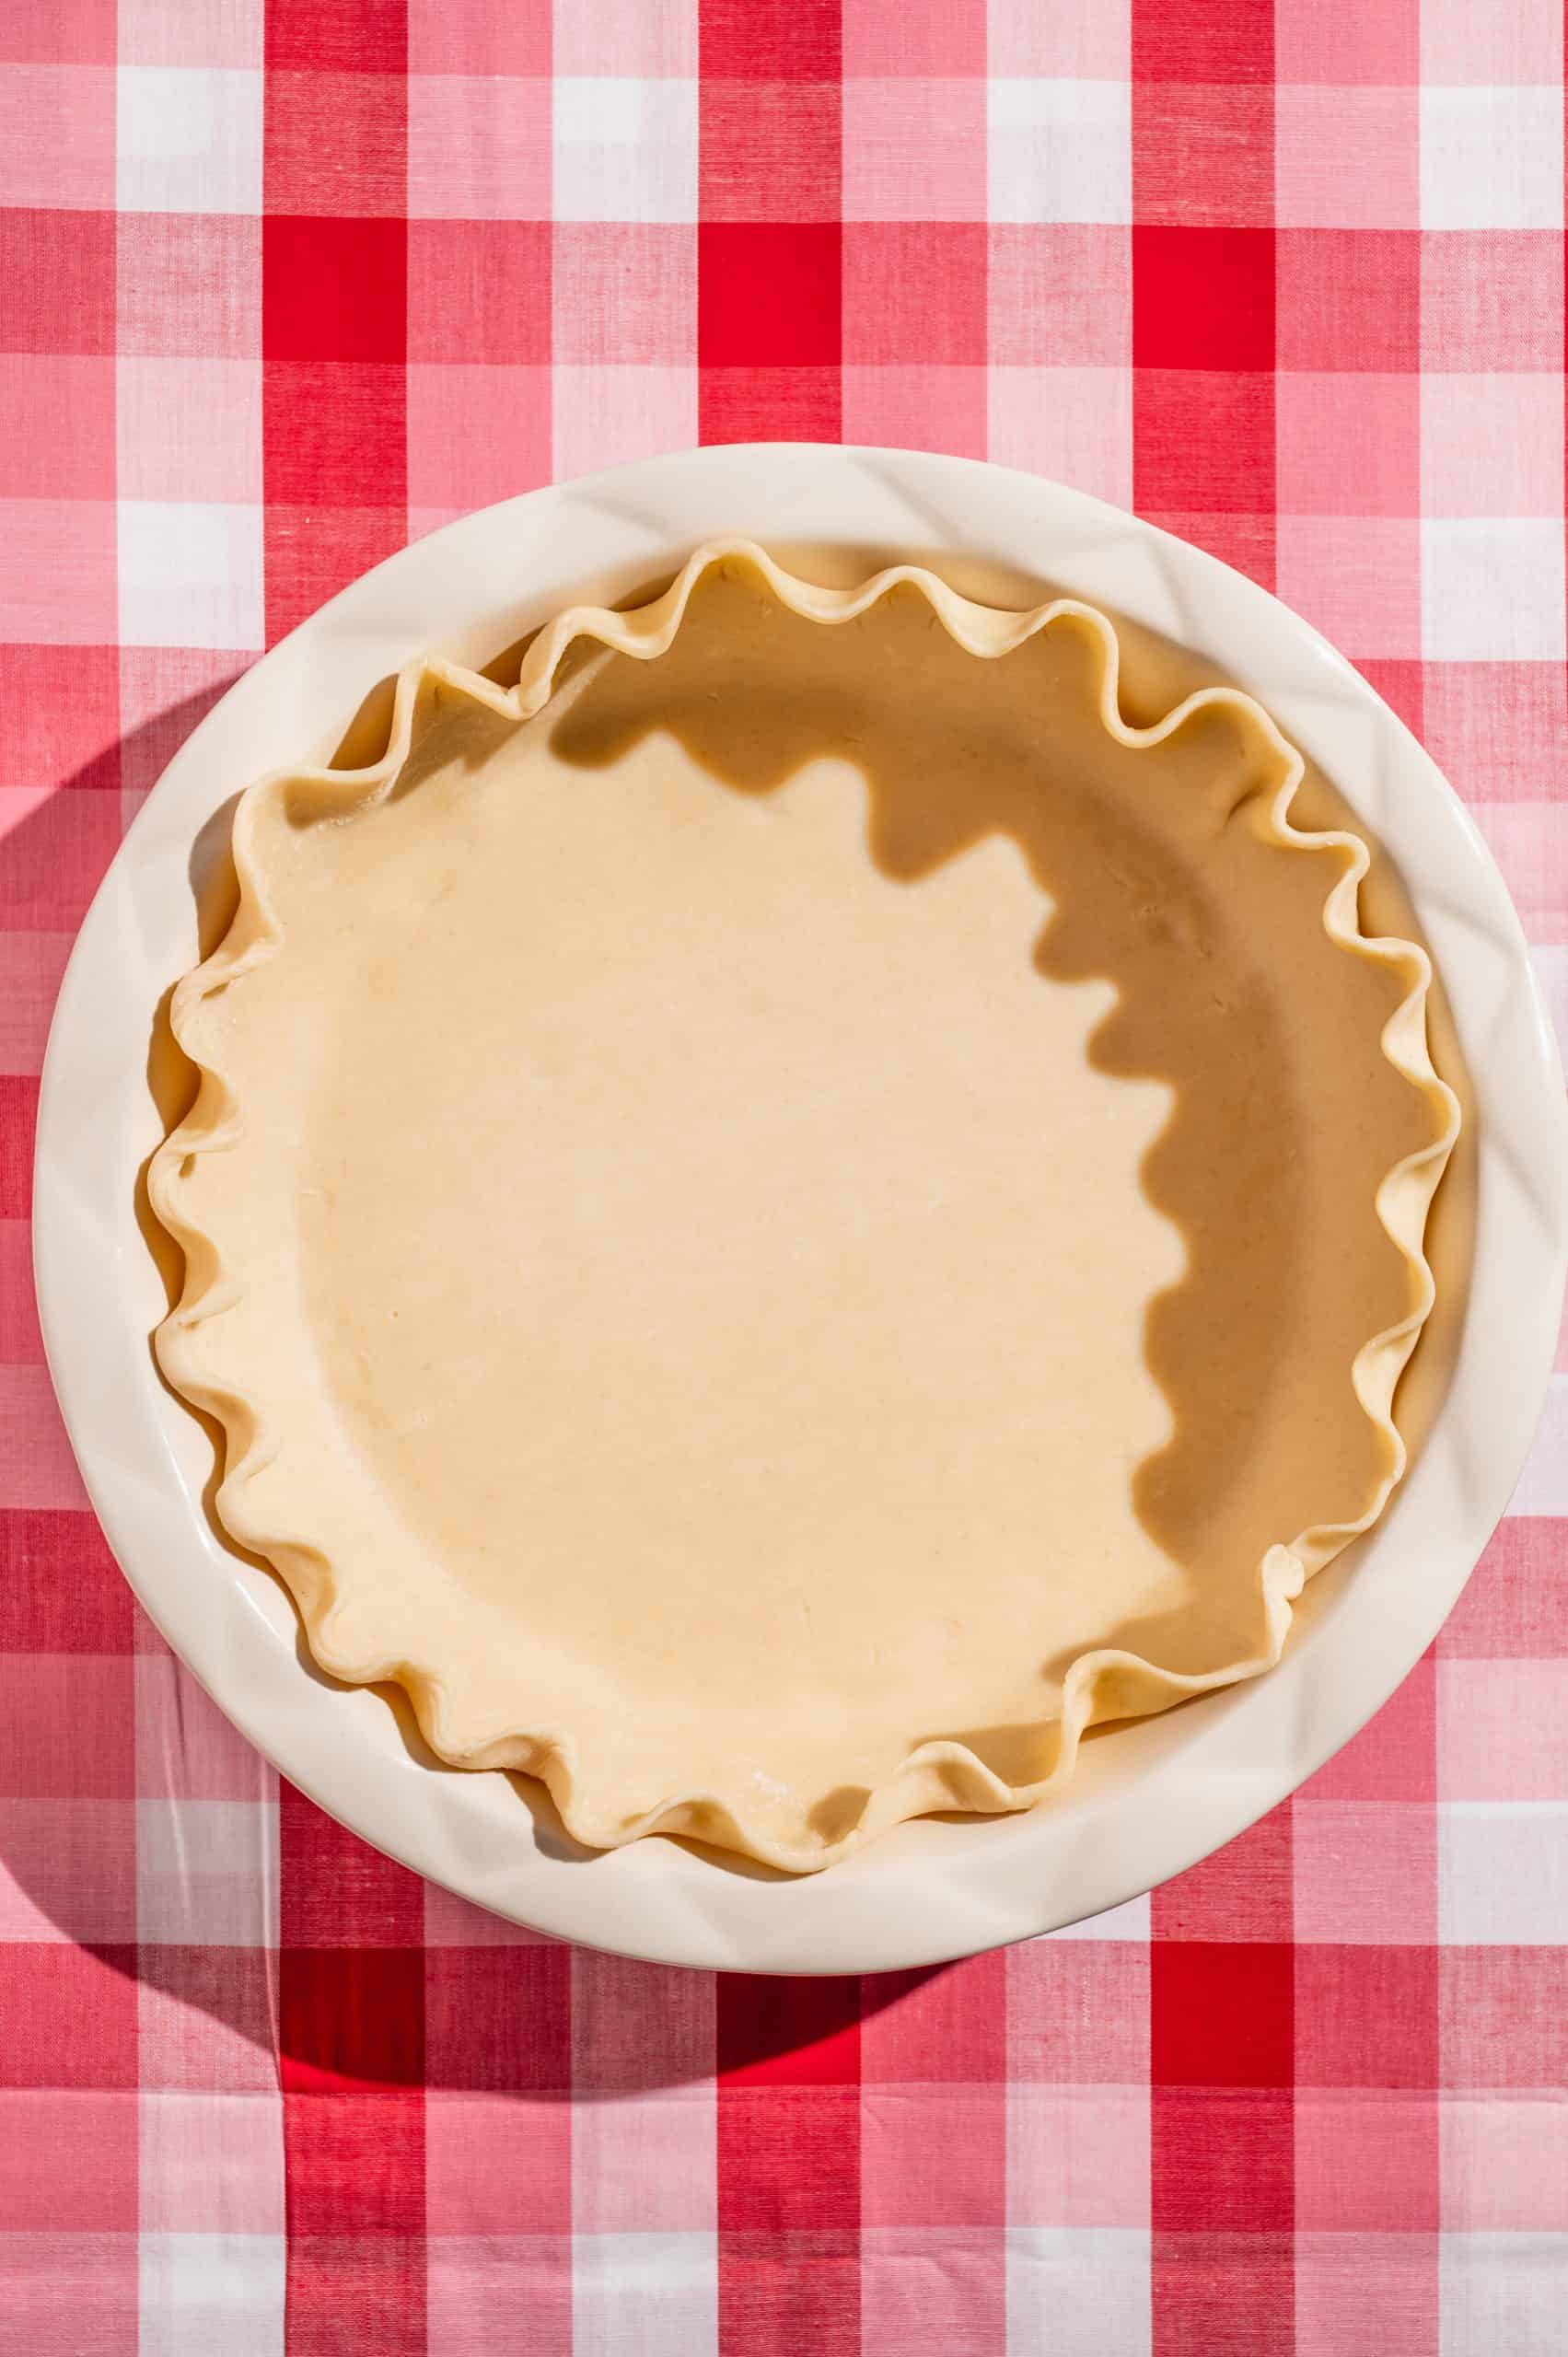
First, prepare a pie dough and roll it out to ¼ inch thickness. Press into a 9-inch pie plate, ungreased, and flute the edges if you want to be fancy.
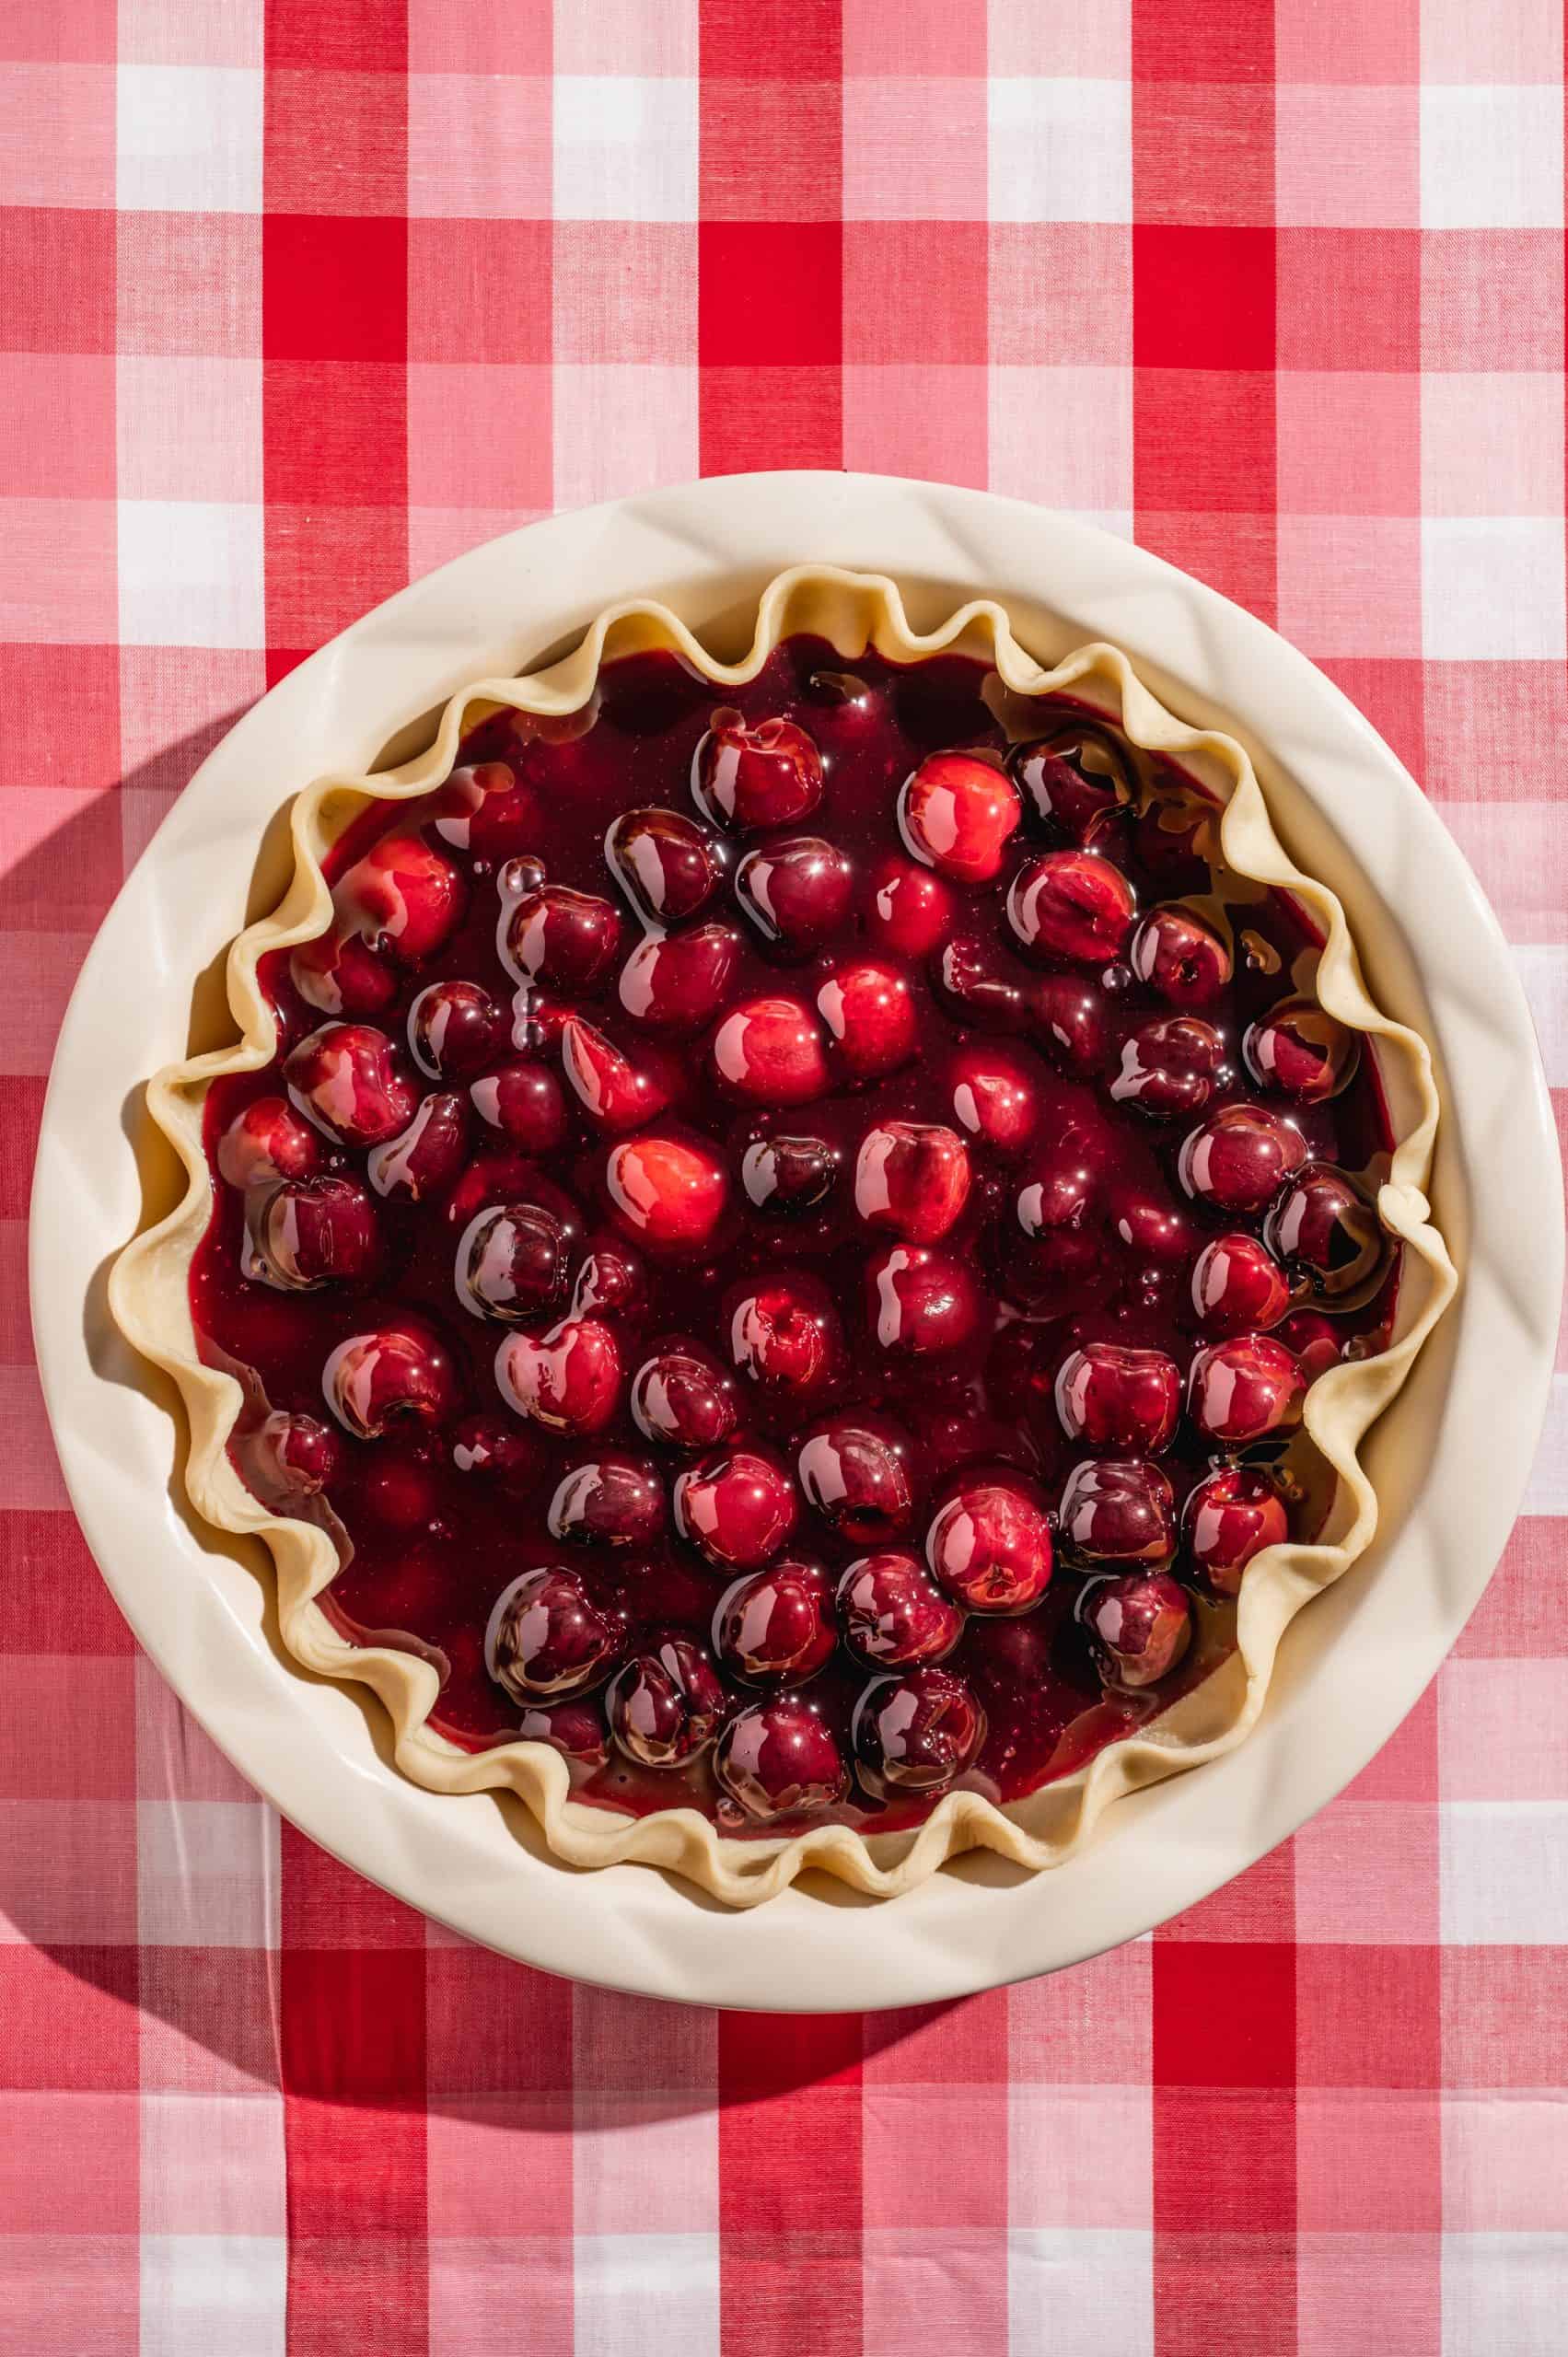
Fill the raw pie crust with the prepared cherry filling once it reaches room temperature. It's ok if it's still slightly warm but it should be pretty cool.
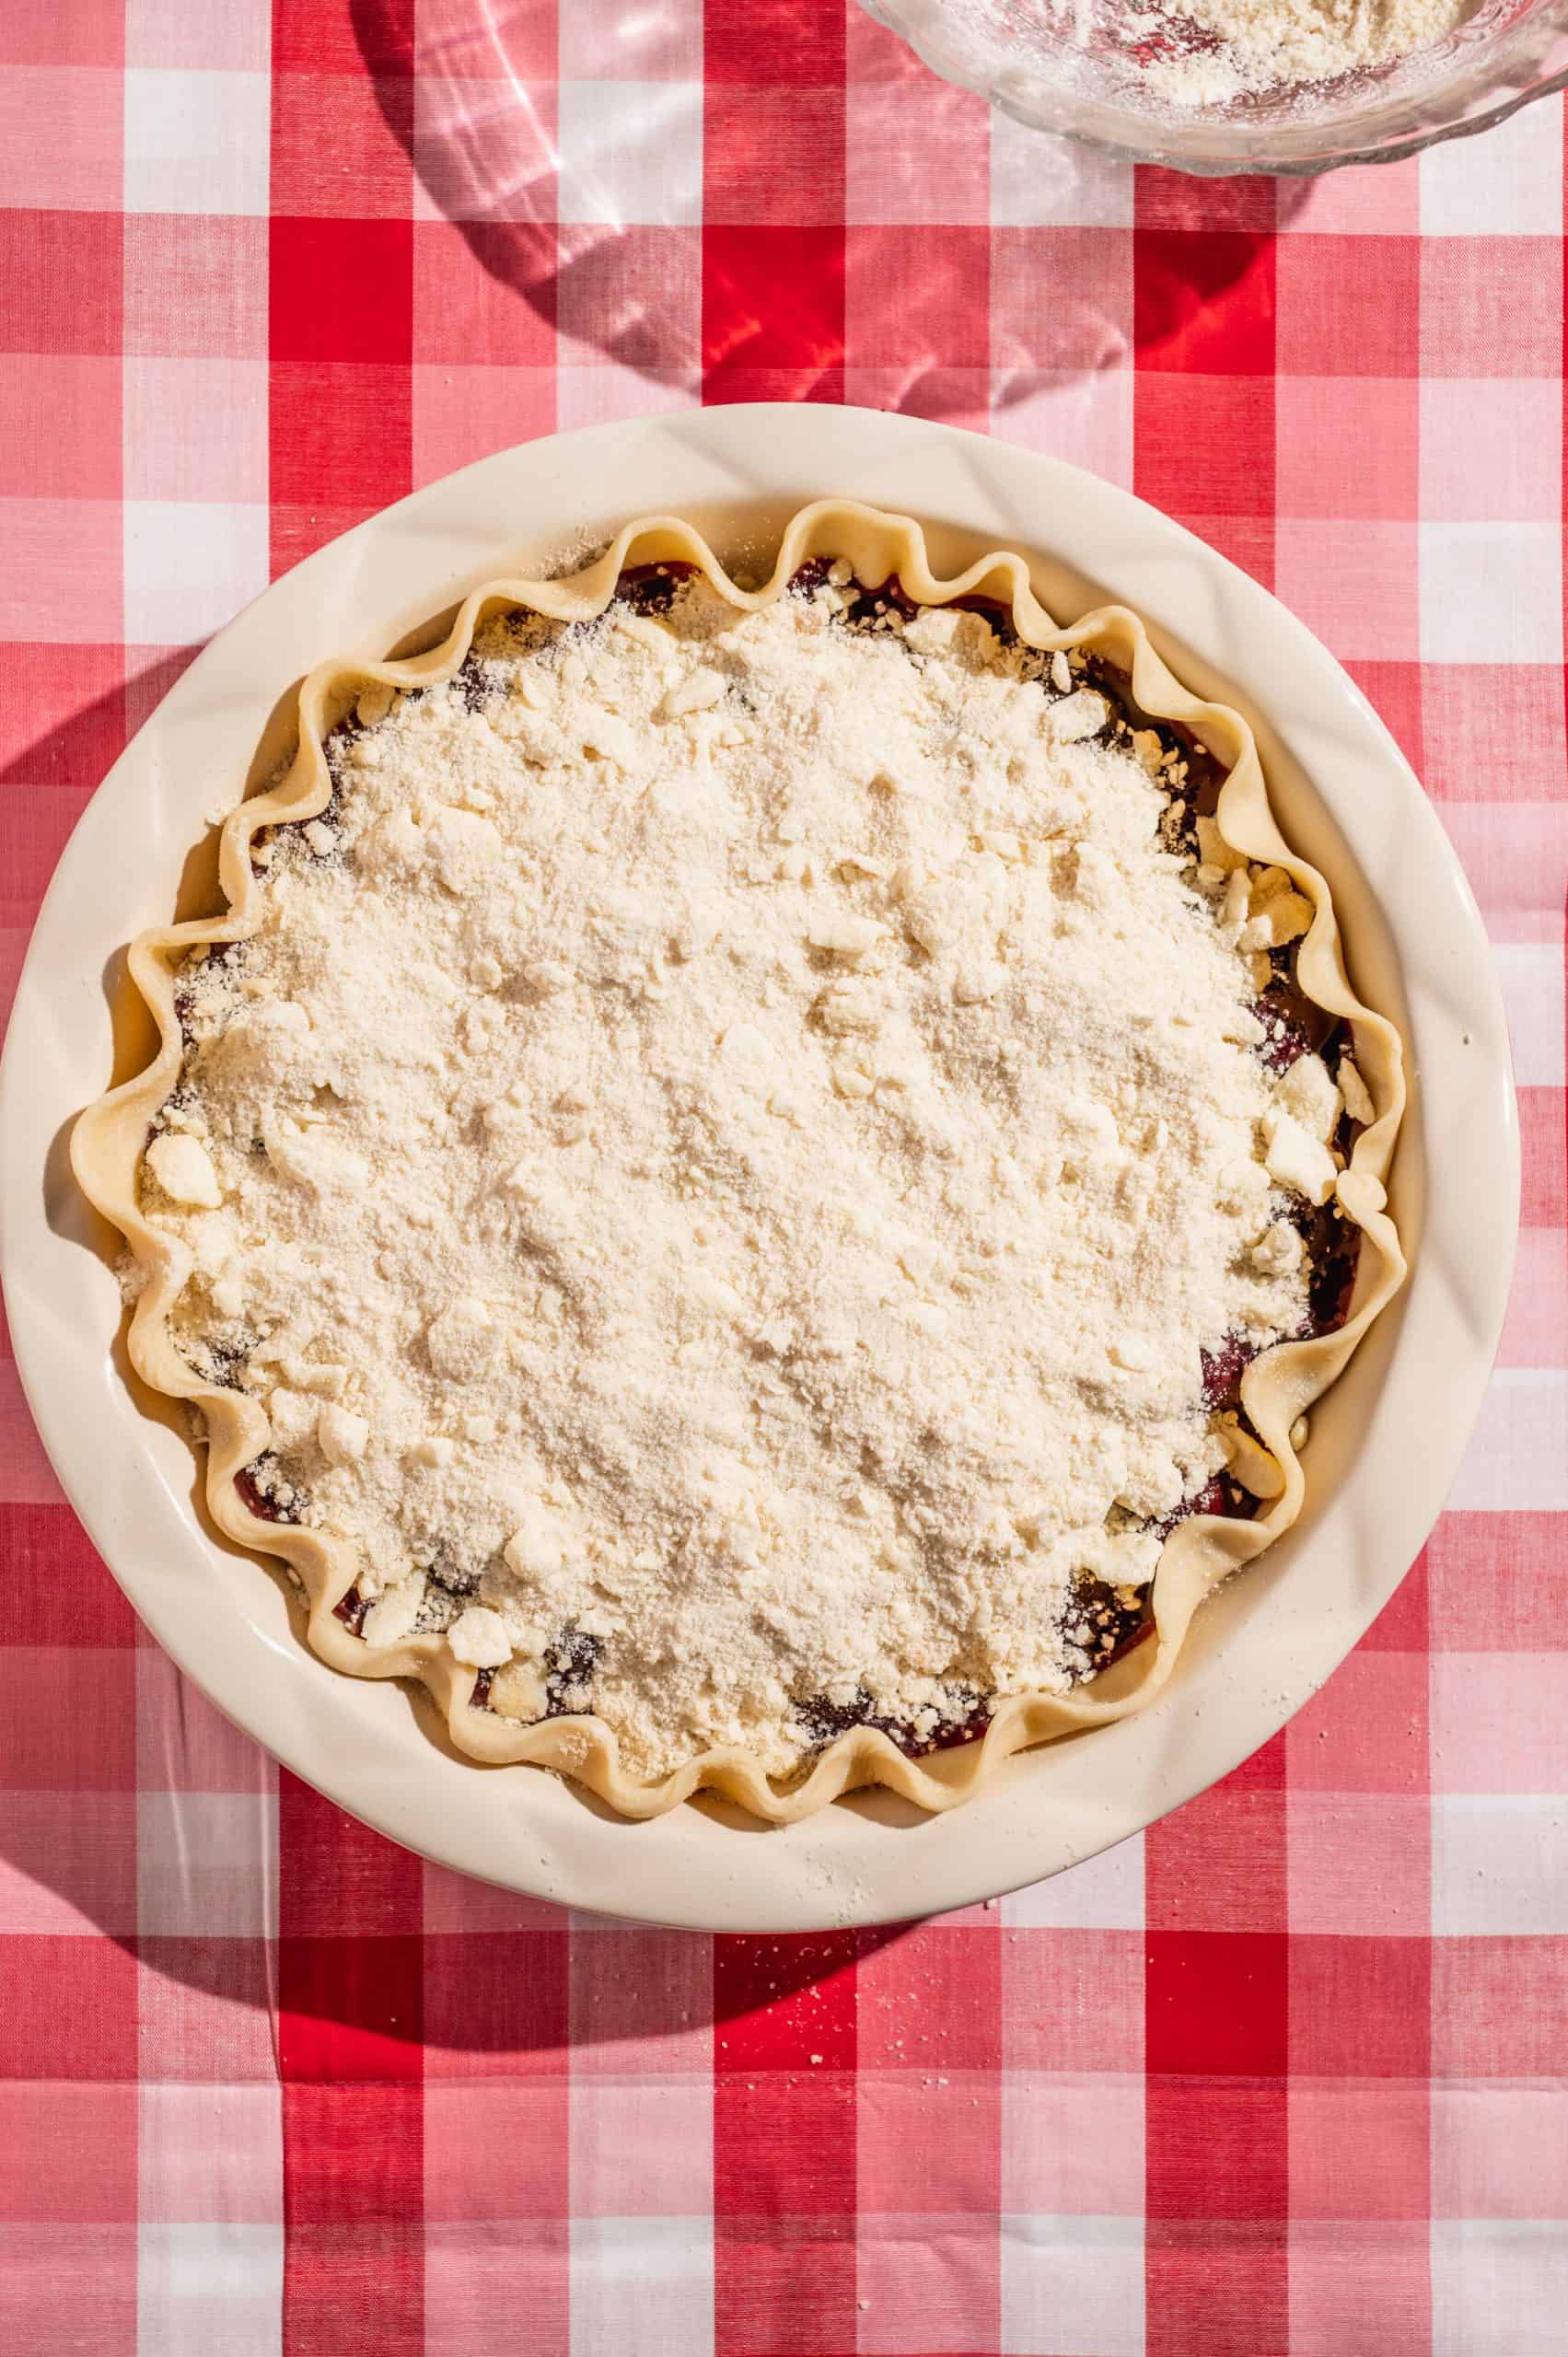
Sprinkle the crumble topping evenly over the cherry filling. Then, transfer the pie into the preheated oven.
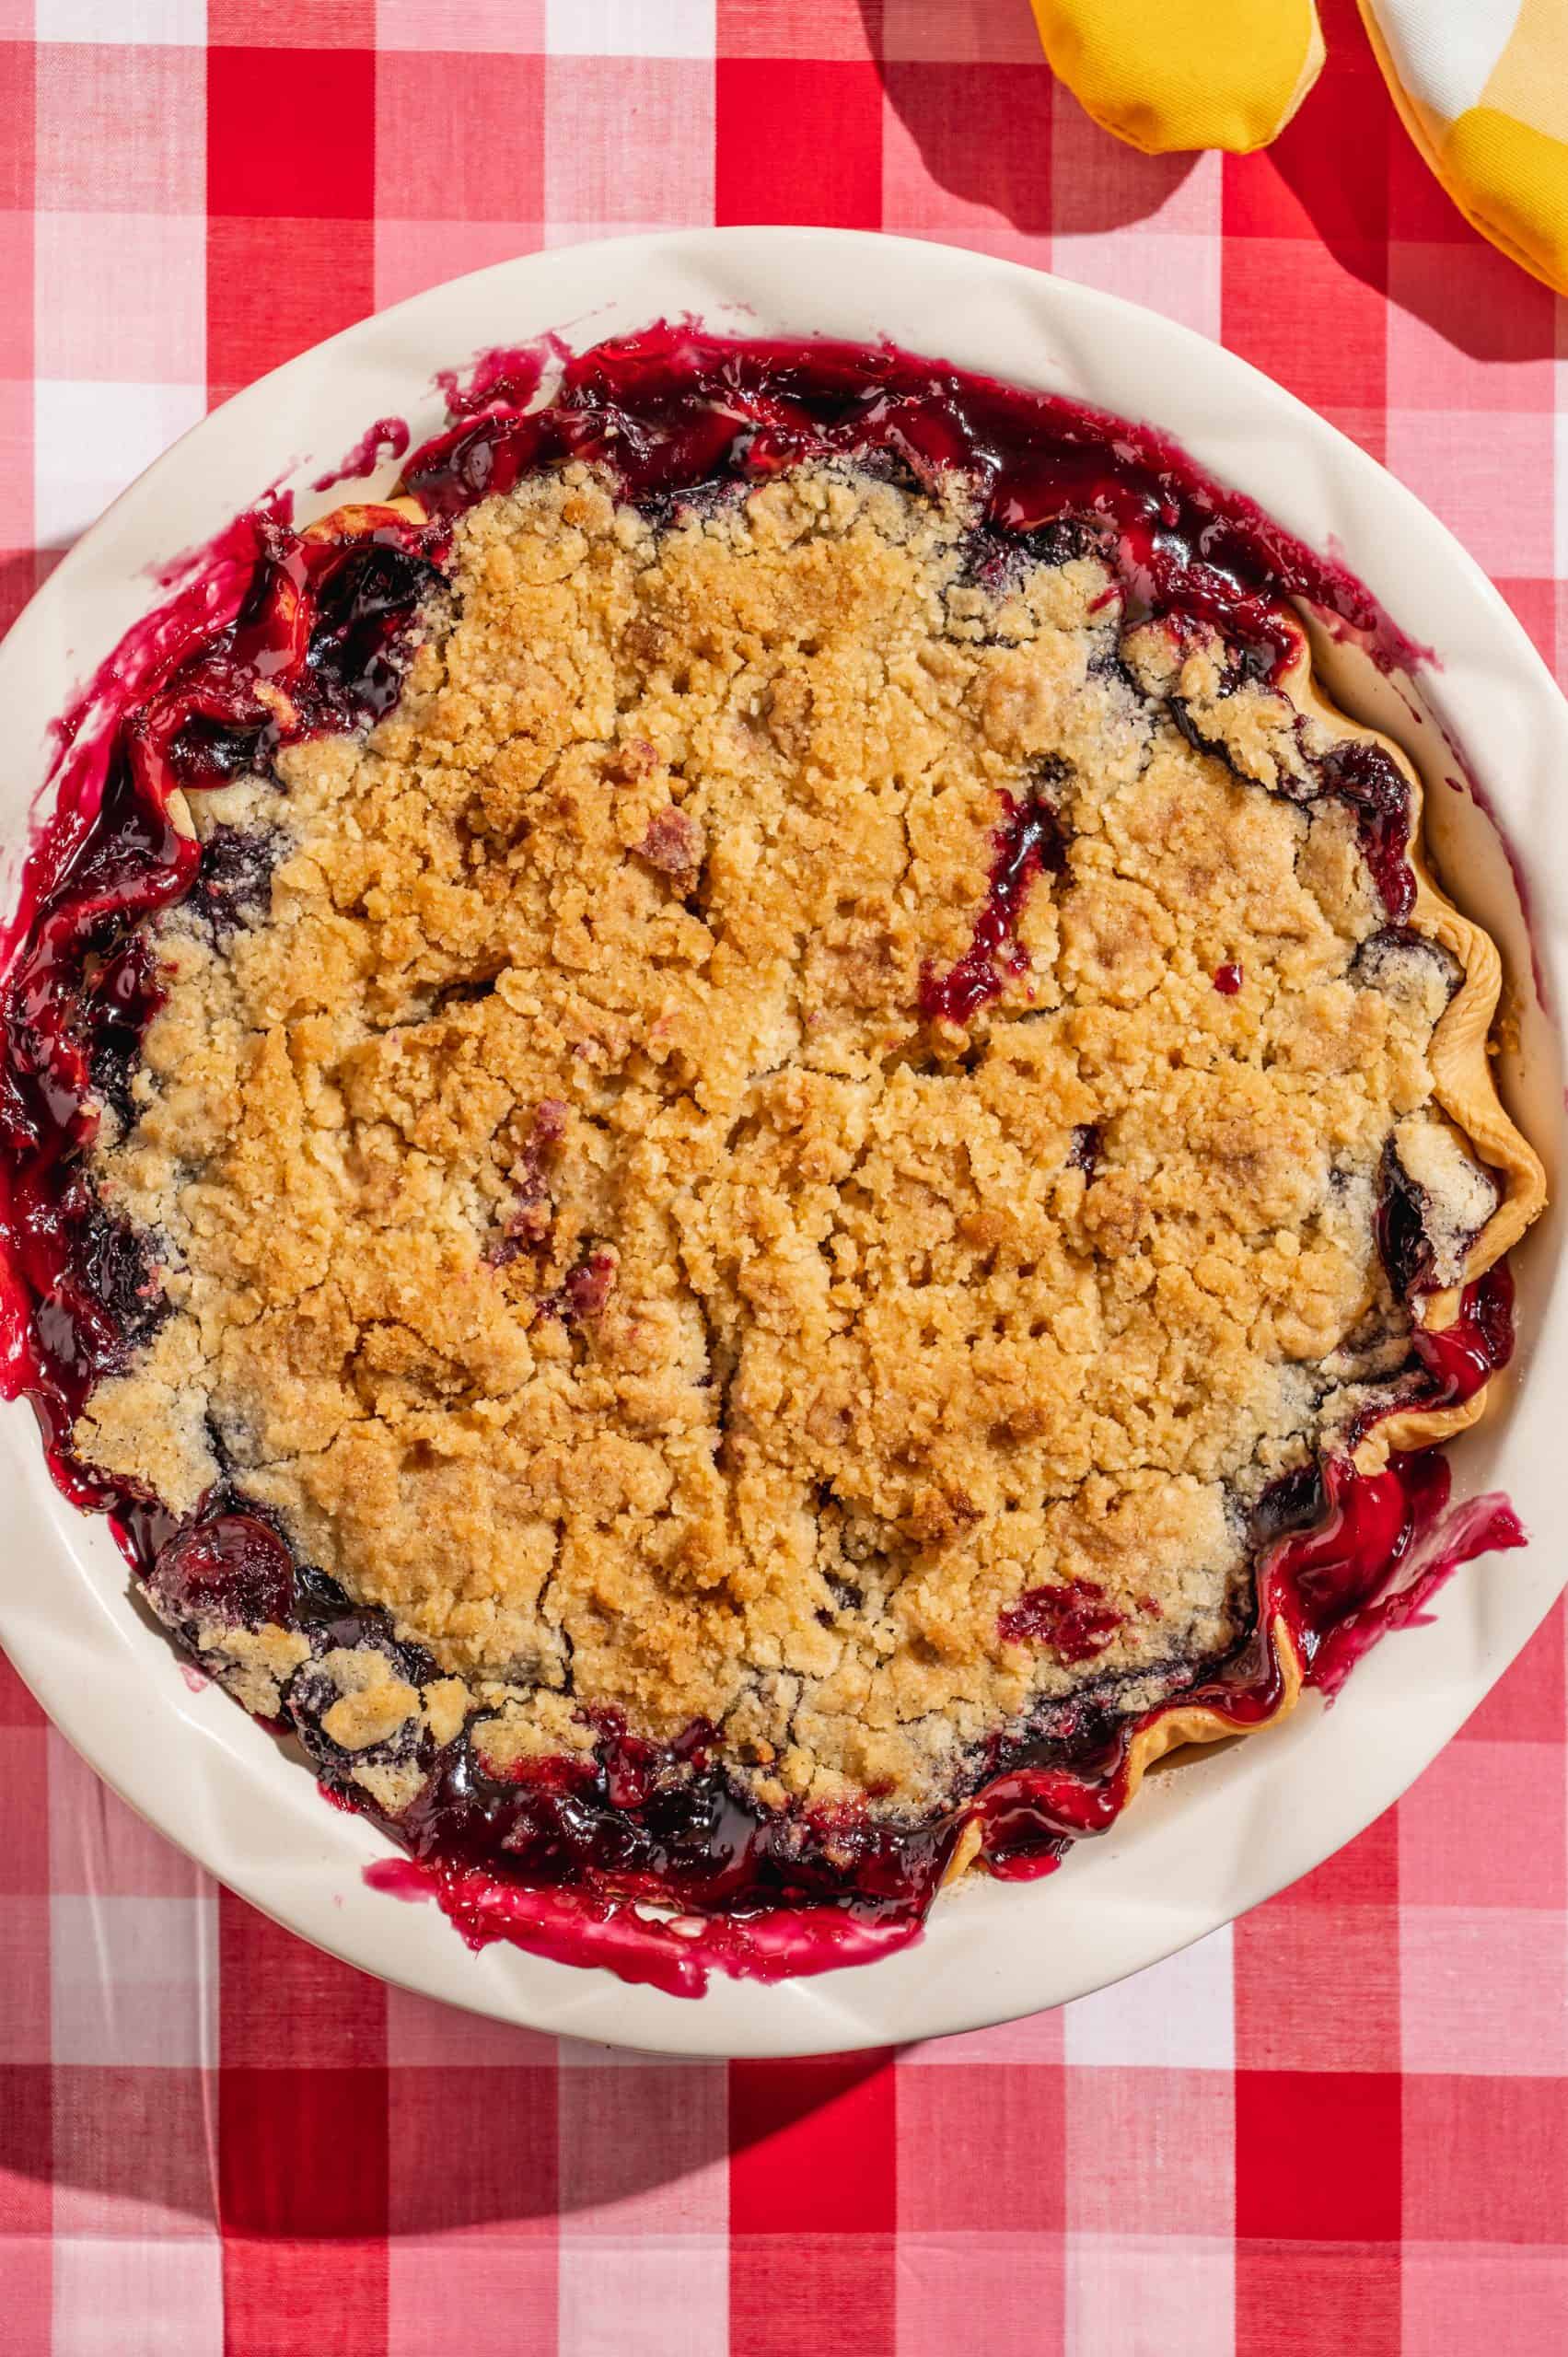
Bake the pie until the cherry filling starts to bubble around the edges and the top is golden brown. This will take at least an hour, maybe a little more!
Top tip: Use a Pie Shield
Oftentimes, the edges of a pie will cook faster than the interior. To prevent the edges from burning, cover the crust edges with a pie shield or aluminum foil once the outside is golden brown.
For this cherry streusel pie, I placed aluminum foil around the rim after about 45 minutes. It took another 30 minutes for the top to brown and the insides to bubble. Exact cook times may vary based on your oven and equipment, but this should be a good guideline.
Substitutions & Variations
If you’re not a fan of the crumble topping, this cherry filling can be used in a traditional double-crust pie too.
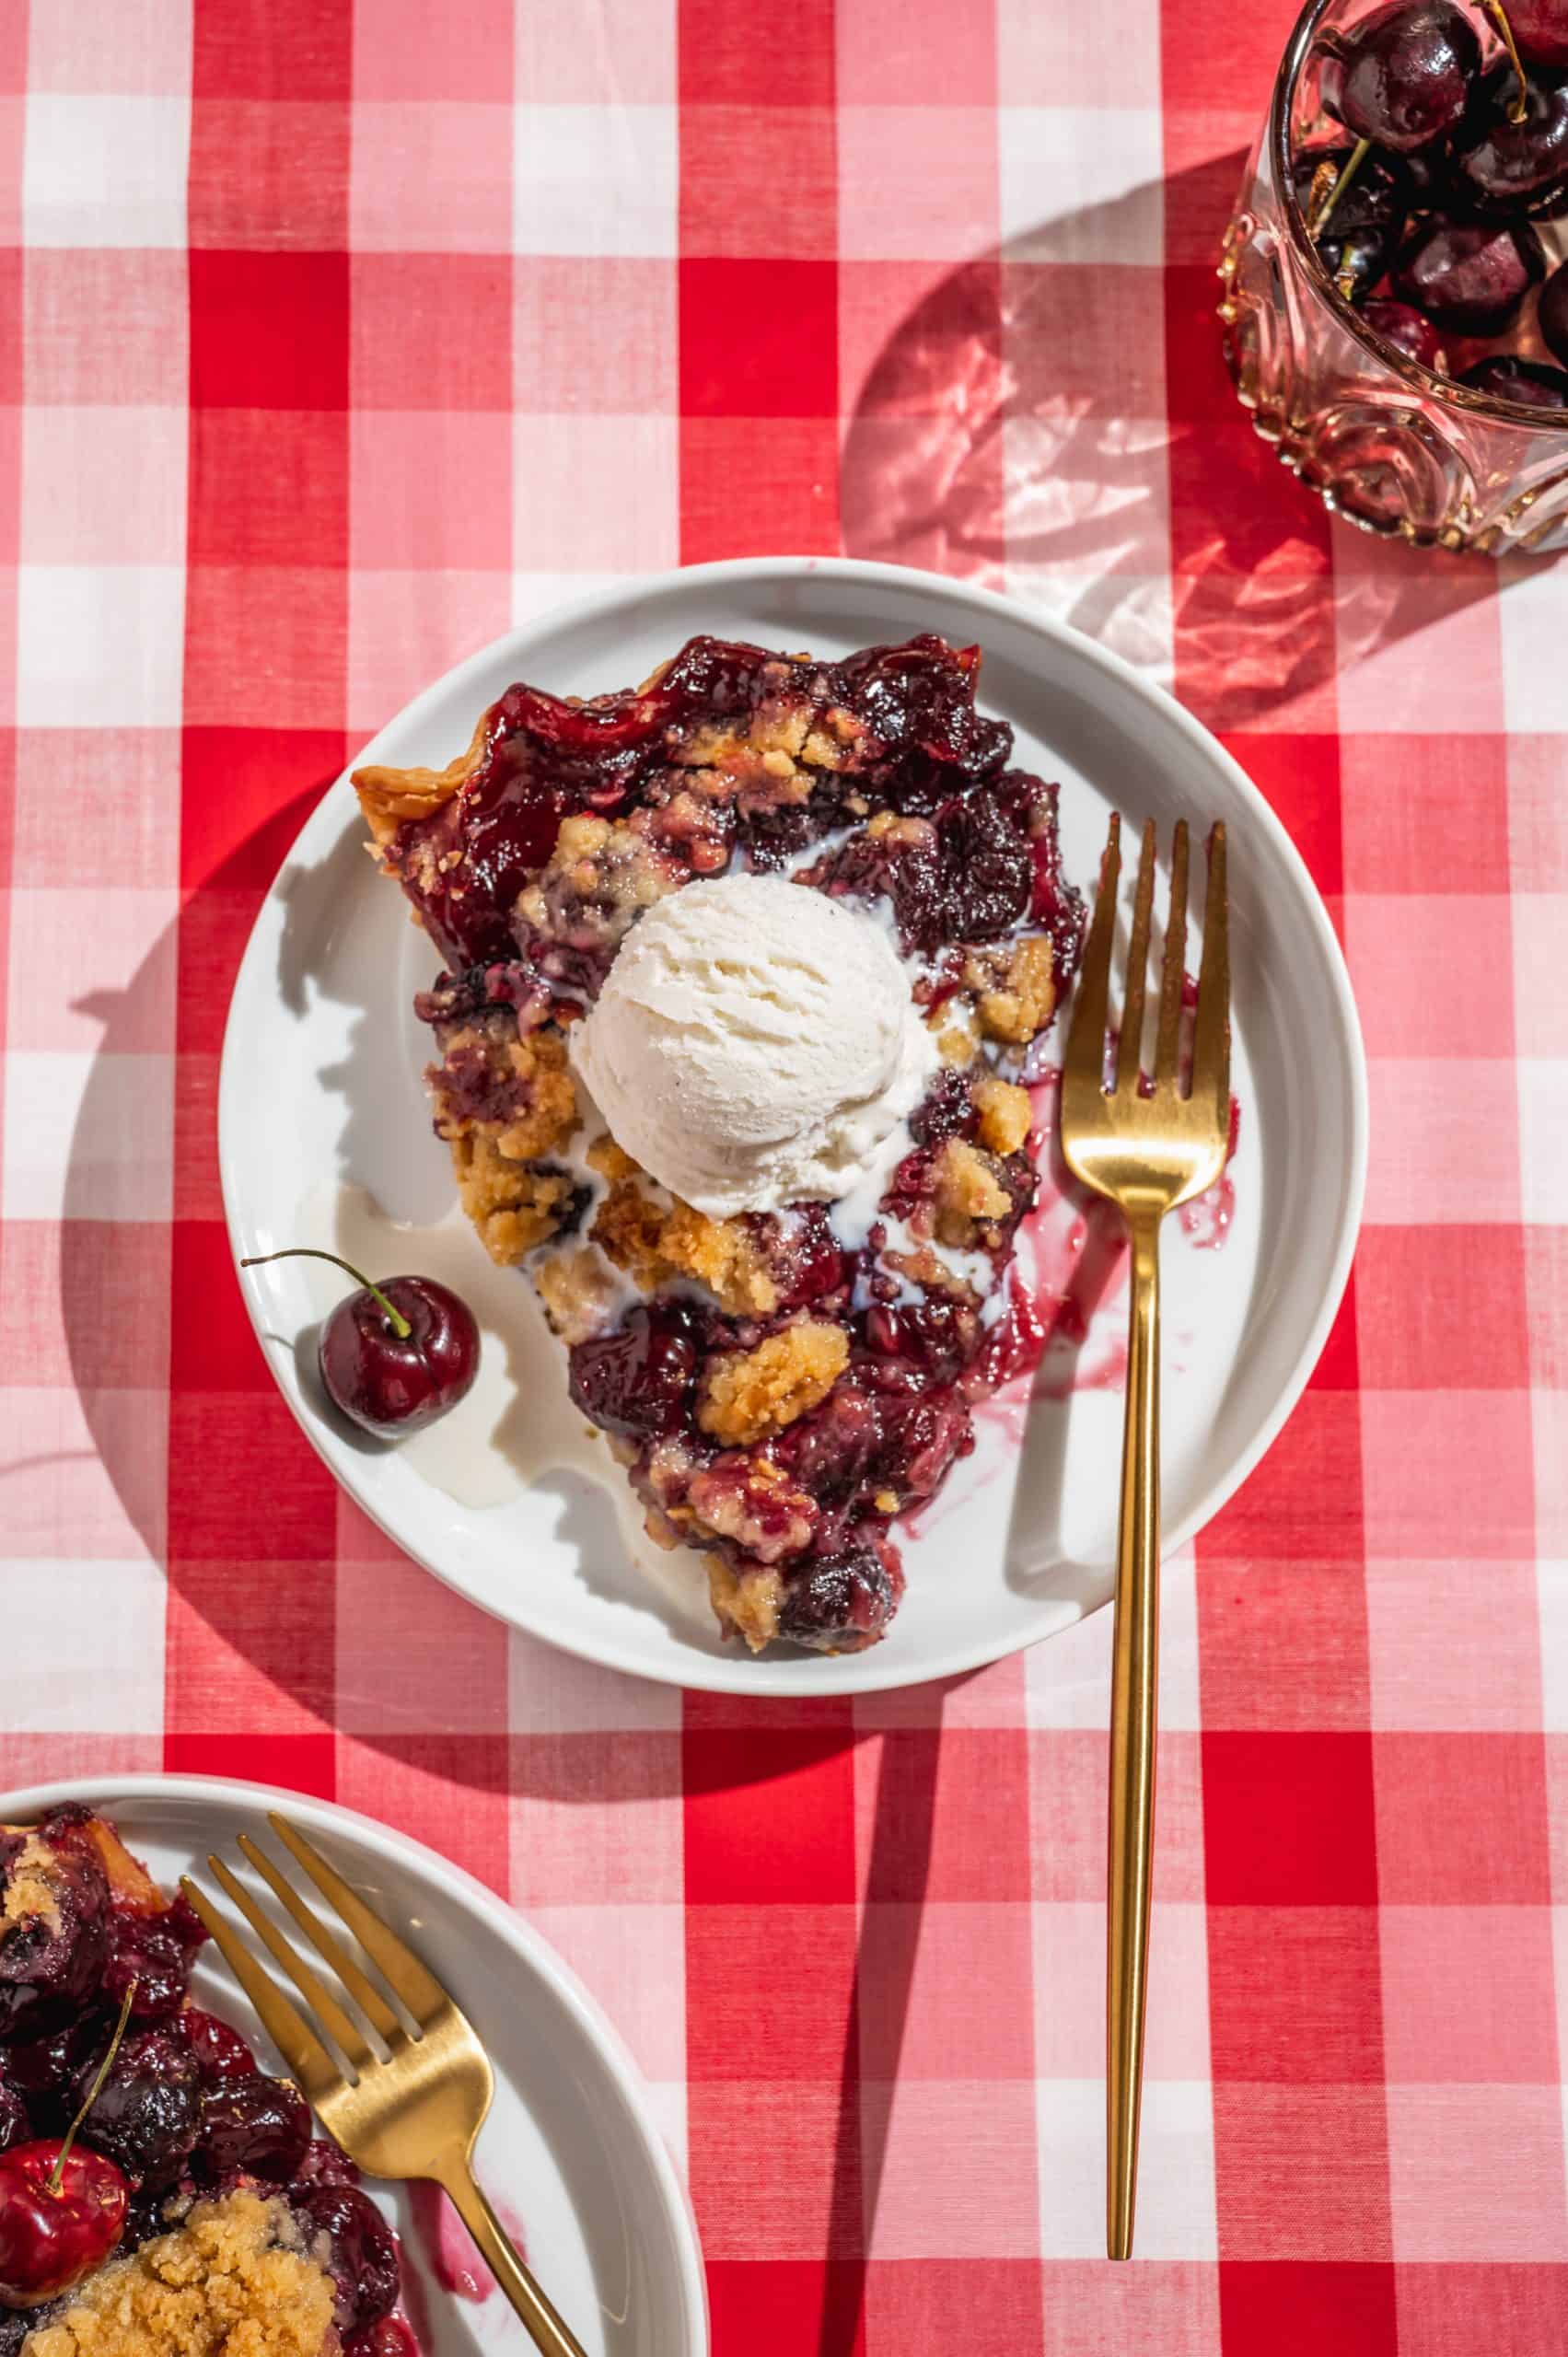
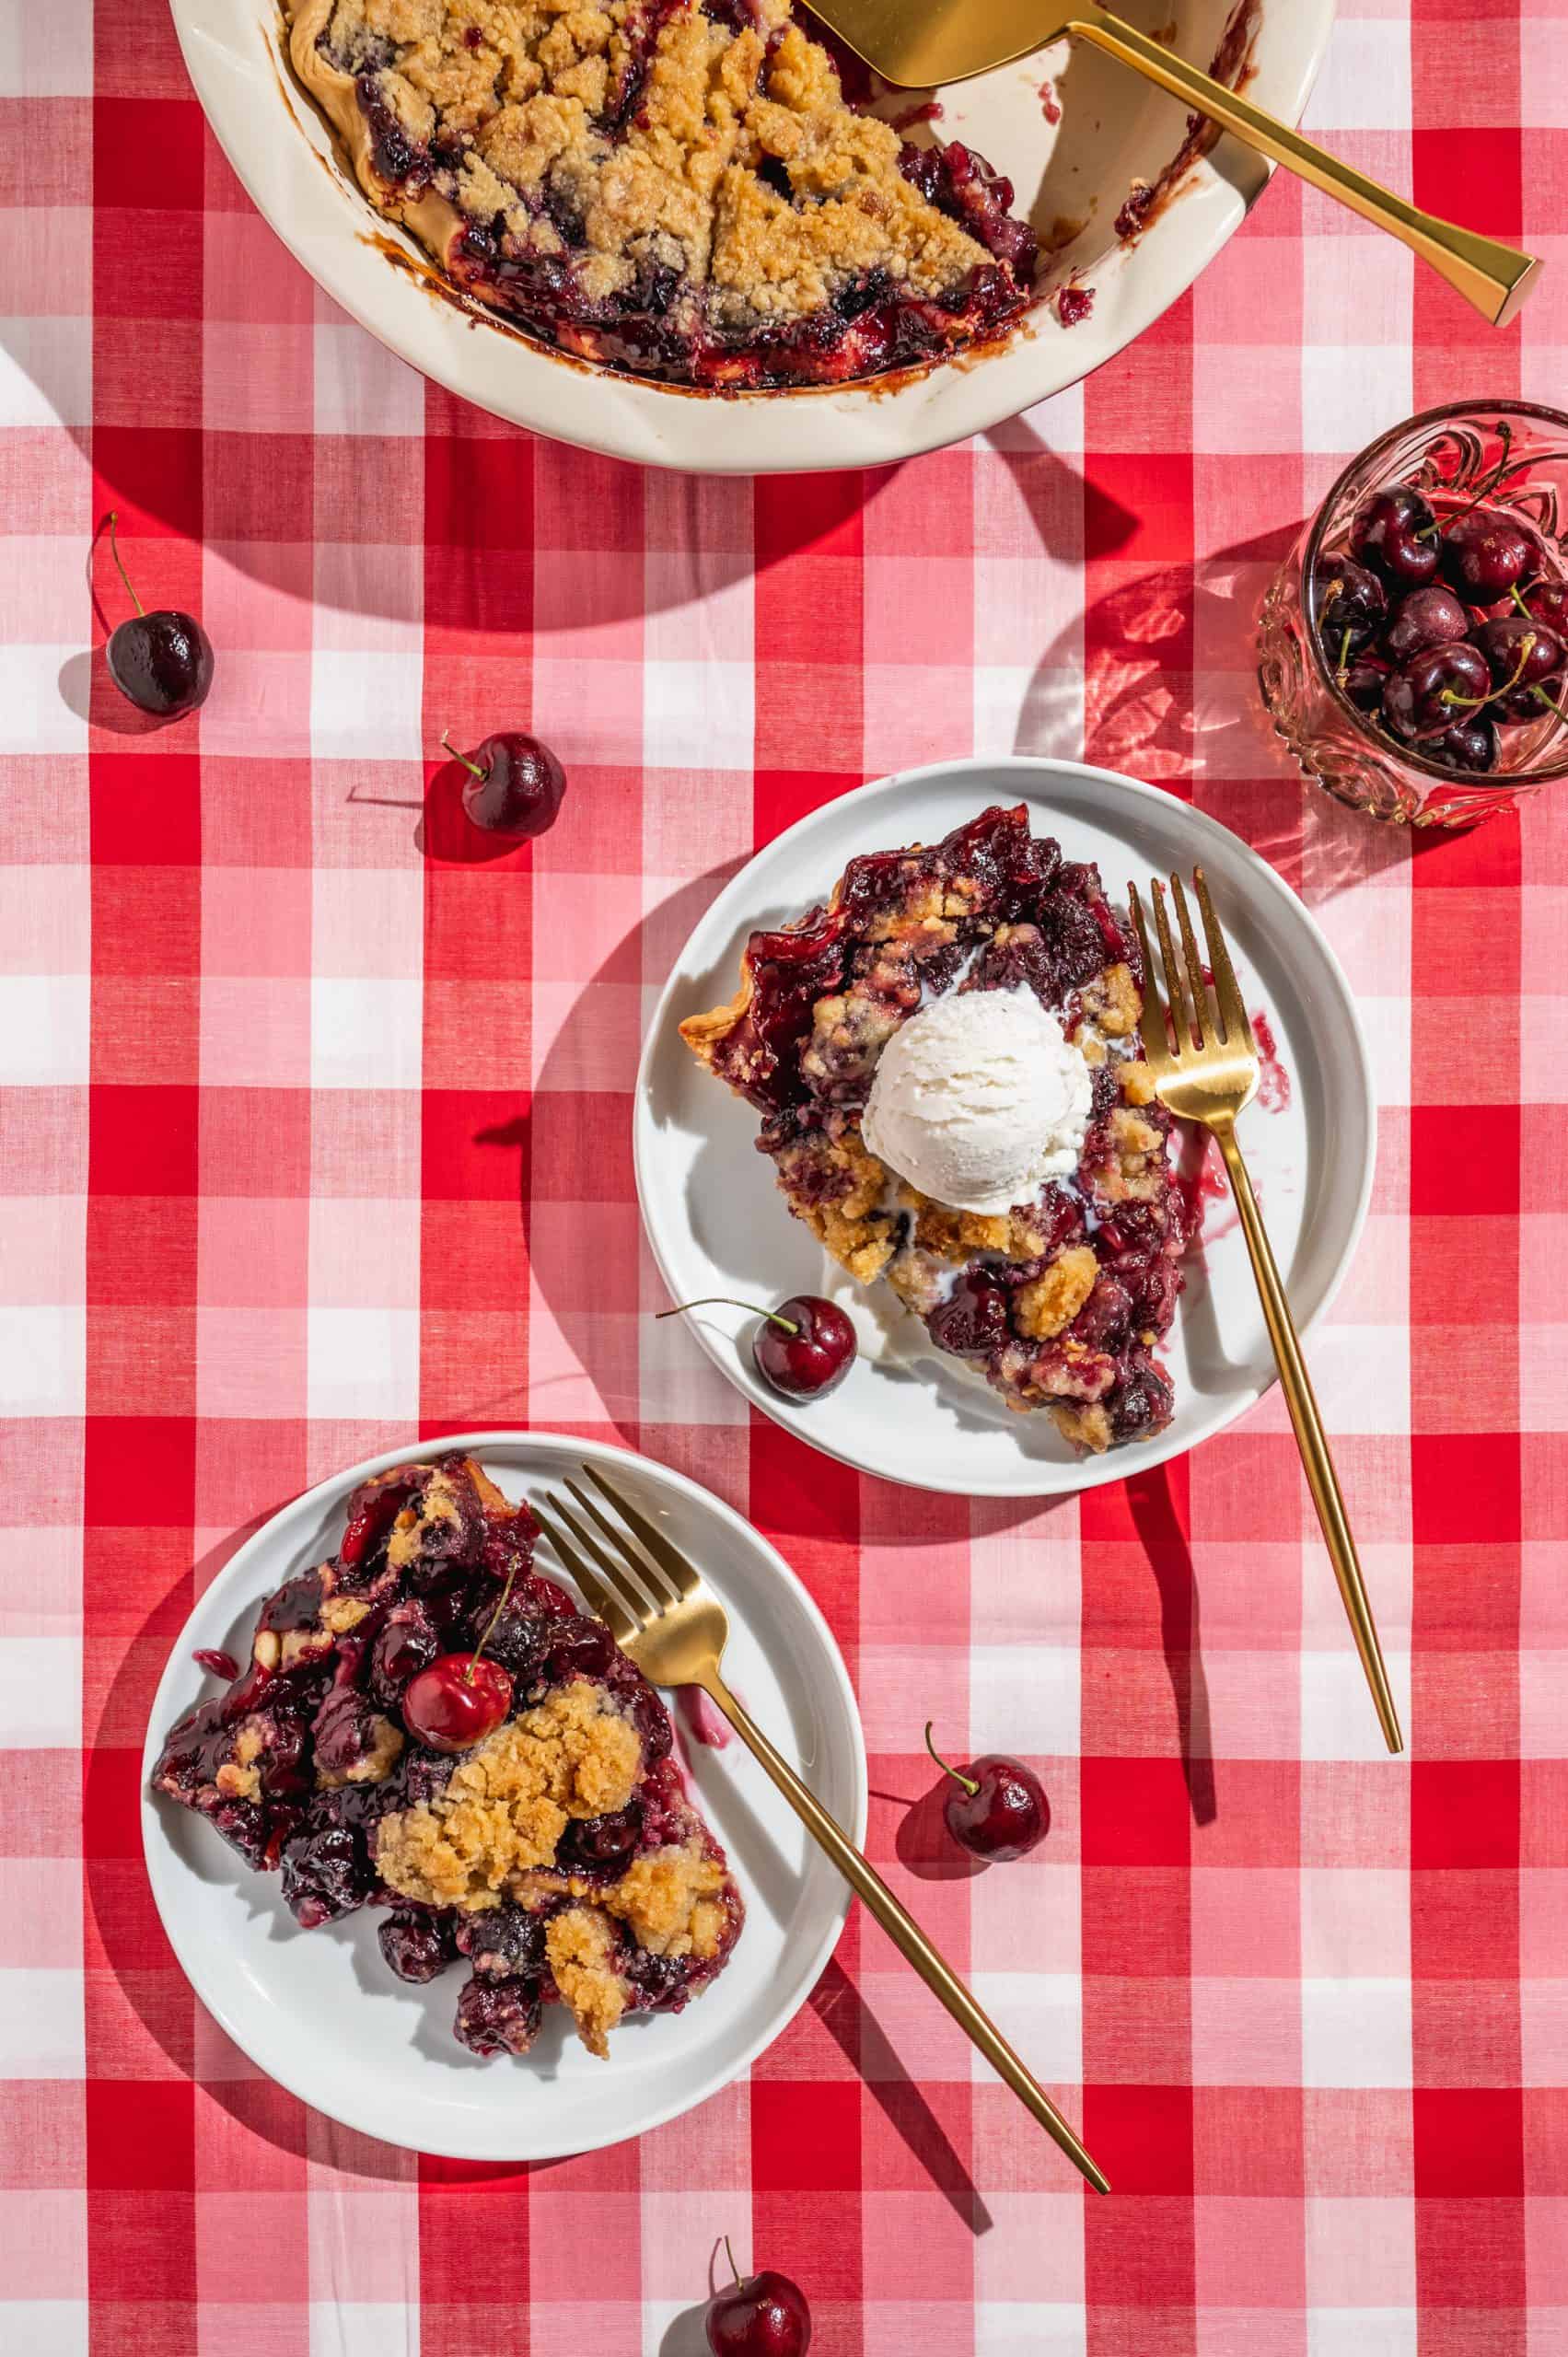
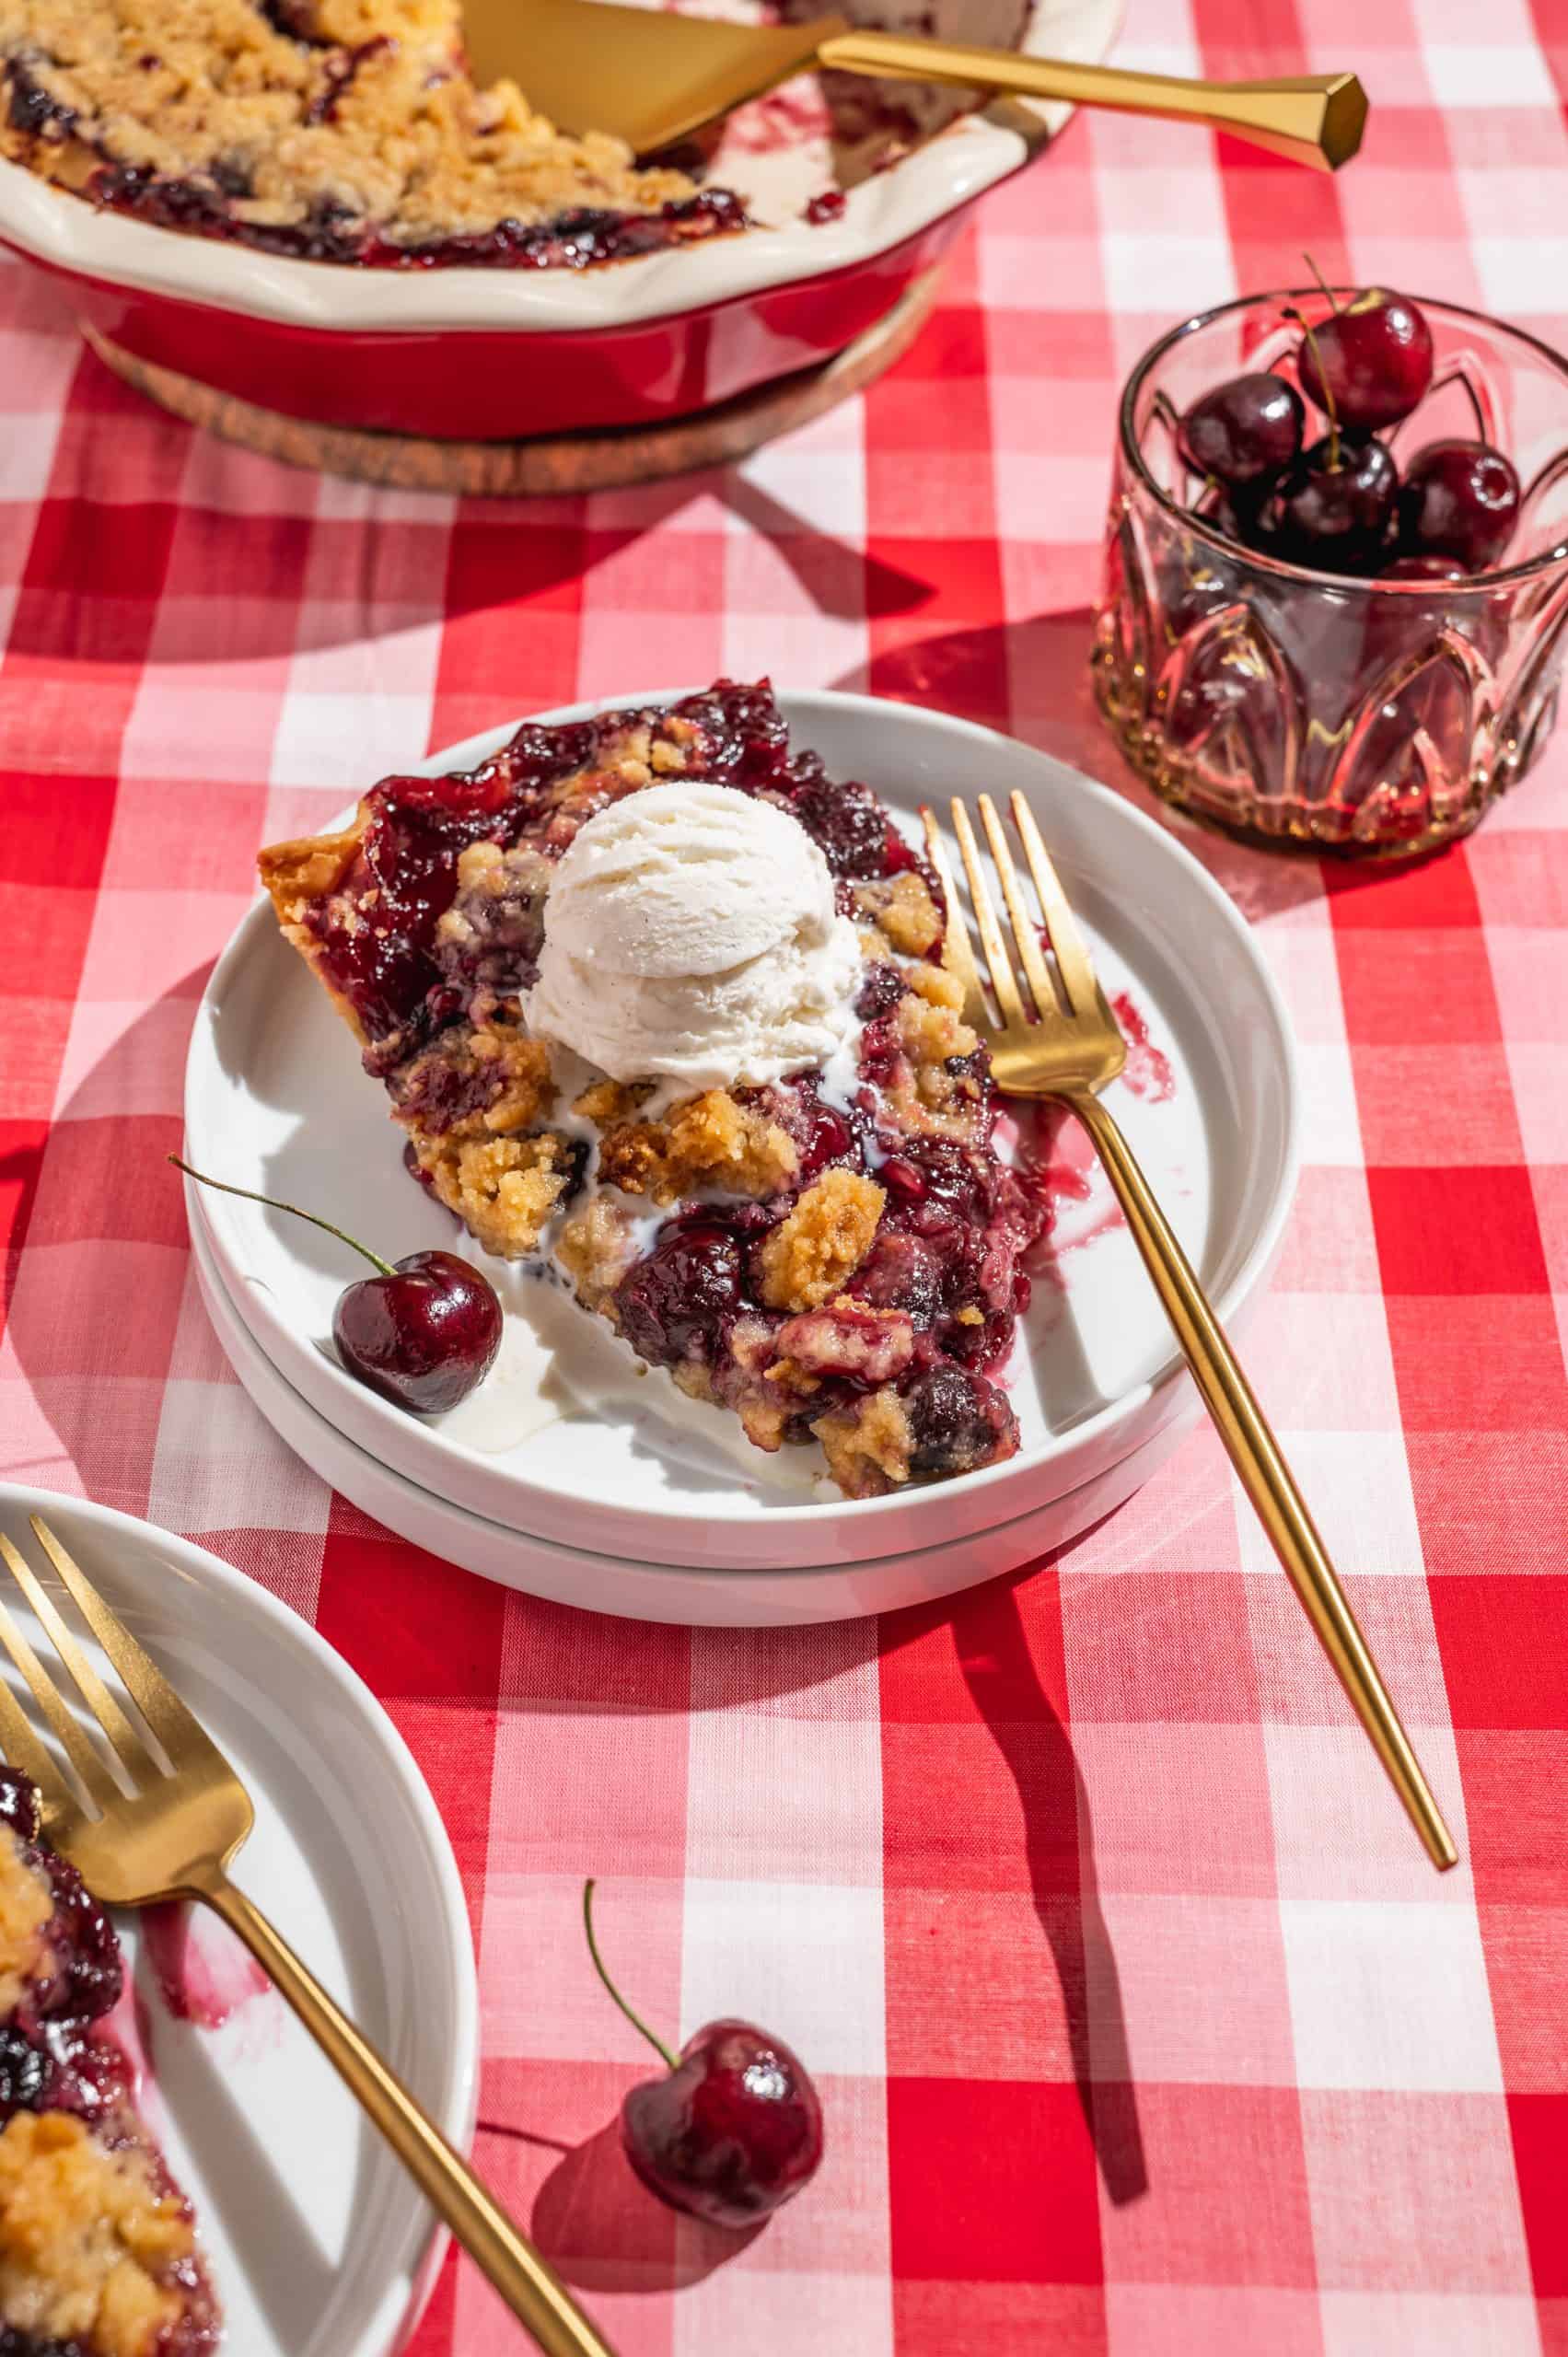
If you want to avoid rolling pie dough altogether, you can use this recipe to make a cherry crumble. Pour the filling straight into an empty pie dish and top with the crumble topping. Then serve warm, spooning into shallow bowls, and top with vanilla ice cream ◡̈
And if you add oats to the crumble mixture, it becomes an equally delicious cherry crisp!
Equipment
Here's some tools and equipment you might find useful when making this recipe:
- Cherry pitter - While you can pit cherries without a cherry pitter, this little device helps make it go a lot faster. It also works for olives! If you use a lot of fresh cherries and/or olives, I highly suggest a multi-cherry pitter (definitely on my wish list if this one ever gives out).
- Large pot - a 4-quart Dutch oven works great for making the cherry filling. You can also use a regular saucepot.
- Mixing bowls - in a variety of sizes.
- Pie plate - this recipe makes a good amount of filling, so I recommend using a deep dish pie plate (or one that's at least 2 inches tall). The one I used is ceramic. So if you use a glass or metal pie plate, keep in mind it will probably cook a little faster.
- Pie server - or a knife and server set that works for both pies and cakes.
- Pastry blender (optional) - TBH I don't even own one, because I prefer to use my hands. But if you want to keep your hands clean, a pastry cutter is the tool you want to cut butter into flour to make flaky pie crusts and buttery streusels.
- Pie shield (optional) - if you don't make a lot of pies, aluminum foil works too, but it's a little more difficult when the pie plate is hot out of the oven. An adjustable pie shield is inexpensive and works on pies from 8 to 11.5 inches.
- Rolling pin (optional) - if you're making the bottom crust from scratch or using a box mix.
Storage & Reheating
Because of its high sugar content, cherry crunch pie can be stored at room temperature for a couple of days. However, it's safer to store it in the fridge and will last longer (up to 5 days).
Fruit pies should be allowed to cool for a minimum of 2-3 hours before serving. Otherwise, the juices will run out everywhere. So if you want to serve a warm pie, it's best to make it ahead of time and gently reheat it before serving.
To refresh a whole pie, bake it for about 15-20 minutes in a 325-degree oven. You should store the pie at room temperature instead of in the fridge since it will take longer to heat up if it starts cold. And reheating the pie for too long may eventually cause it to dry out.
To reheat a single slice of pie, you can also bake it in the oven on a baking sheet (15 minutes at 325 °F. Or, microwave in 20-second intervals until warm.
FAQ
Not all cherry pie filling is gluten free, but luckily this one is! Some cherry pie fillings use flour or other gluten-containing starches as a thickener. But this recipe uses cornstarch, which is naturally gluten free. So if you follow a gluten free diet, you can make this cherry pie filling recipe as written.
To make a gluten free cherry pie with crumble topping, you can use a gluten free pie crust and gluten free flour in the streusel. Just double check that your brand of baking powder is gluten free too.
They are essentially the same thing: a shaggy combination of flour, sugar, and butter often used to top a cake or pie. Streusel is a German word, while a crumb topping or crumble is the British version.
📖 Recipe
Cherry Crumble Pie

This Cherry Crumble Pie recipe is bursting with fresh cherries suspended in a deliciously smooth and syrupy homemade filling, topped with an easy-to-make yet scrumptious crumble.
- Prep Time: 20 minutes
- Cook Time: 1 hour 15 minutes
- Total Time: 1 hour 35 minutes
- Yield: 8 servings 1x
- Category: Dessert
- Method: Baking
- Cuisine: American, British, German
Ingredients
For the Cherry Pie Filling
- 5-6 cups tart pitted cherries, fresh or frozen*
- 1 ½ cups granulated sugar
- ½ tsp vanilla extract
- ½ tsp almond extract
- ¼ cup lemon juice
- ¼ cup cornstarch
For the Crumble Topping + Assembly
- ¾ cup all-purpose flour
- ⅓ cup packed light brown sugar
- 2 tablespoons granulated sugar
- ½ teaspoon baking powder
- pinch salt
- 8 tbsp unsalted butter, cold and diced
- 1 single pie crust, uncooked*
Instructions
- Make the cherry pie filling: place the cherries + ½ cup of water* in a large pot and cook over medium heat for about 5 minutes. Add sugar and extracts and continue to cook until sugar is dissolved.
- Mix together lemon juice and cornstarch in a small bowl, then add to the pot. Turn up the heat to medium-high and continue to cook, stirring frequently, until bubbling and thickened.* Let the cherry filling mixture cool to room temperature.
- Make crumble topping: in a large bowl, combine flour, sugars, baking powder, and salt. Then add the diced butter and cut the butter into the flour mixture (using your hands or a pastry blender) until the mixture is crumbly.
- Assemble the pie: preheat the oven to 350 °F. Roll out the pie dough to ¼ inch thickness and place it into an ungreased pie dish. Then fill with the cooled cherry filling and sprinkle with the prepared crumb topping.
- Bake for 65-75 minutes or until golden brown and bubbly.* After about 45 minutes, cover the outer crust with a pie shield or aluminum foil to keep the edges from browning too much. Let cool for at least 2 hours before slicing and serving.
Notes
- If using frozen cherries, defrost and drain excess liquid. Or, cook from frozen and decrease water by ¼ cup (start with ¼ cup water.) If using sweet cherries, decrease the sugar by ⅓ (use only 1 cup of sugar).
- Use refrigerated pie crust or your favorite single pie crust recipe for the bottom crust.
- Cornstarch is activated above 180-190 °F. Once it reaches that temperature, the mixture will begin to thicken rapidly. When that happens, remove the pot from the heat, and continue to stir until it cools down a little to avoid sticking or scorching.
- Cook time will vary based on the type of pan (glass and metal pans will cook the pie faster than ceramic). Keep a close eye on it after about 50 minutes and rely on visual cues (deep golden brown color, bubbling through the surface).
Leave a Reply