

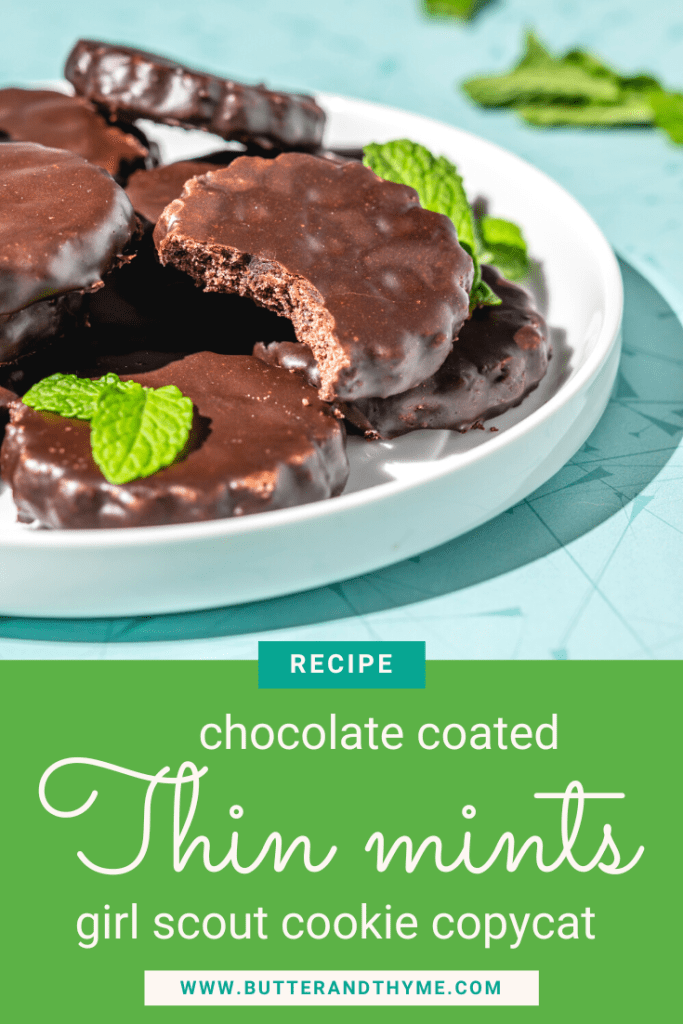
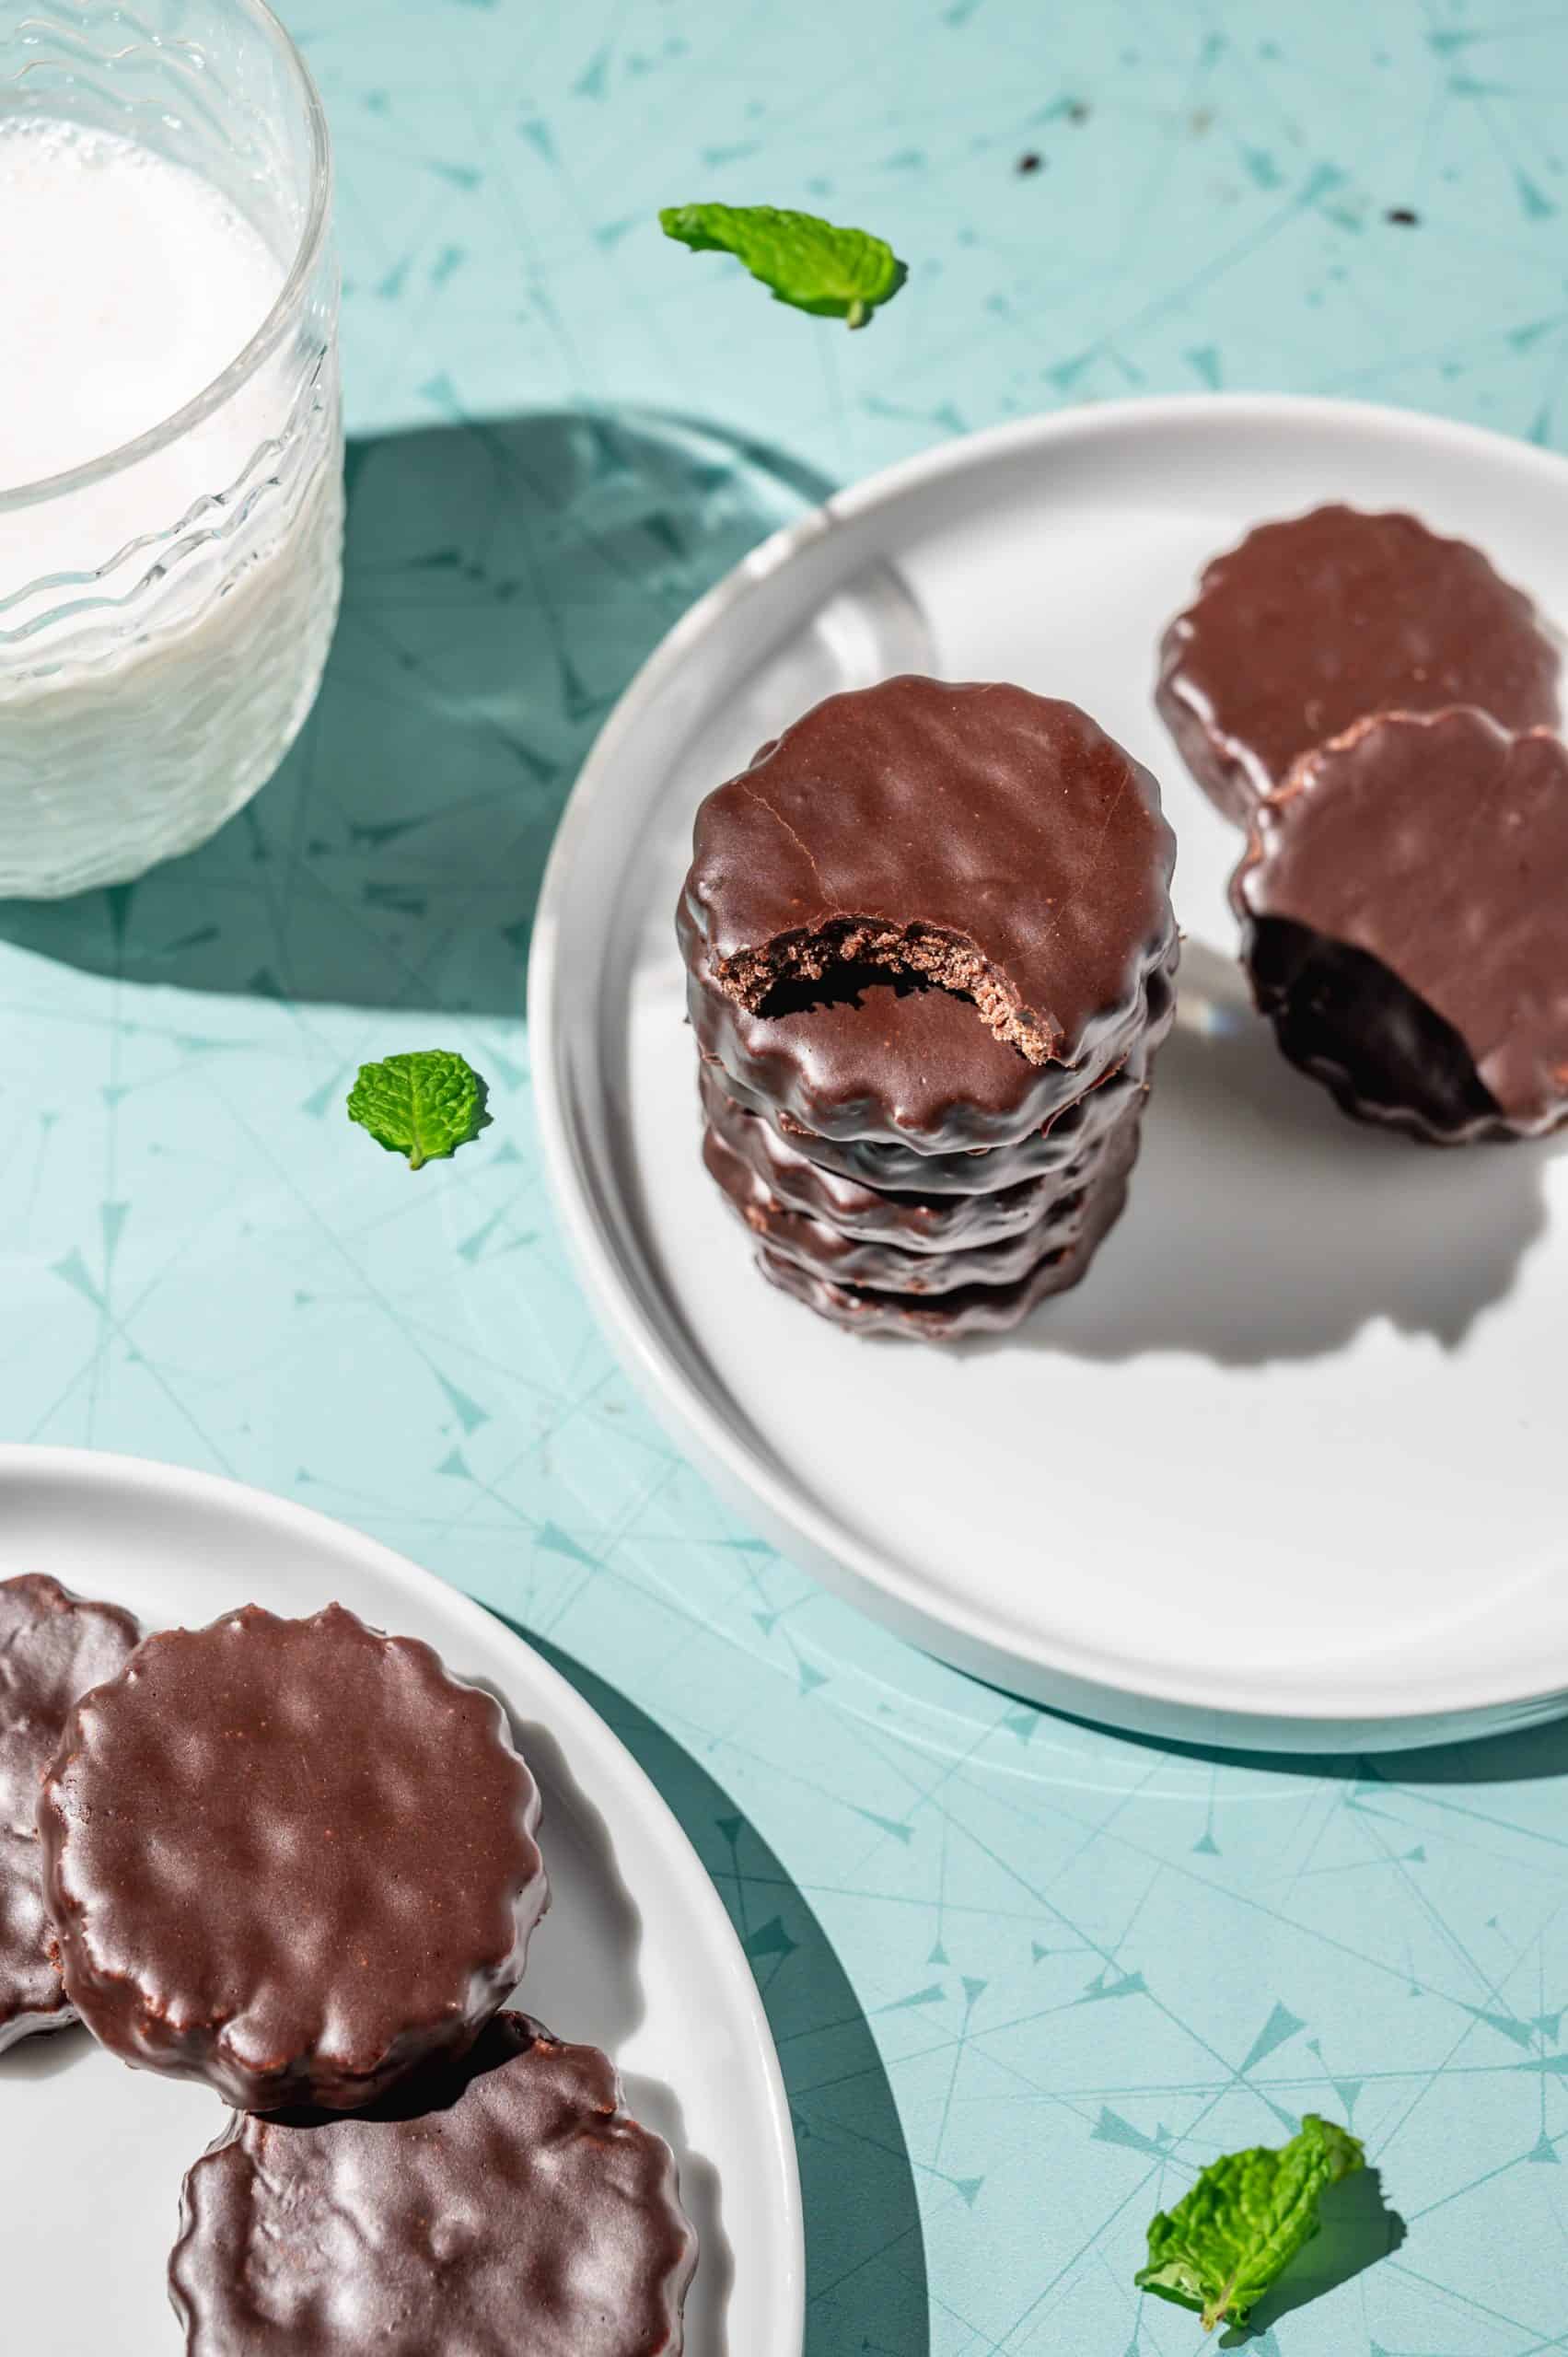
Girl Scout Thin Mints are one of my all-time favorite cookie recipes! And with this copycat thin mints recipe, you won’t have to wait until Girl Scout Cookie season. You can enjoy these chocolatey thin mints ALL YEAR ROUND!
These thin chocolatey wafers with that addicting soft-yet-crispy texture couple with just a hint of refreshing mint to leave you wanting more. The texture is sort of similar to one of my other favorite cookie recipes, white chocolate cranberry shortbread.

Girl Scout cookies are usually only available from January to March, depending on where you live. So I wanted to try to recreate my favorite girl scout cookie recipes to taste as close to the originals as possible!
Looking for more copycat cookie recipes? Try my copycat homemade Oreos next!
Jump to:
Why You'll Love This Recipe
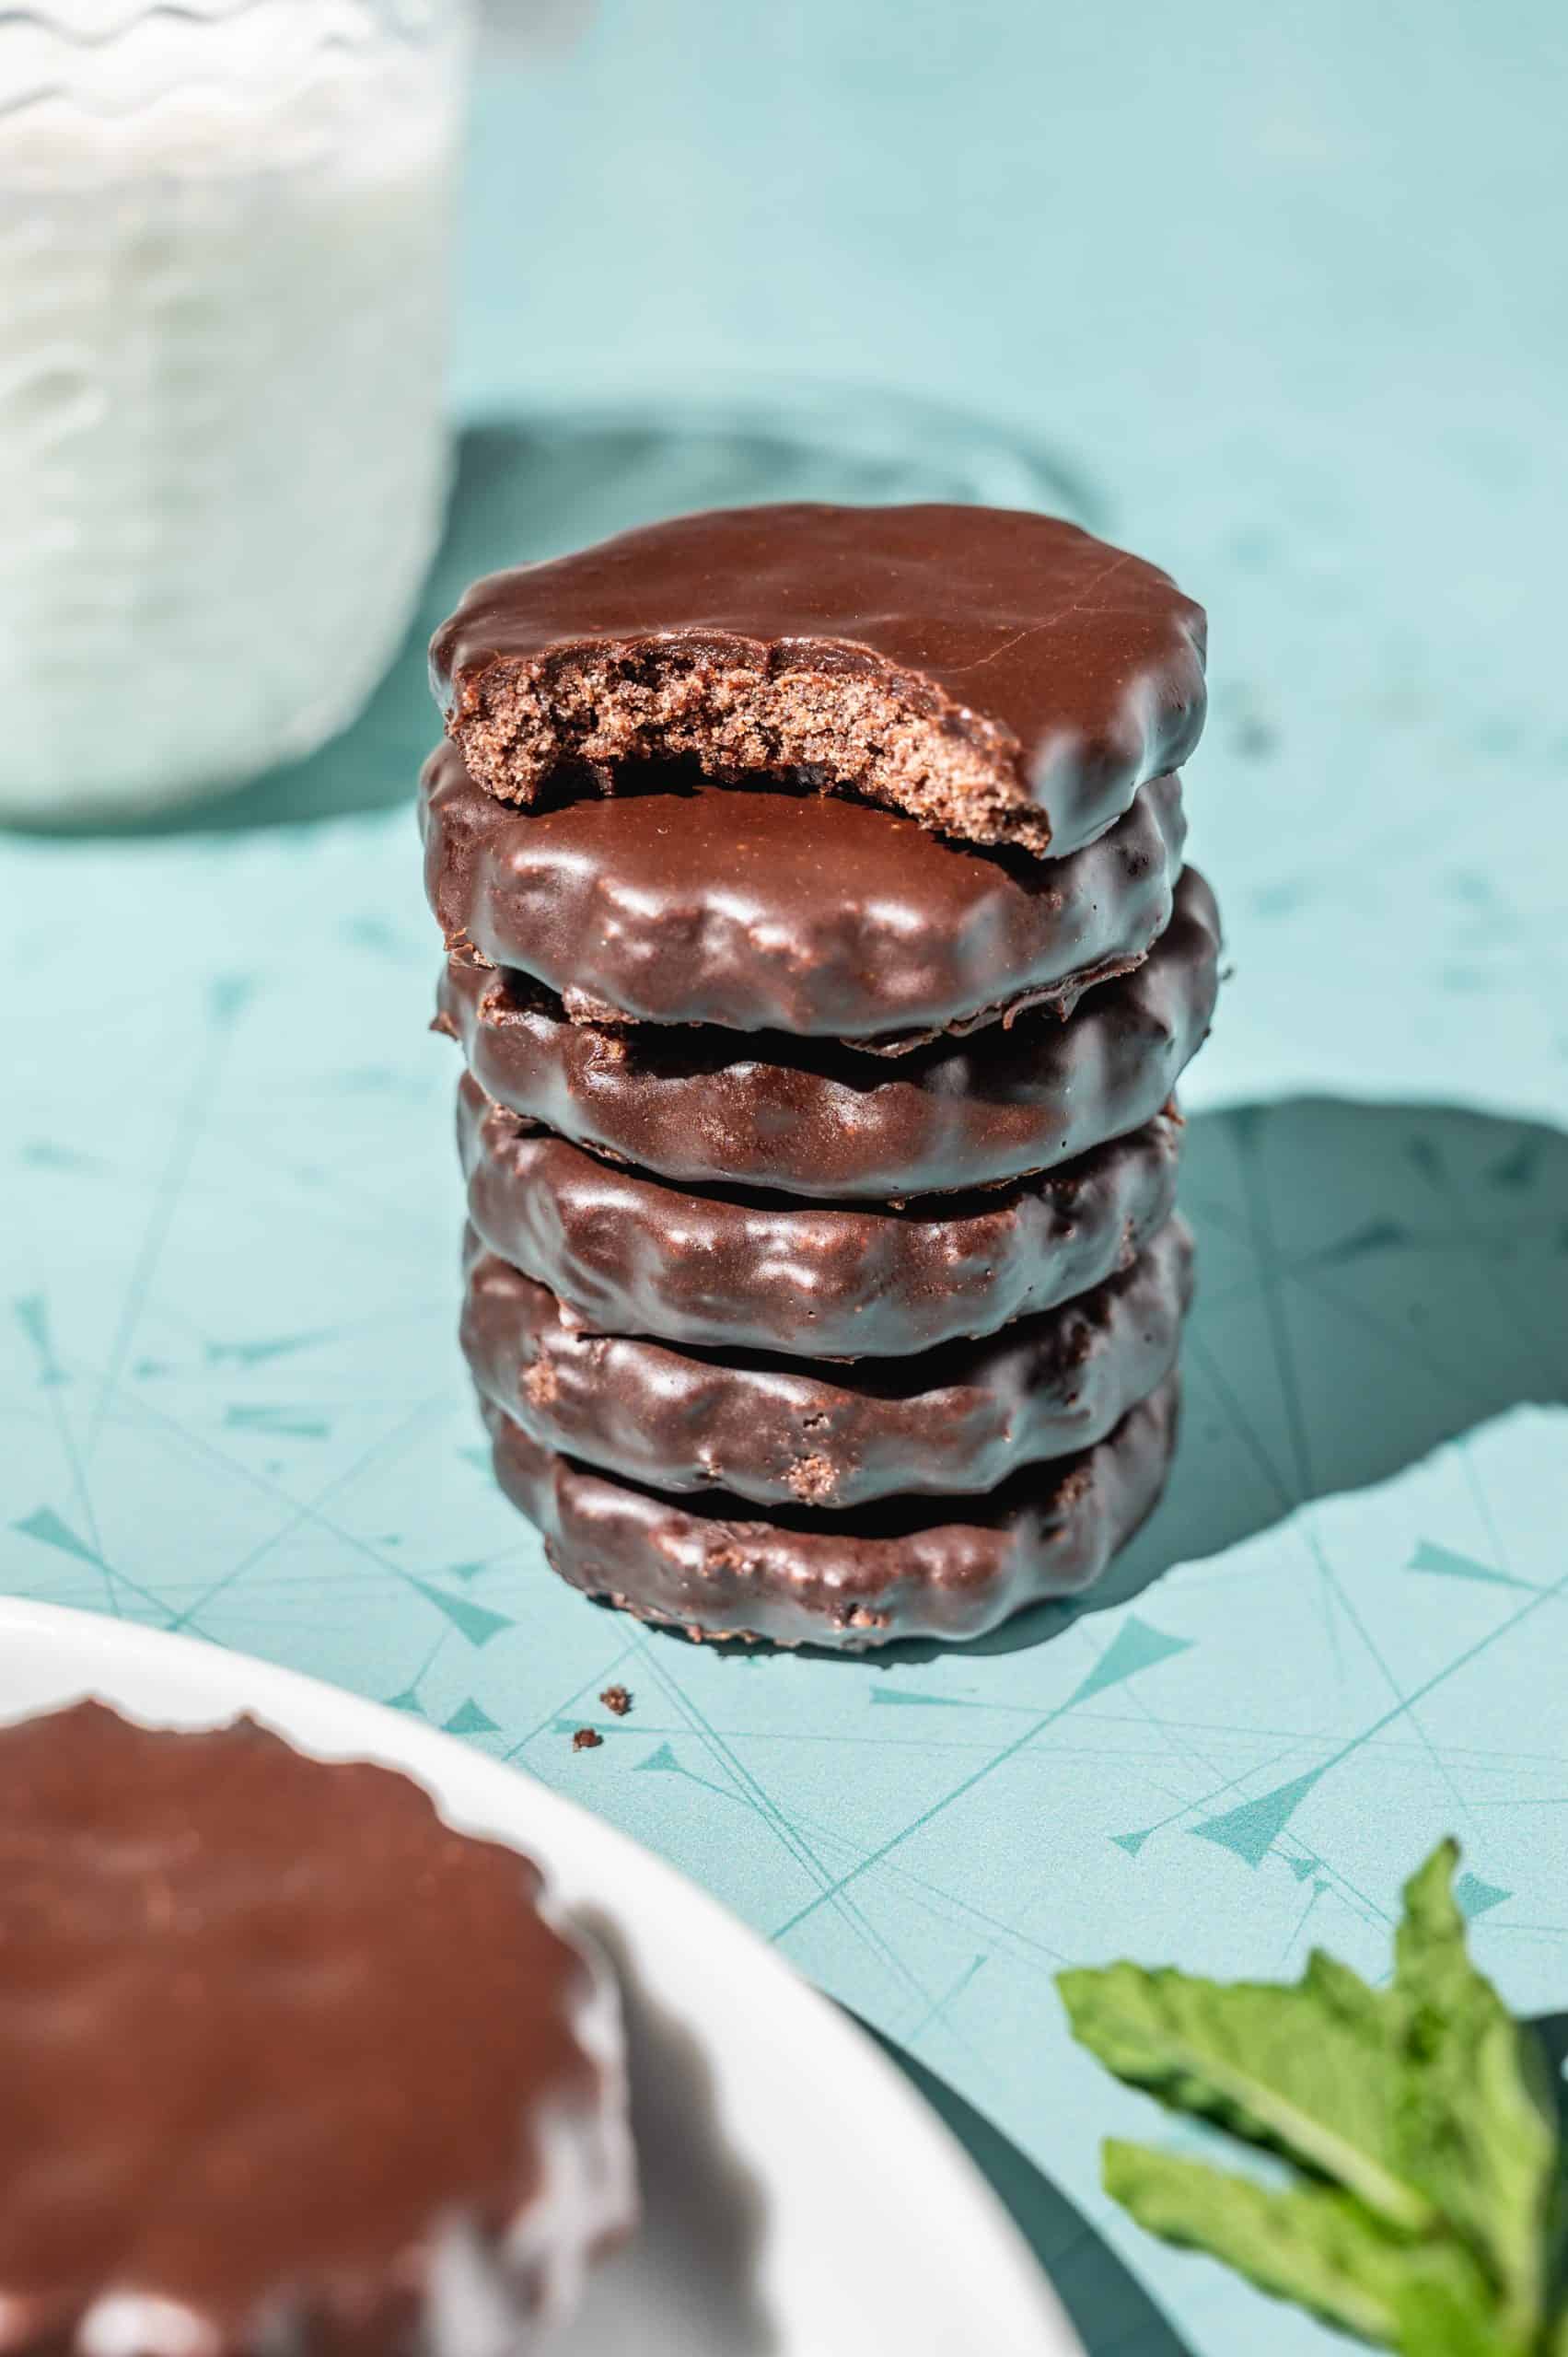
- They taste just like the original! Other copycat recipes are too soft and chewy, and they're usually coated in melted chocolate which isn't the right texture for the chocolate coating. This recipe really captures the soft-yet-crisp melt-in-your-mouth texture that will give you a rush of nostalgia.
- They're cost-effective! I do love supporting my local Girl Scouts by buying cookies when I can. But if you’re trying to save some cash, making your own thin mints is cheaper than buying them.
- You can enjoy them year-round! No more wishing and waiting for Girl Scouts to show up at your door. With this recipe, you have Thin Mints on demand, anytime the craving strikes.
How I Reverse-Engineered This Recipe
Whenever I set out to make a copycat recipe, I first look at the ingredients on the package. Nutrition labels by law require ingredients to be listed in order of most to least by weight, so that's where I start.
Right away I noticed there's no chocolate listed in the ingredients, only cocoa (processed with alkali). When I tasted the Girl Scout cookies, I realized the chocolate coating isn't as hard as melted chocolate would be. It's almost like a glaze or royal icing, flavored with cocoa powder.
Then I think about what ingredients are accessible to home cooks since some ingredients common in commercial kitchens aren't easily found at the grocery store. So I made a few easy swaps (i.e. corn syrup instead of invert sugar) and omitted some unnecessary additives (i.e. soy lecithin, caramel color).
I would also expect the process of making Thin Mints in a large commercial kitchen or factory would differ from what's possible or realistic in a home kitchen. So I relied on my culinary expertise to create a process that best emulates the texture and appearance of the Girl Scout cookies. For example, I know that cookies should be baked at lower temperatures for a longer time to achieve a crispy texture.
Like my copycat Oreos, these thin mints are a bit larger than the original. I used the smallest scalloped round cutter I have, but if you want them to match exactly in size, you’ll want a 1.25” cutter (the cookies spread a little bit when baked, but not much).
Girl Scout Thin Mints Ingredients
As I mentioned above, I've used most of the same ingredients as the original Girl Scout Thin Mint recipe, with a few small tweaks. Here's what you'll need to make these copycat thin mints:
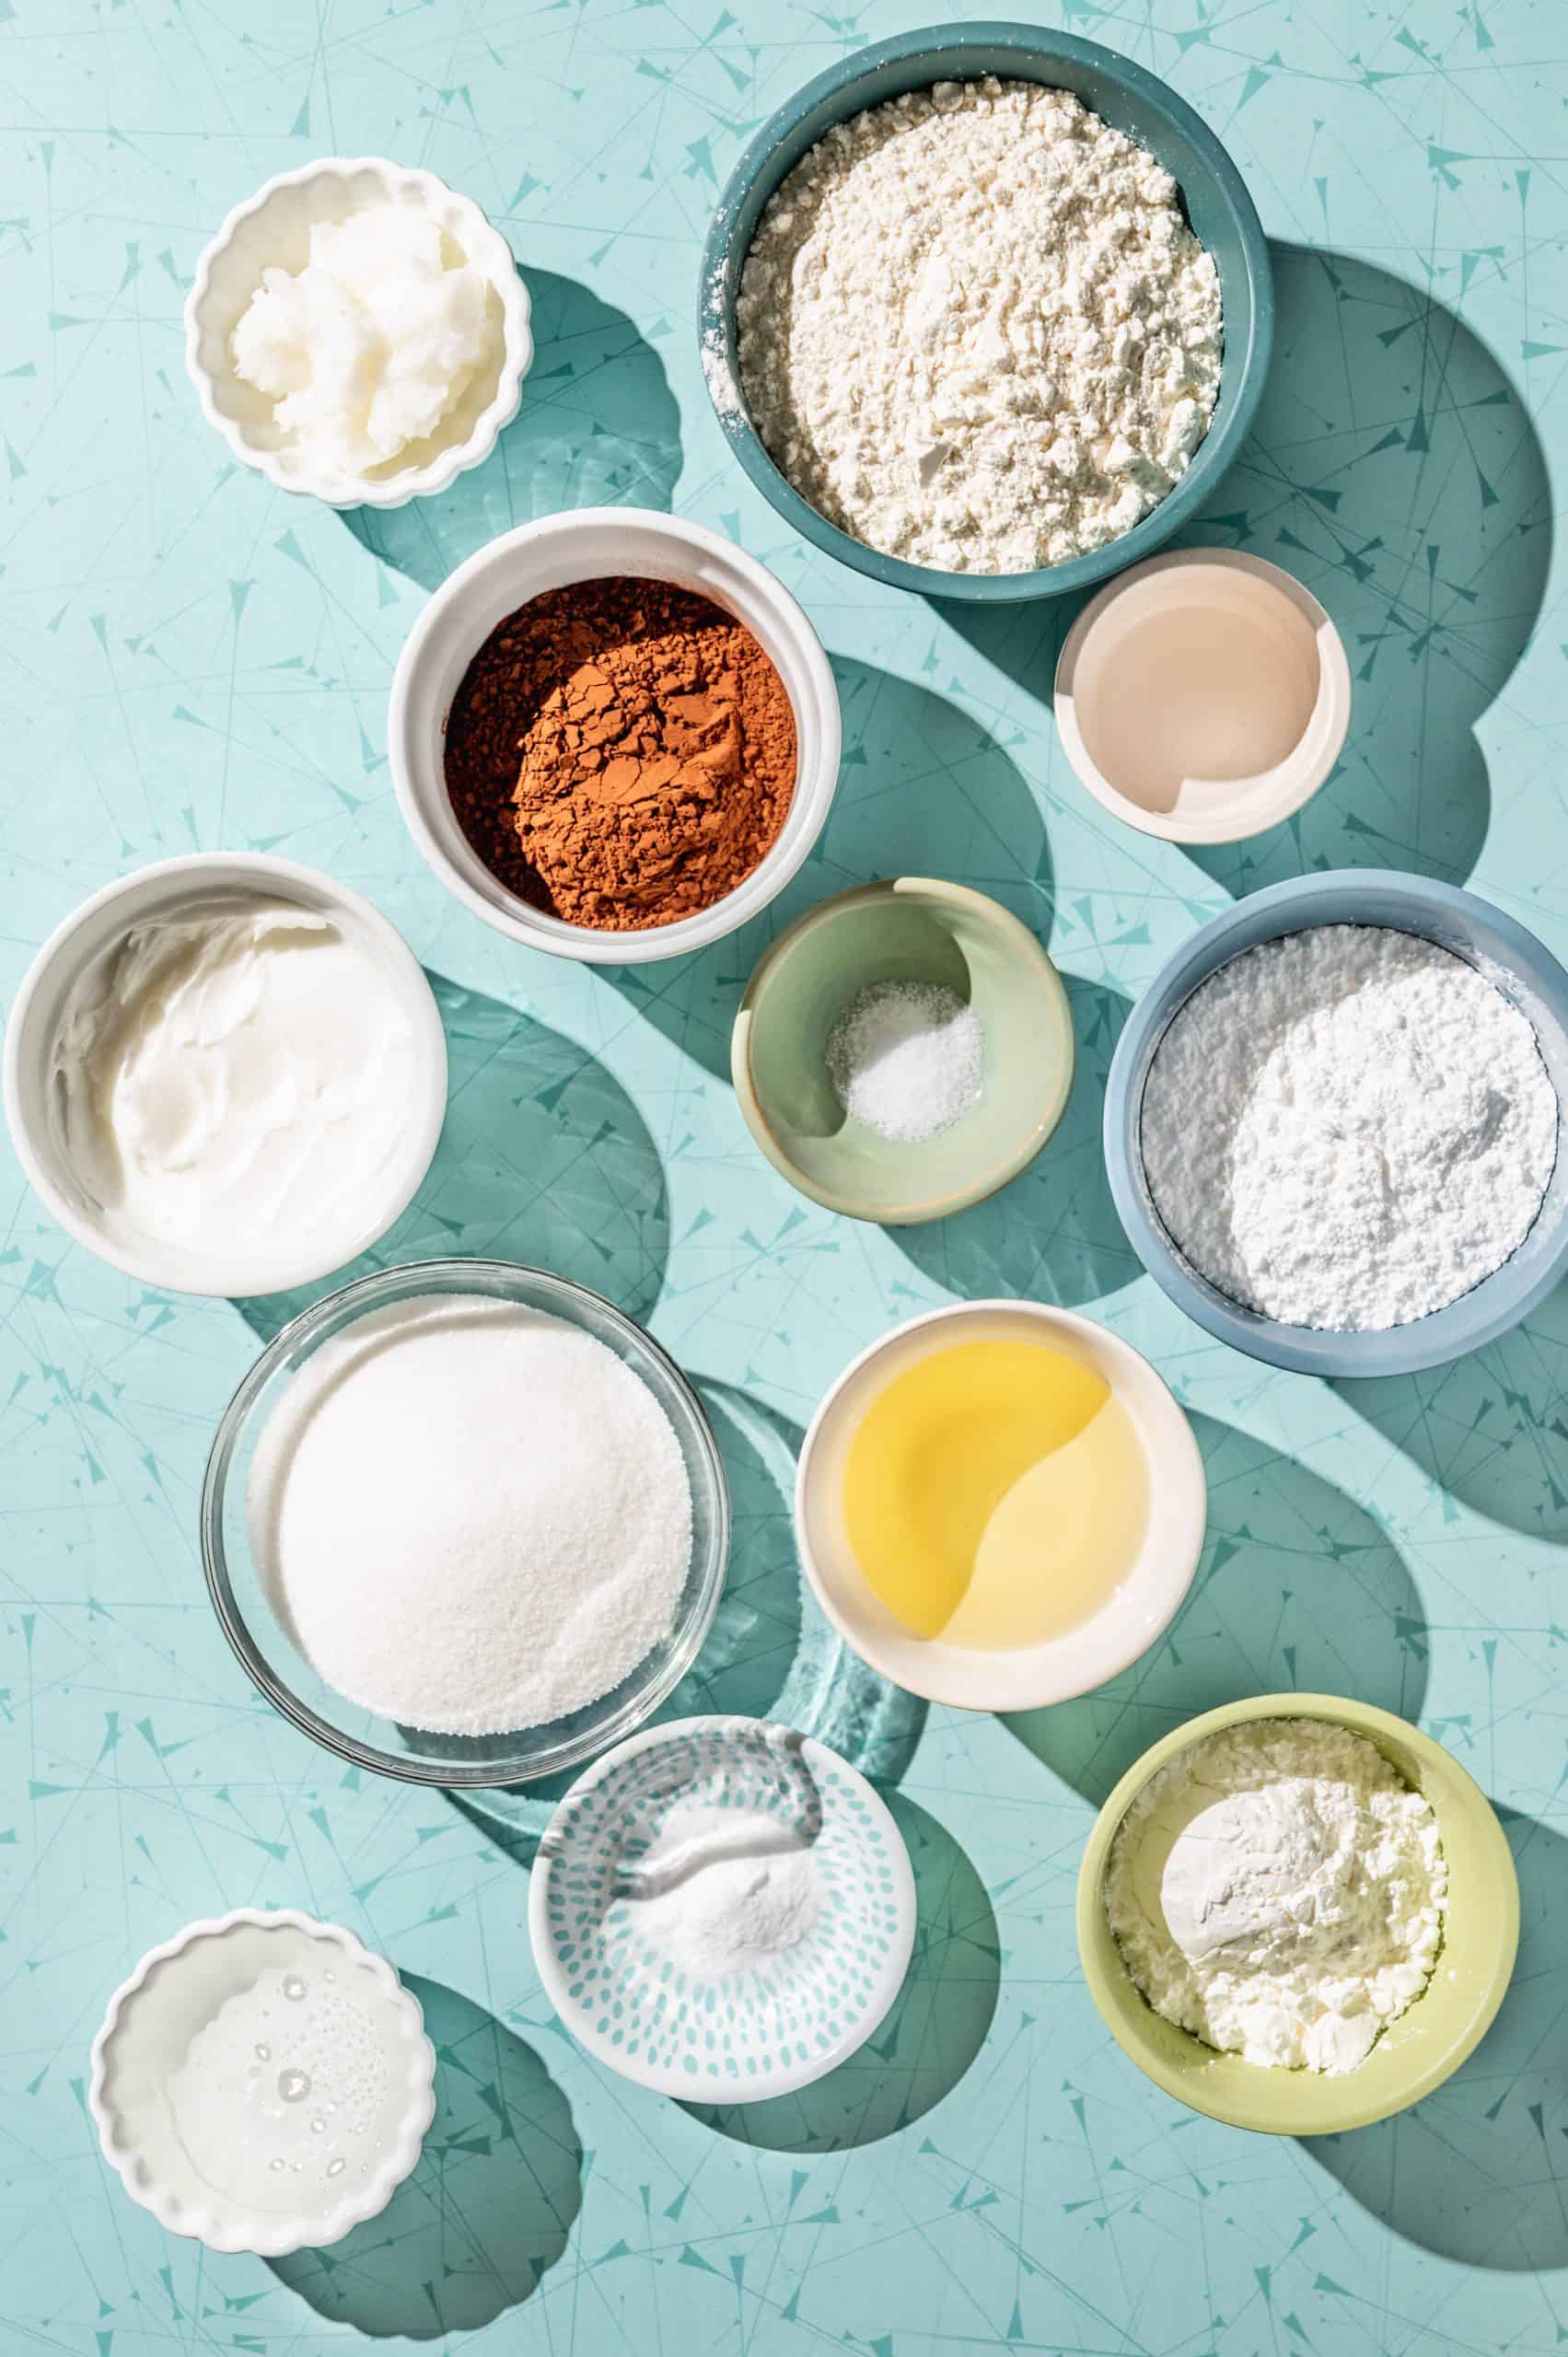
- Vegetable shortening - a.k.a Crisco. You can substitute butter if you want and they'll still taste great, but shortening is necessary to get the right texture.
- Sugar
- Vegetable oil
- Corn syrup - this is what I used instead of "invert sugar." They are very similar nutritionally (both very similar to regular sugar nutritionally, too) and in terms of what they do for the texture.
- Peppermint extract - or alcohol-free peppermint oil, make sure it's food grade.
- Flour - all-purpose.
- Cocoa powder - alkalized or Dutch-processed cocoa, used in the cookie dough and the chocolate coating. This can be hard to find in stores, so I usually stock up online!
- Baking soda
- Cornstarch - while there isn't any cornstarch in the Girl Scout Thin Mint cookies, I added some to achieve the same soft, crumbly texture.
- Salt - just a little bit balances the bitterness of chocolate and enhances flavor and texture.
- Water - I added a little water to hold the dough together since there's very little liquid (no eggs!)
- Coconut oil - this is another change from the original recipe, which I used in the chocolate coating. Refined coconut oil doesn't have any coconut flavor or scent. It tastes neutral, but it's solid at room temperature, which helps the chocolate coating to harden.
- Powdered sugar - or confectioner's sugar.
See recipe card for quantities.
How to Make Thin Mints
Start by making the simple chocolate wafer cookie dough. I used a stand mixer because it's easier, but you can also mix the dough with a handheld mixer or totally by hand if you don't have an electric mixer.
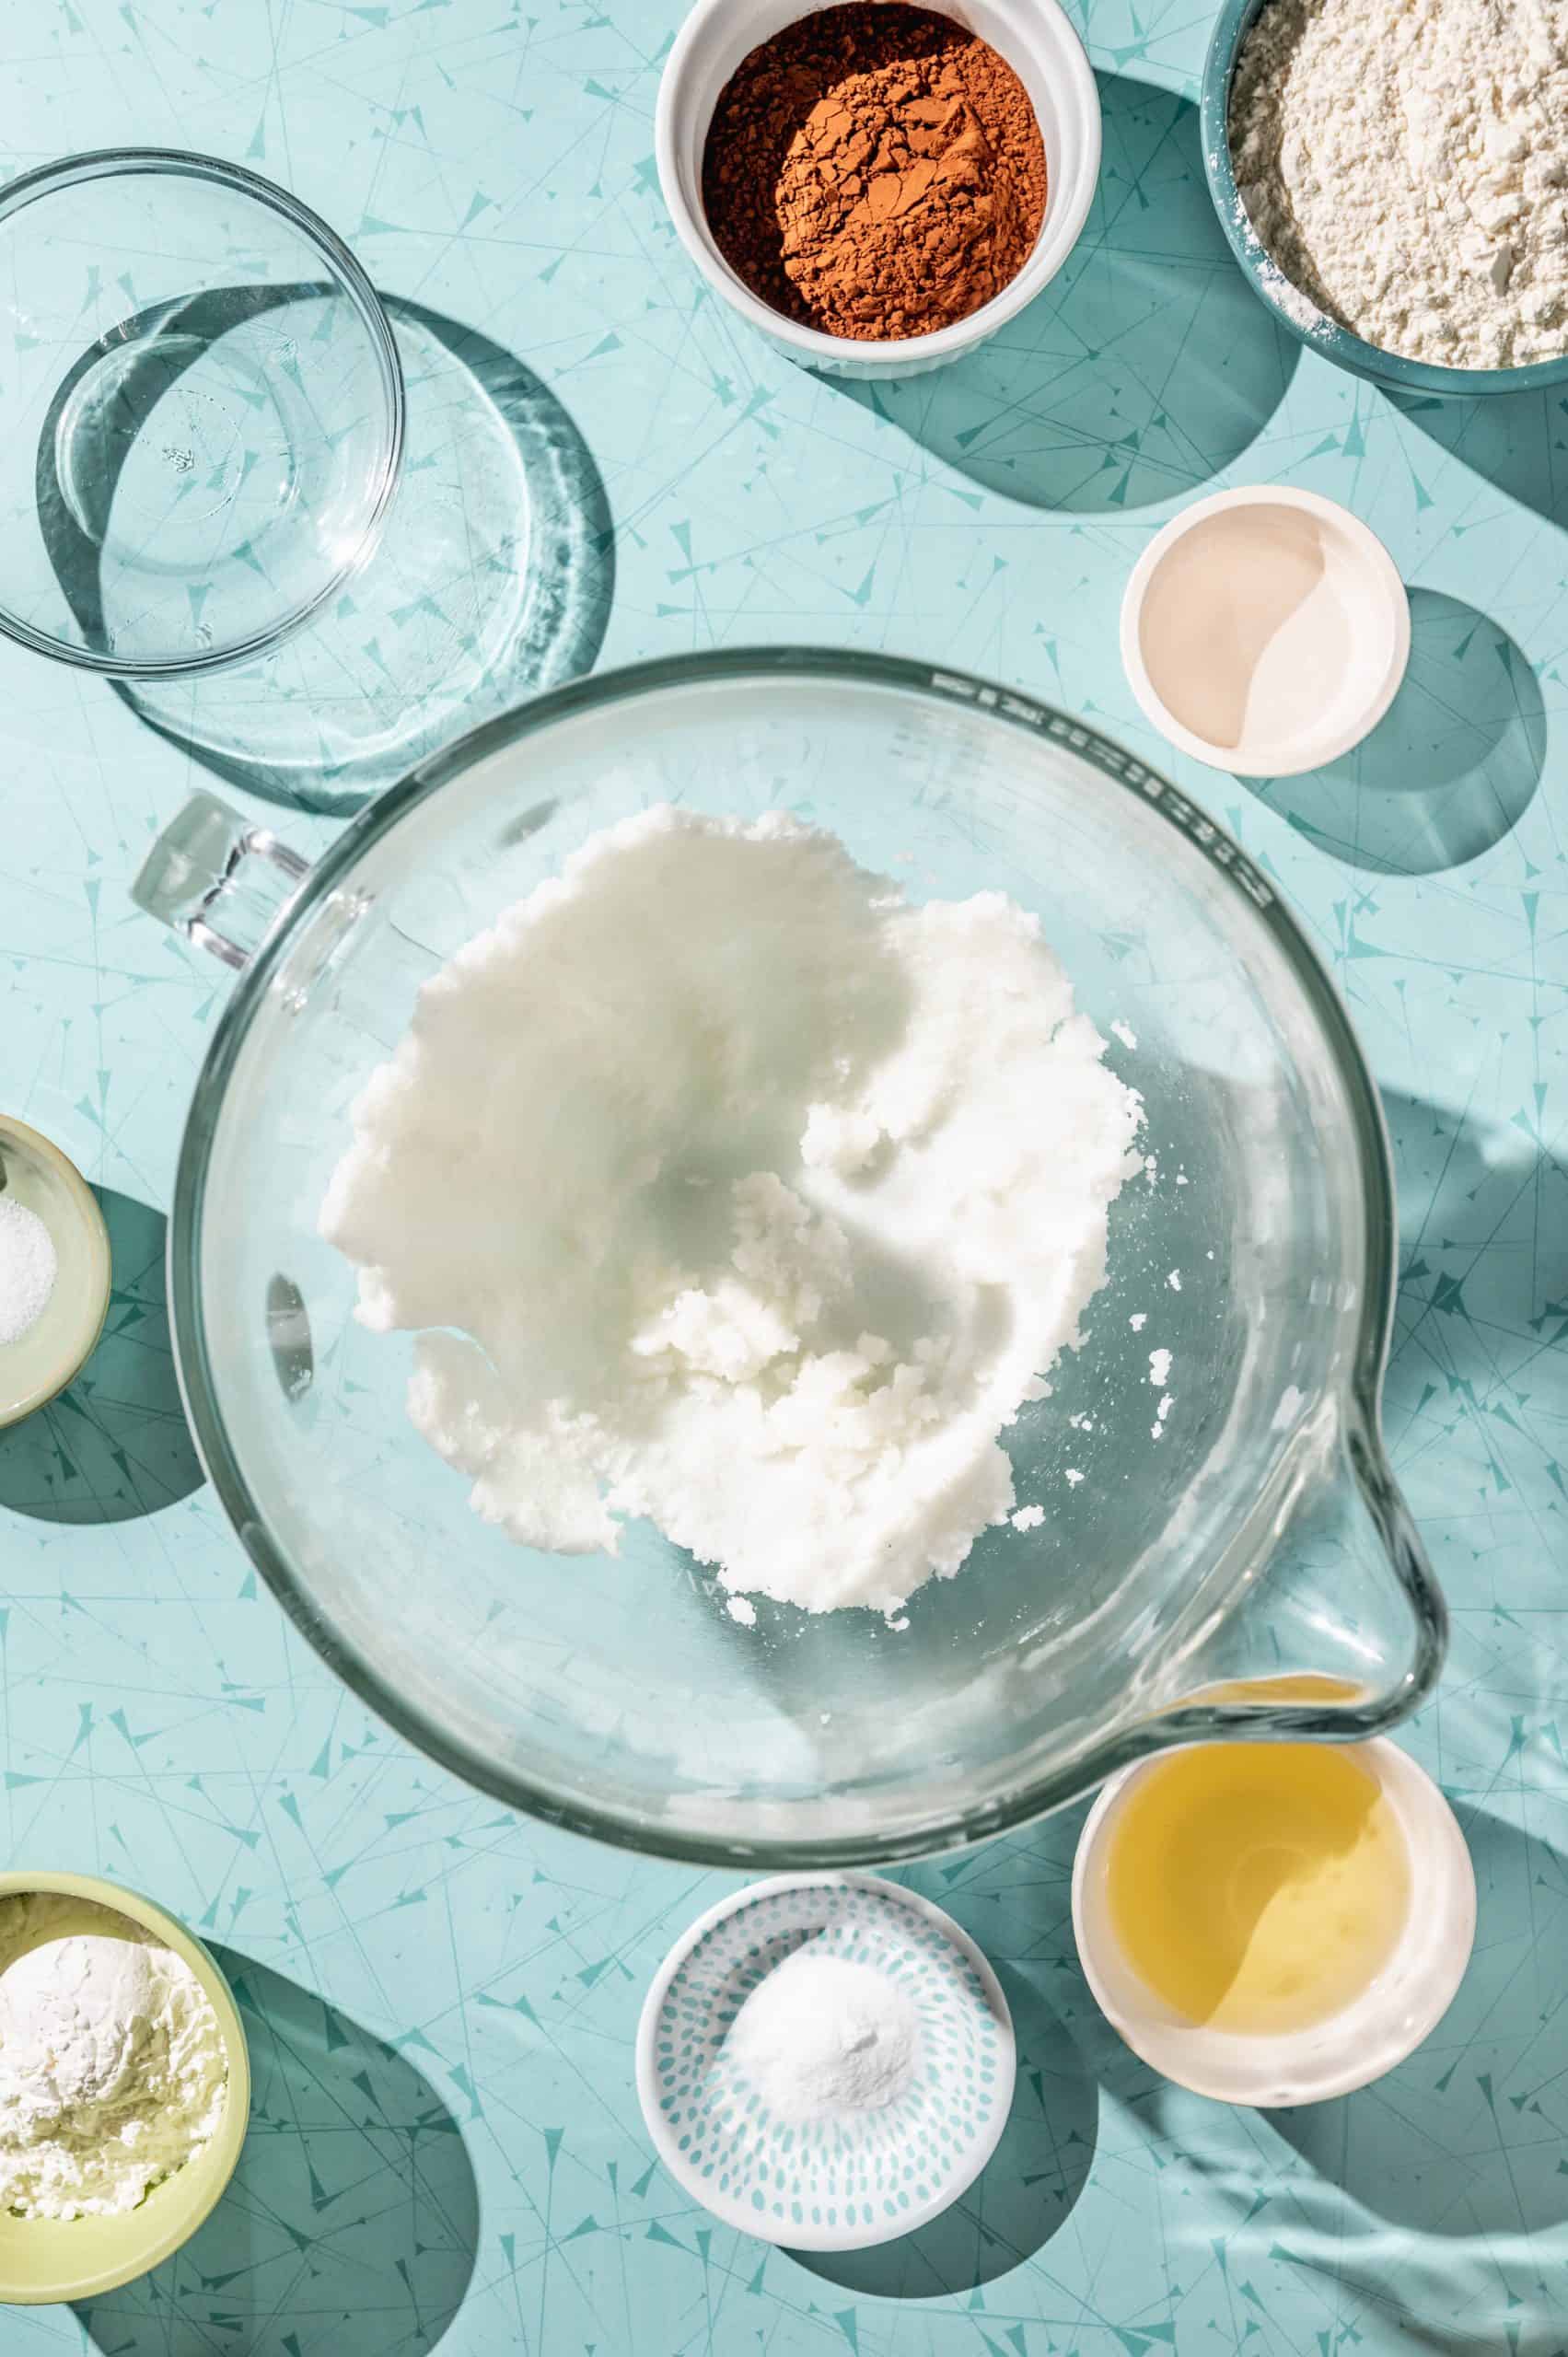
First, cream together the shortening or butter with the granulated sugar.
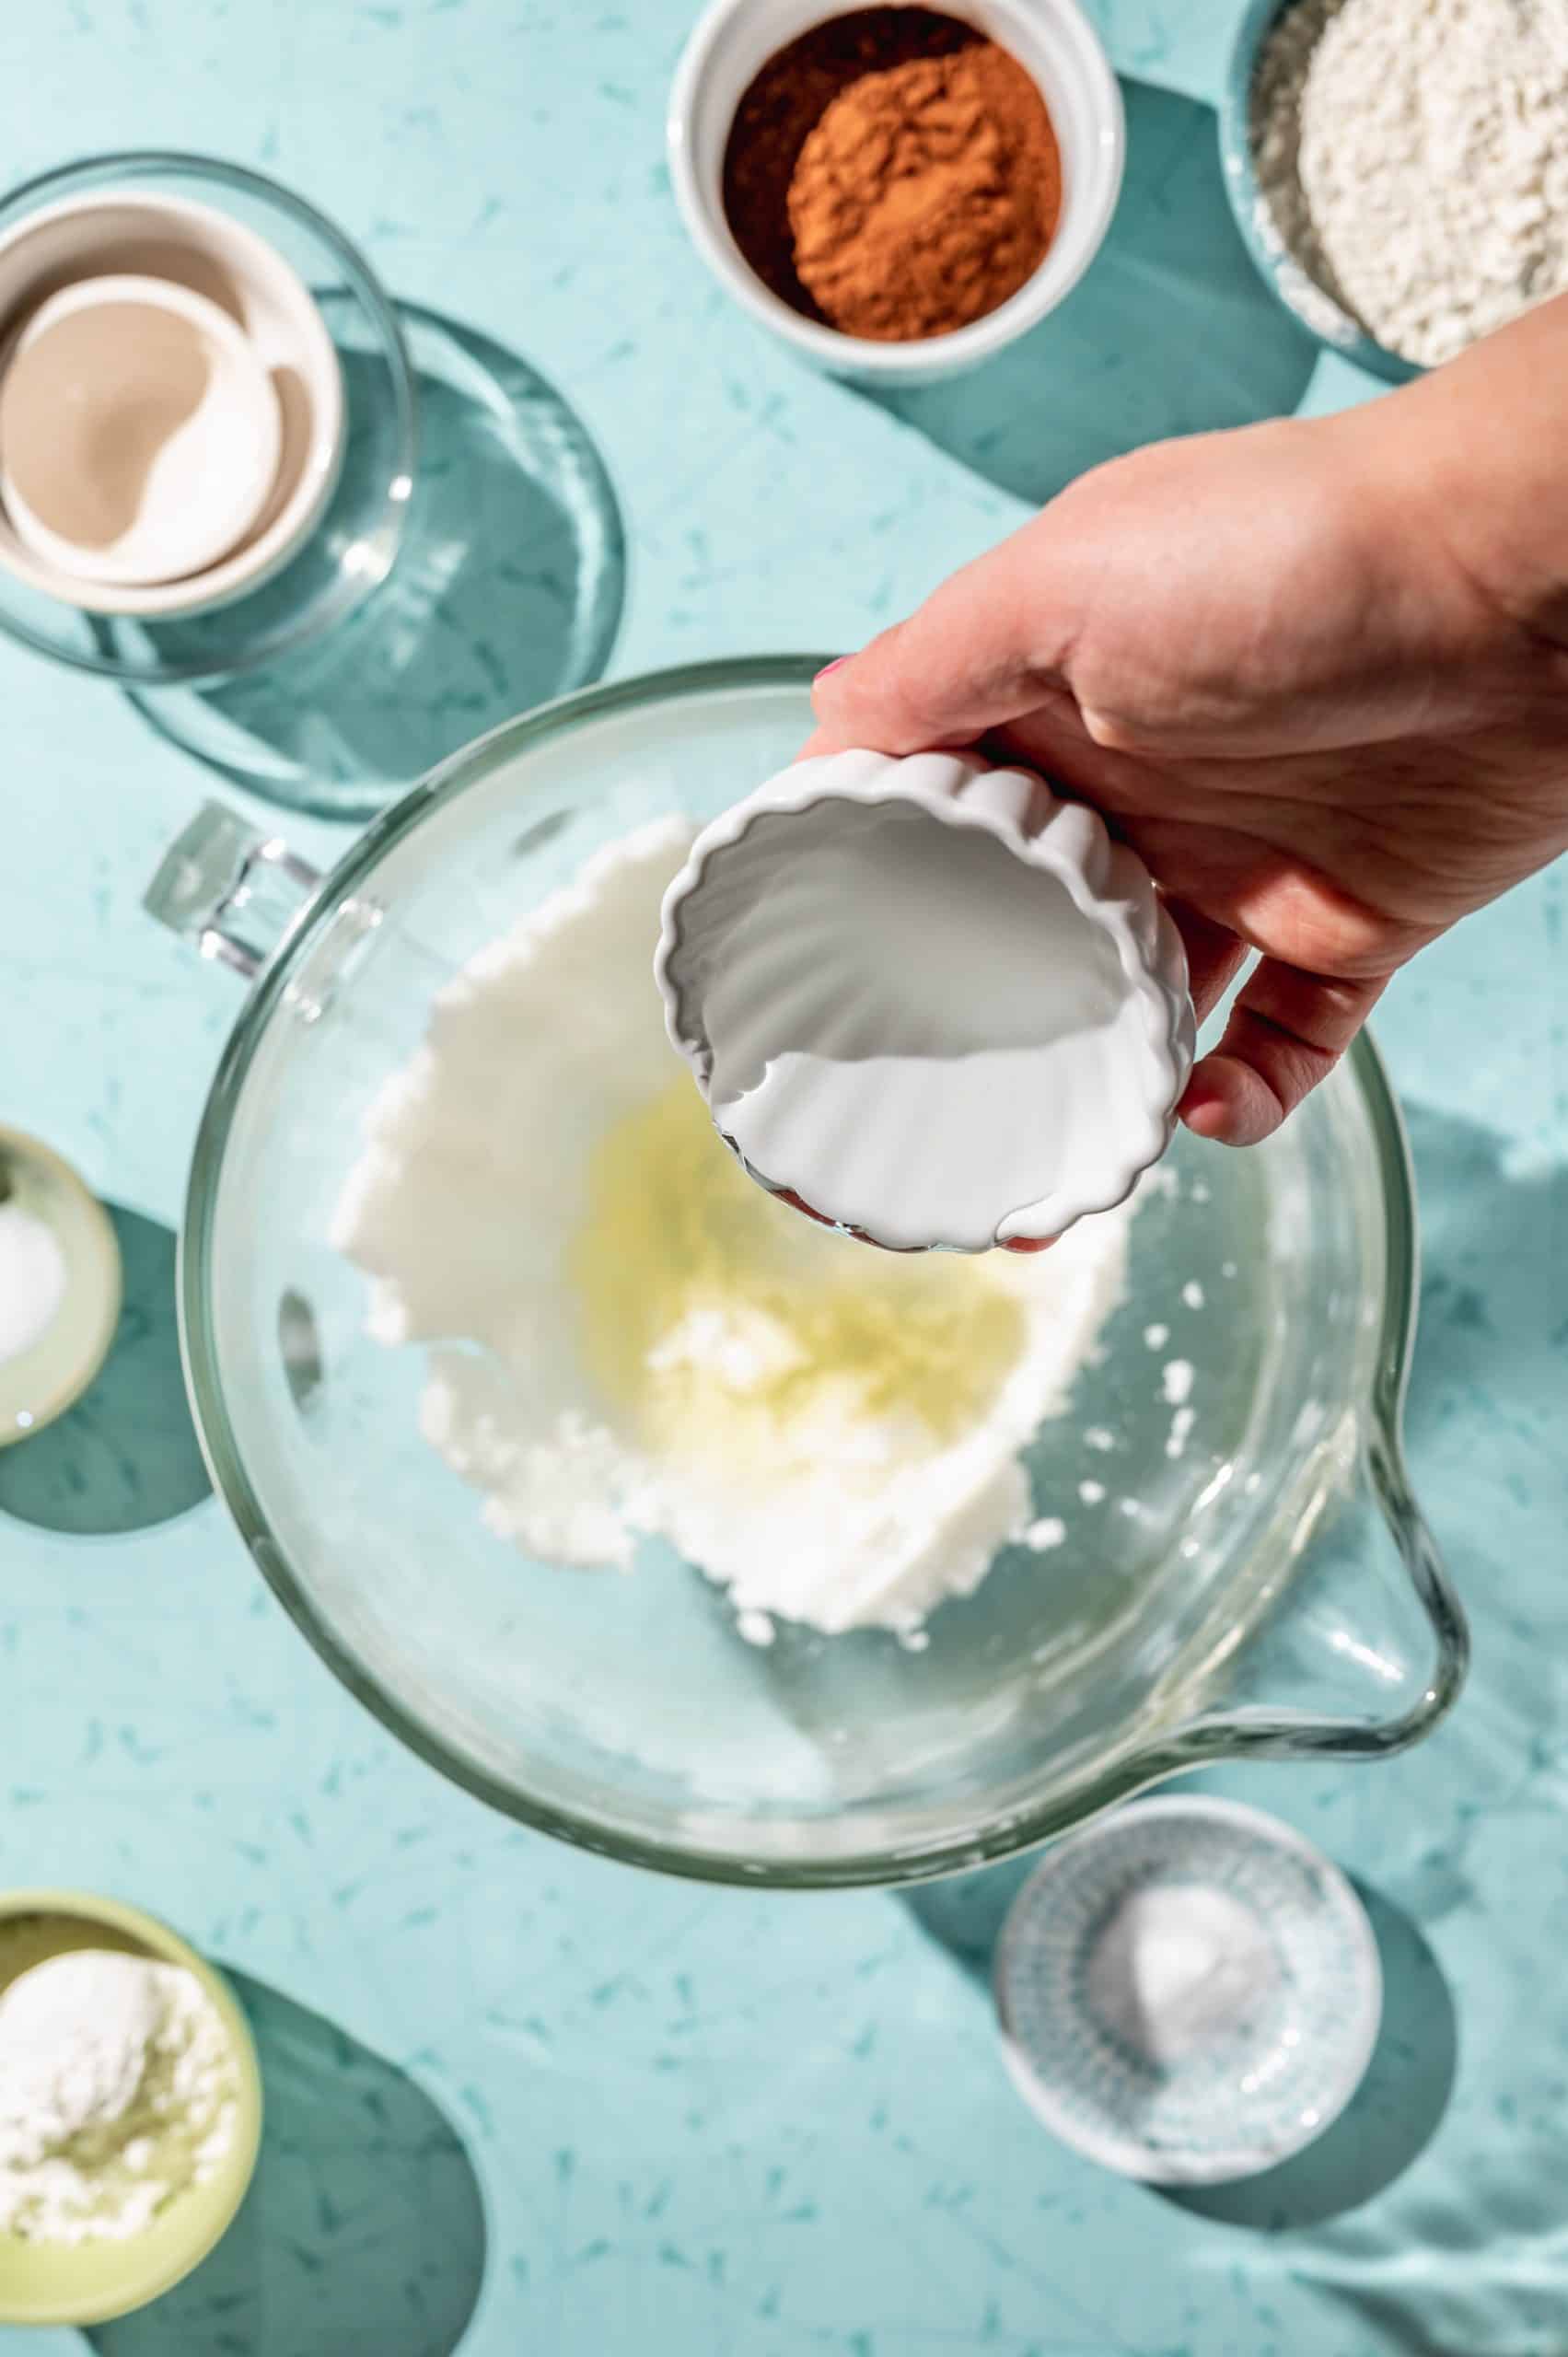
Then, add the vegetable oil, peppermint extract, and corn syrup. Mix to combine.
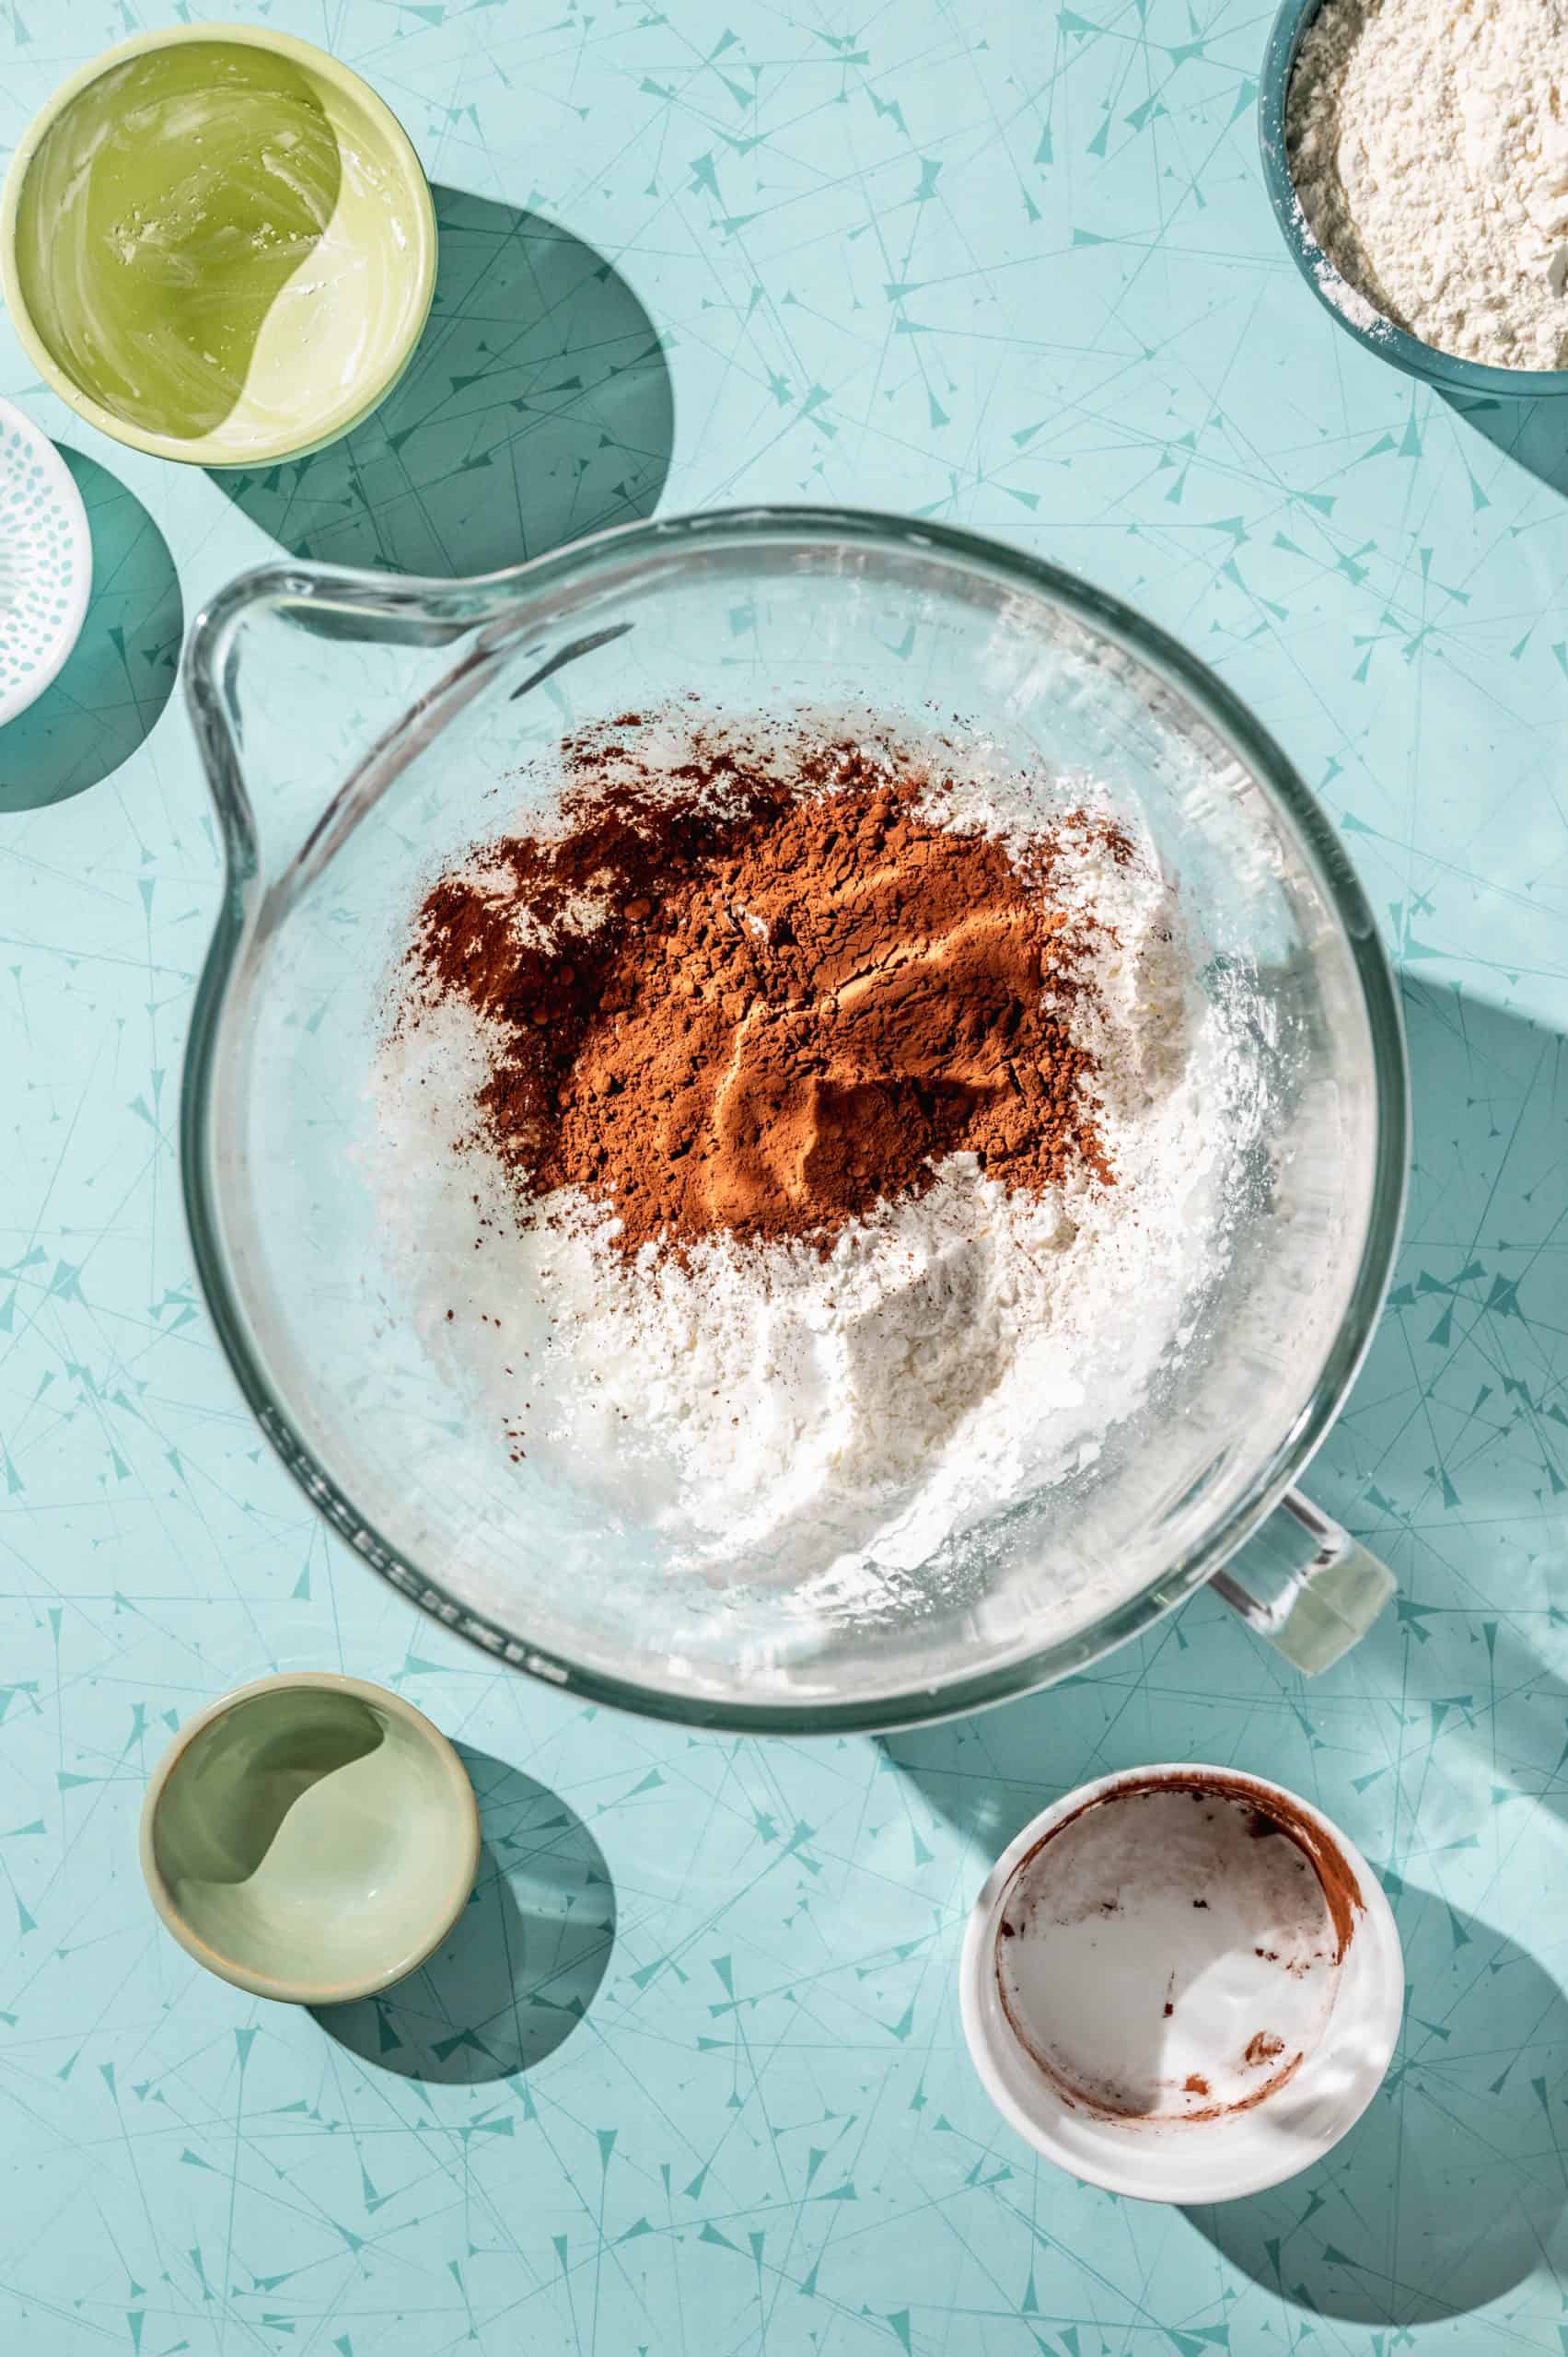
Now add the remaining ingredients (except the flour and water) and mix on low speed until smooth. It's ok if it looks a little oily and grainy at this point, that's normal.
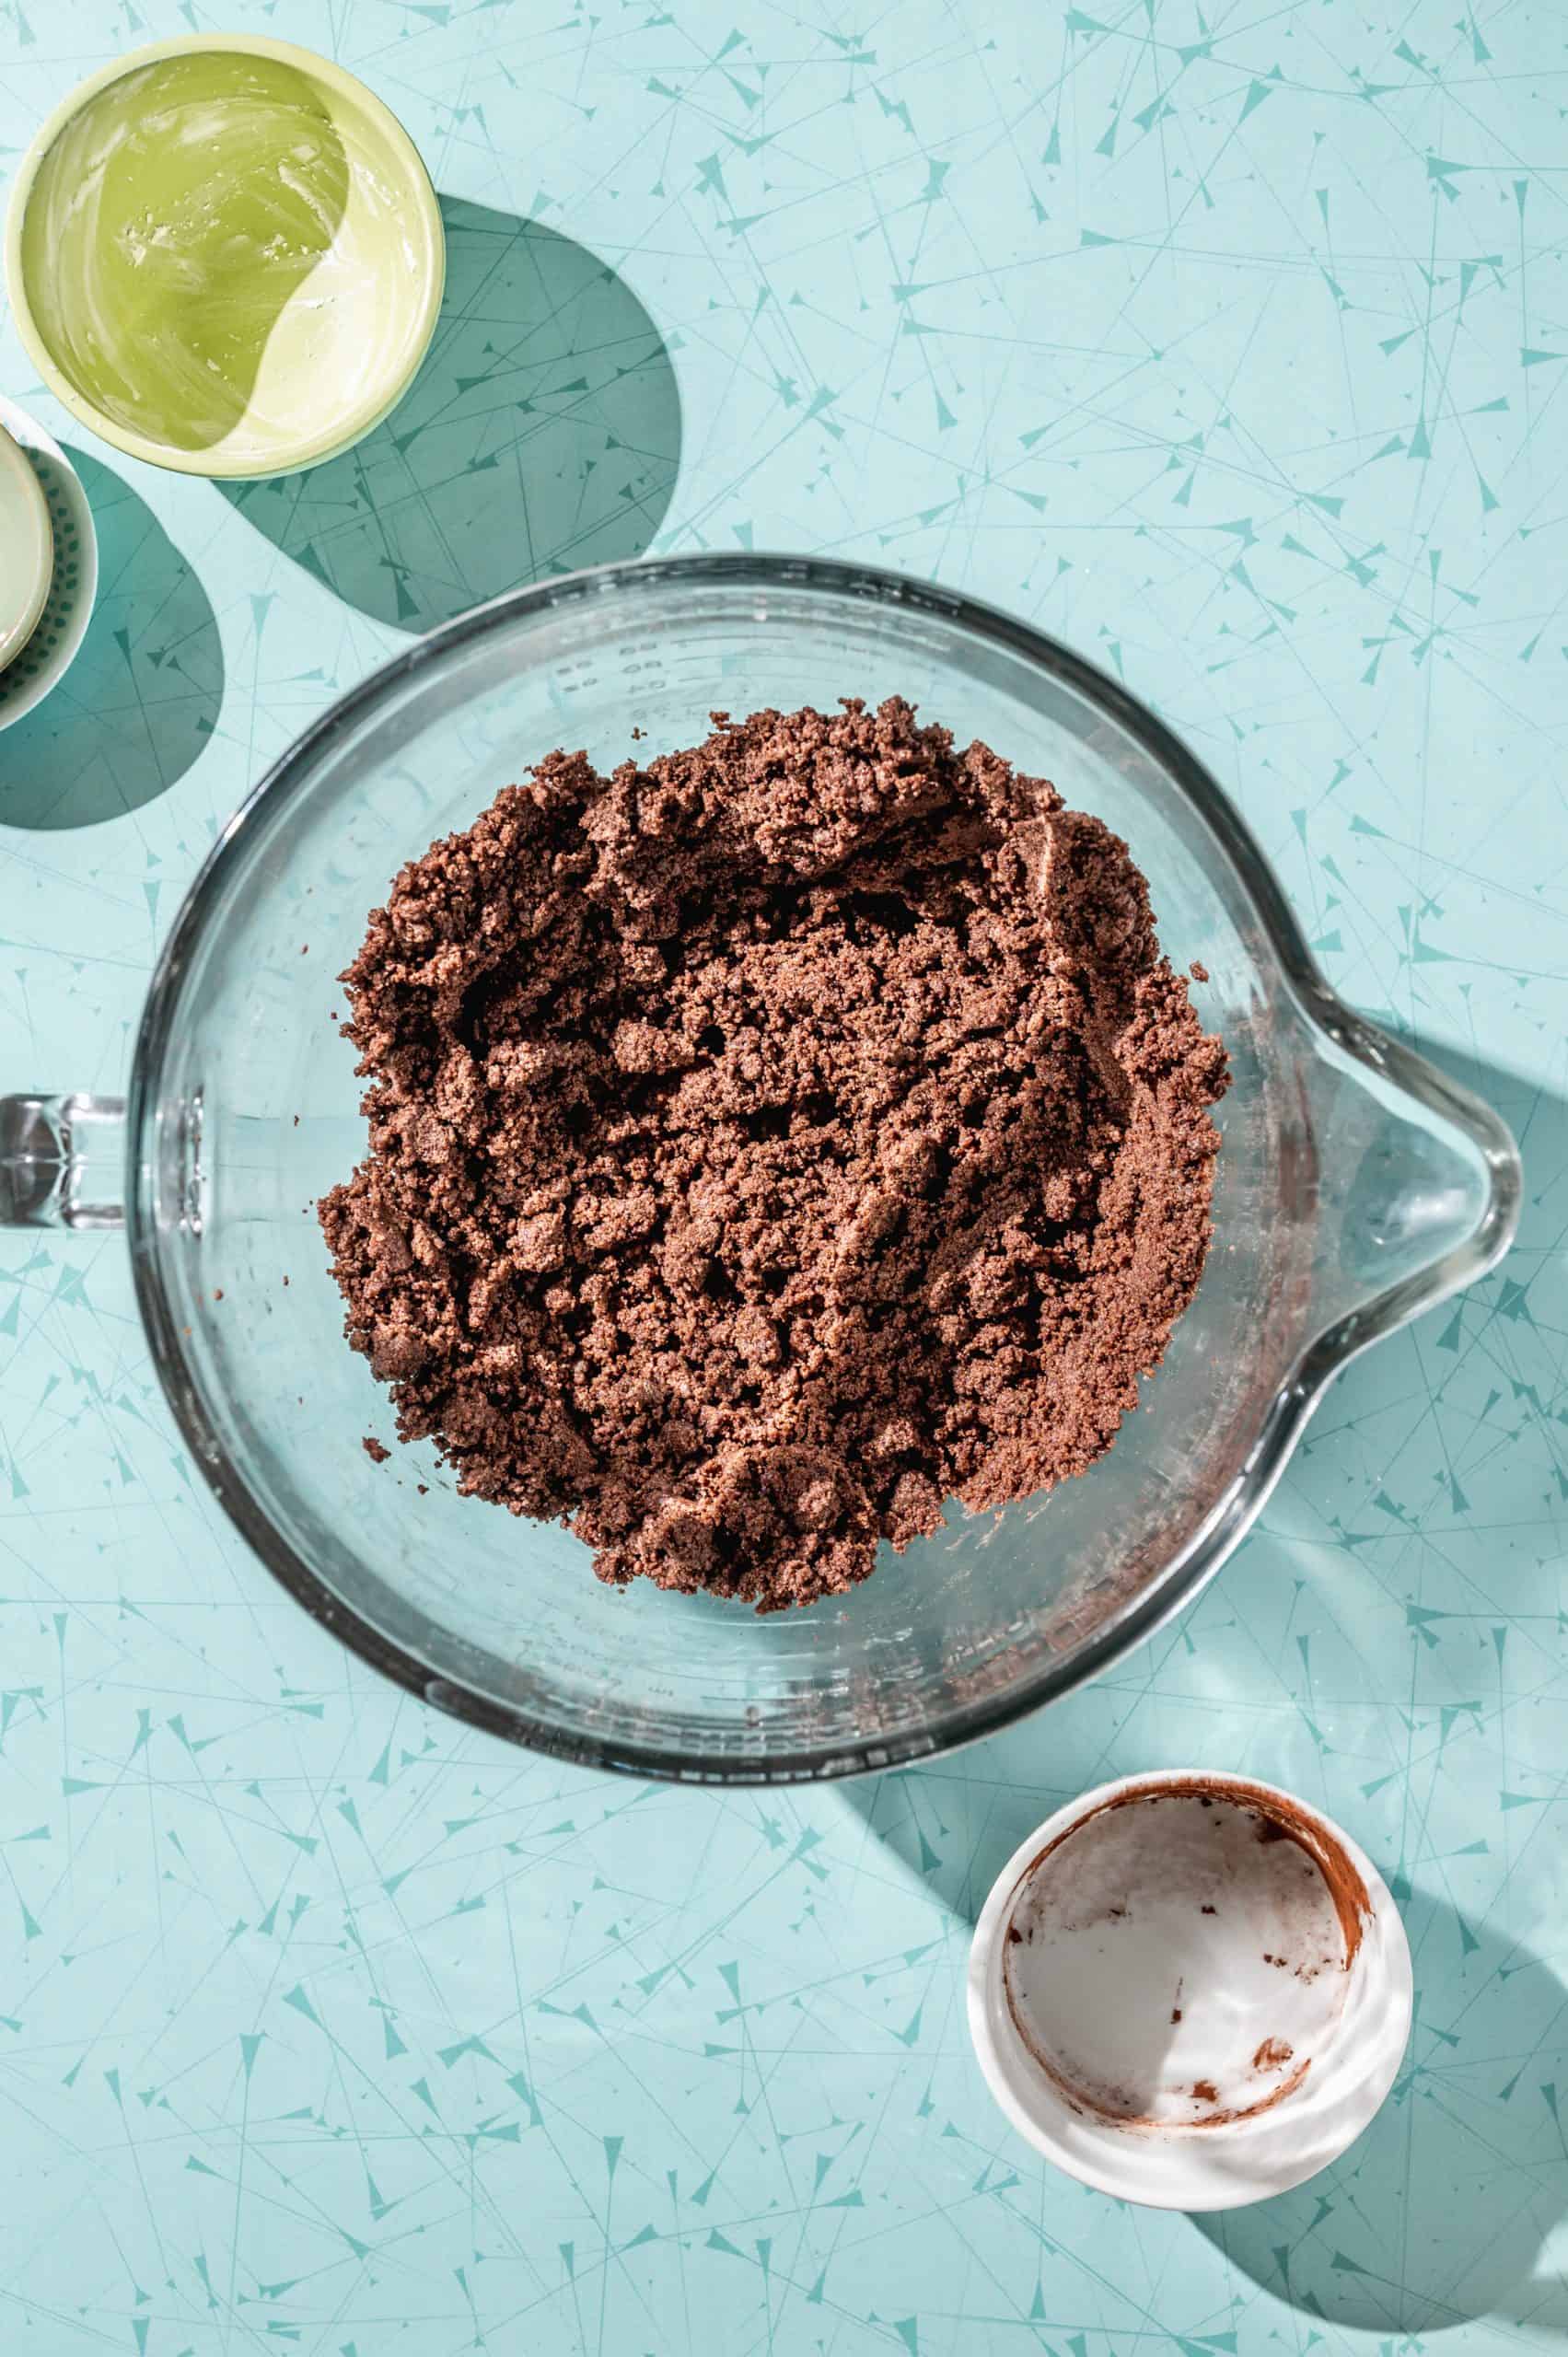
Finally, add the flour and mix on low or by hand. Then add the water. The dough will be very crumbly, resembling wet sand, but will hold together when pressed.
Using your hands, form the cookie dough into a ball and flatten it slightly into a disk. Then wrap the dough in plastic wrap and refrigerate for at least 1 hour or overnight.
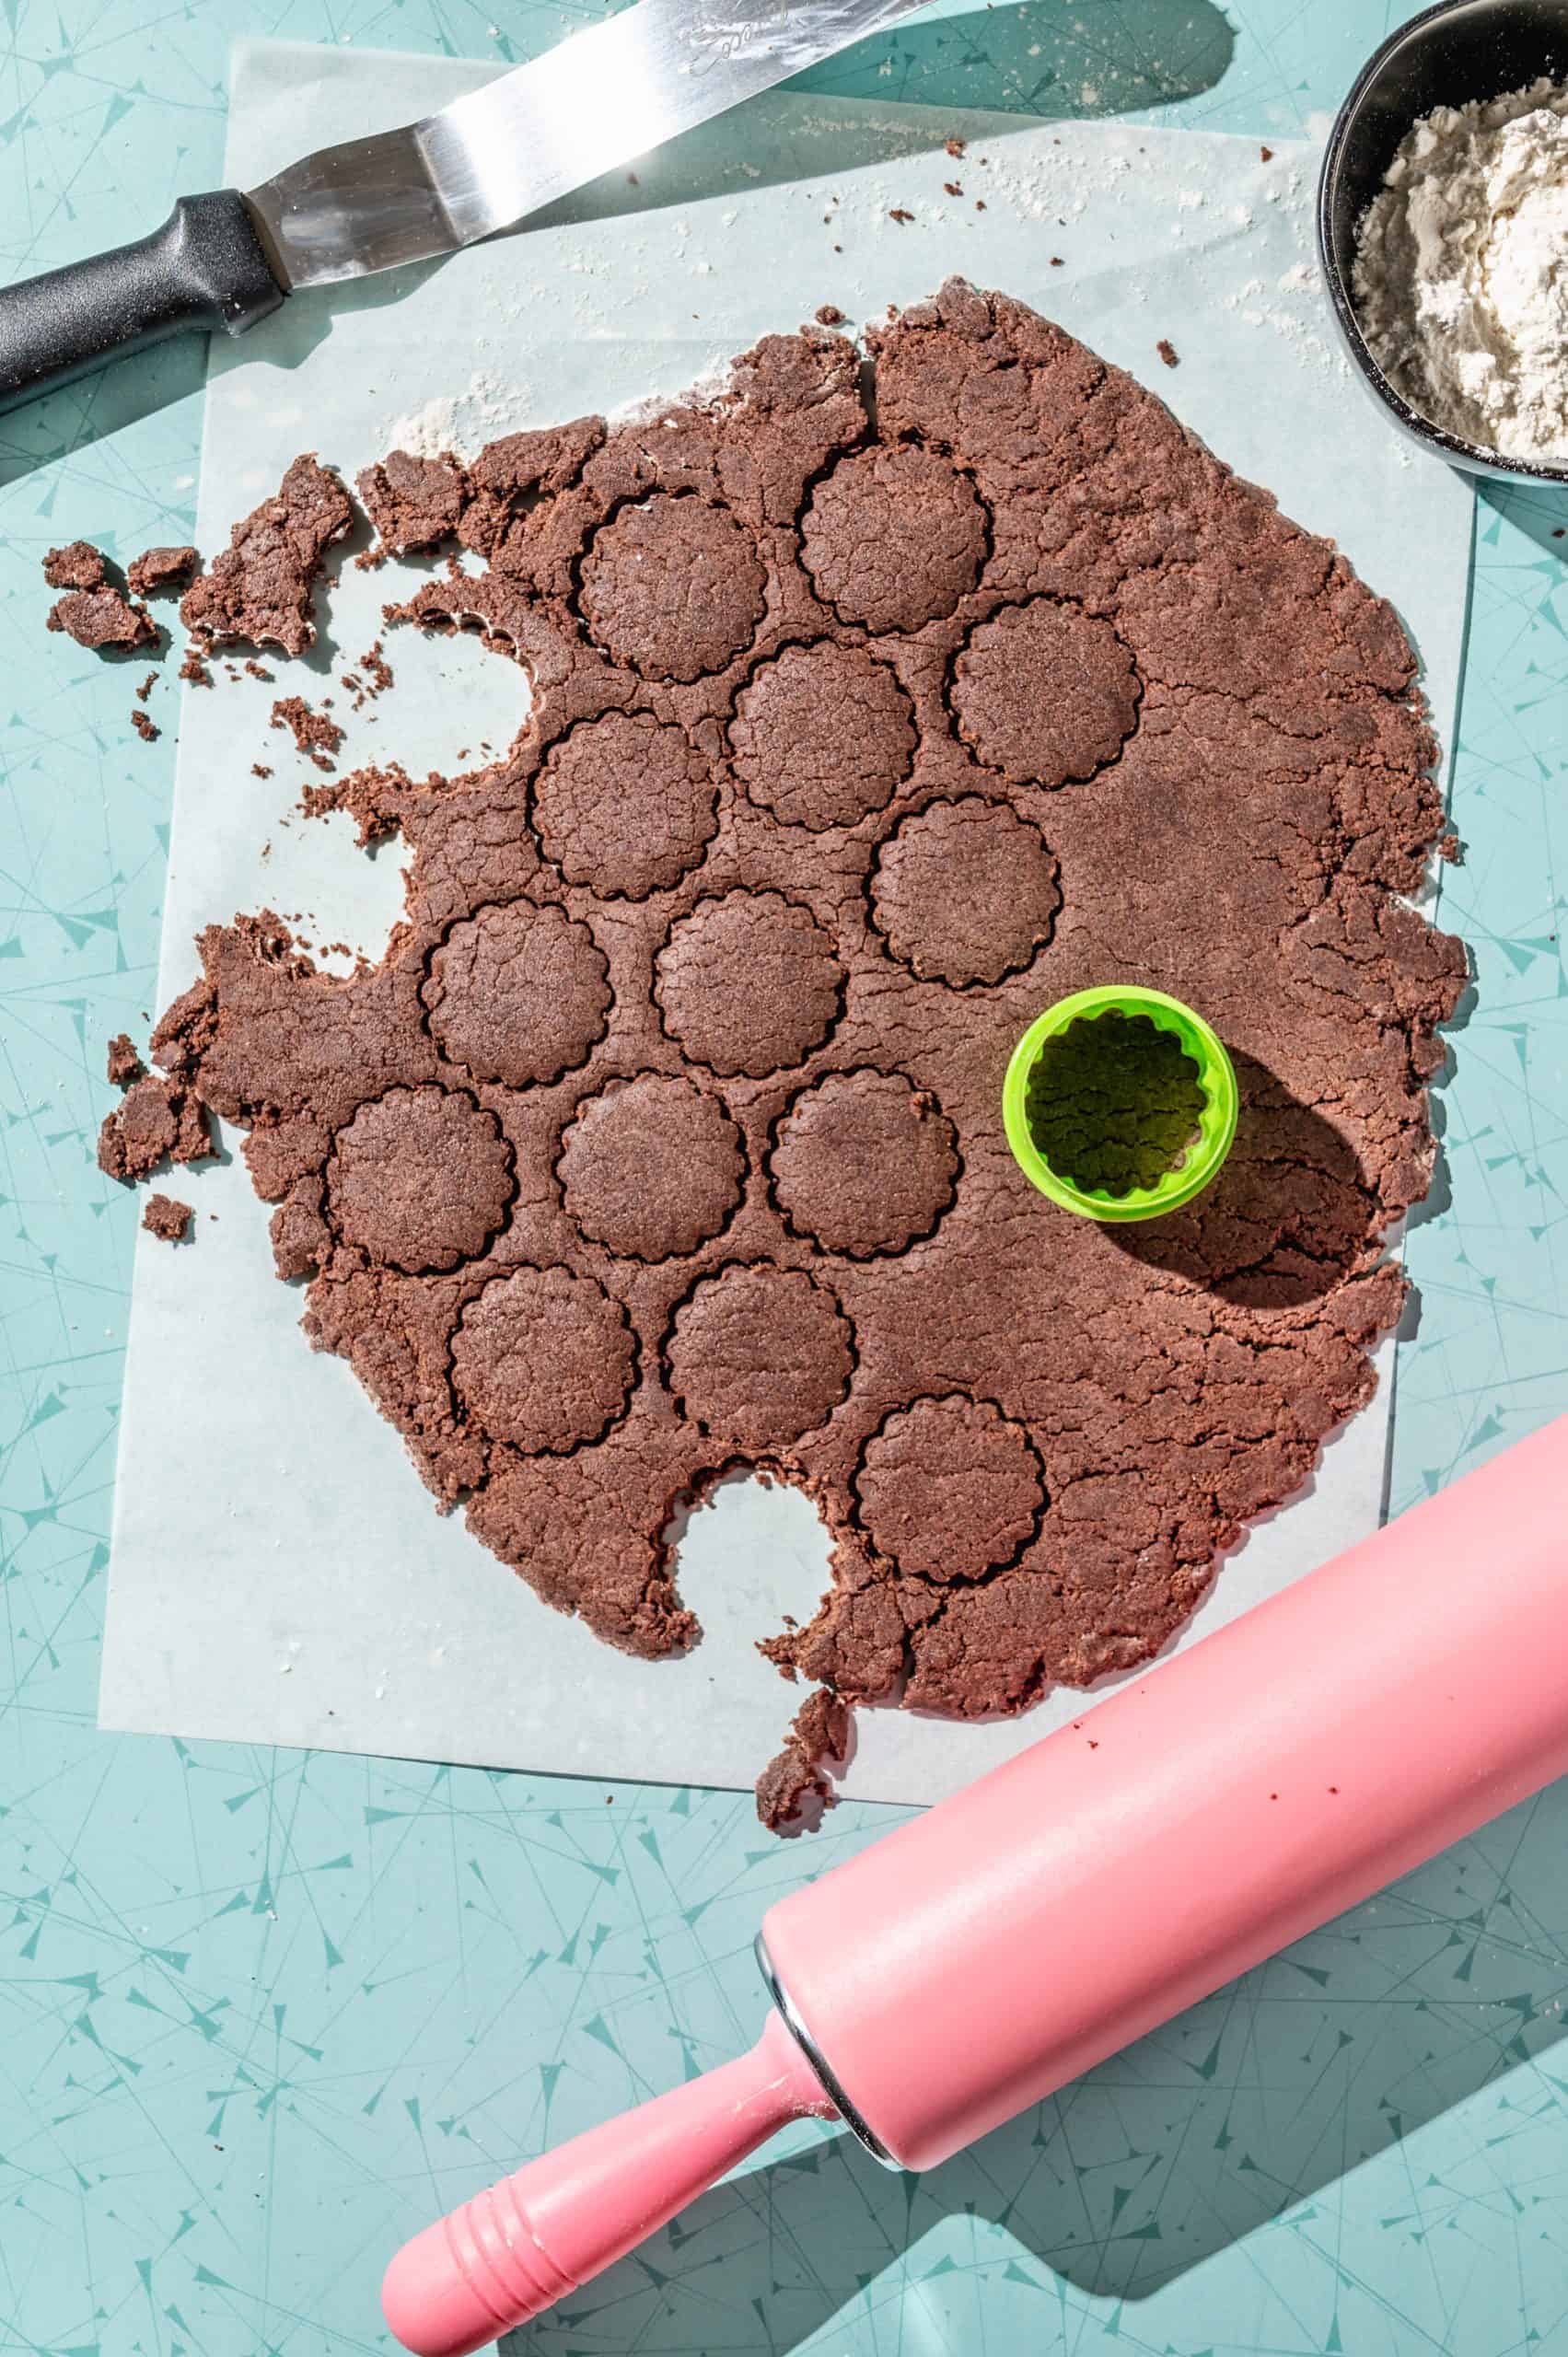
After the dough is well chilled, roll it out on parchment paper to about ¼ inch thickness. Another option is using your hands to press it down. The dough is very crumbly so you may have to press it together.

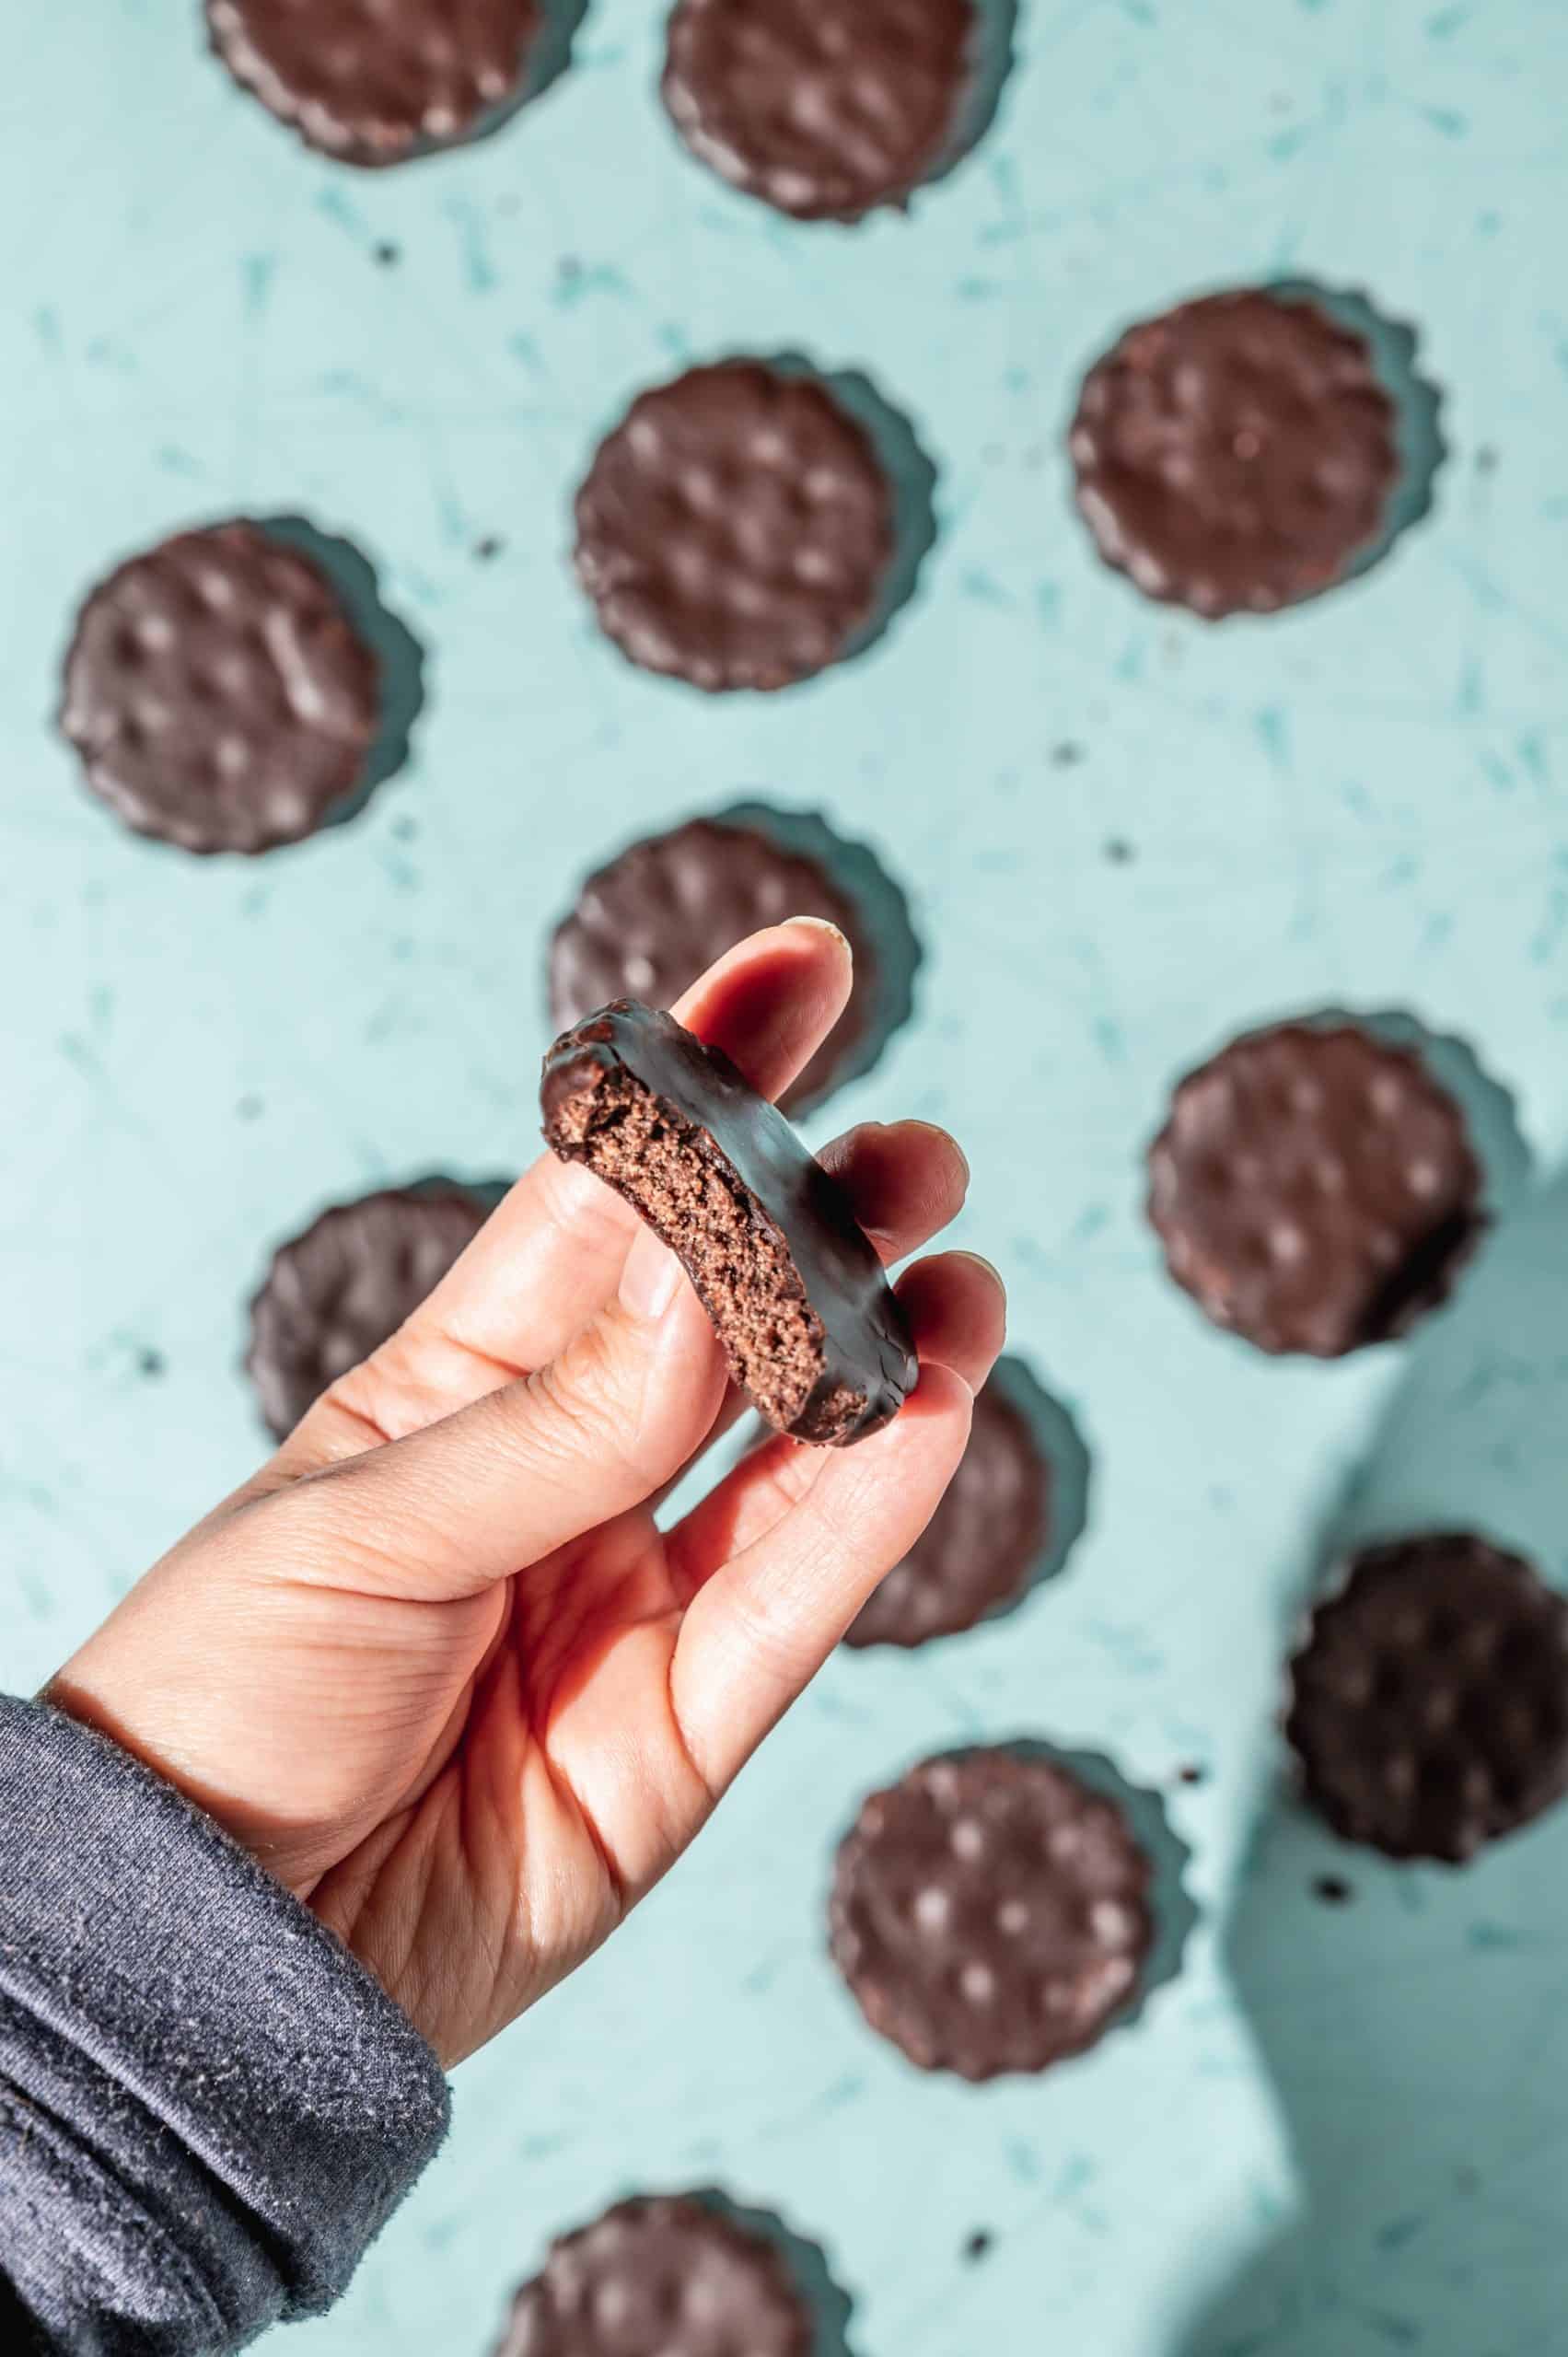
Then, carefully transfer the stamped cookies to a sheet tray lined with parchment paper using a small offset spatula. Bake the cookies for about 8 minutes, and let them cool on the tray before dipping.
I created indents in the cookies using the back of a skewer to make them appear more like the Girl Scout cookies we're accustomed to. This is totally optional and doesn't affect the outcome of the recipe. Since the dough is crumbly, it may start to fall apart if you start poking holes in the cookies, but they'll easily come back together when gently pressed.
Pro tip
Place the tray of unbaked cookies in the freezer or refrigerator for 30 minutes before baking. Chilling stamped cookies helps them to hold their shape in the oven and prevents them from spreading too much!
Dipping Thin Mint Cookies in Chocolate Coating
Now that we have our wafer cookies, it's time to dip them in the chocolate coating! The chocolate glaze coating is similar to my chocolate-glazed donut recipe, but with a higher ratio of sugar and water which allows the glaze to harden once dried.
To make the chocolate coating, simply combine all ingredients in a bowl and whisk until smooth. I like to add the water last a little bit at a time until you reach the desired consistency. Personally, I think this method is even easier than melting chocolate! And it gives the copycat thin mints a more accurate texture.
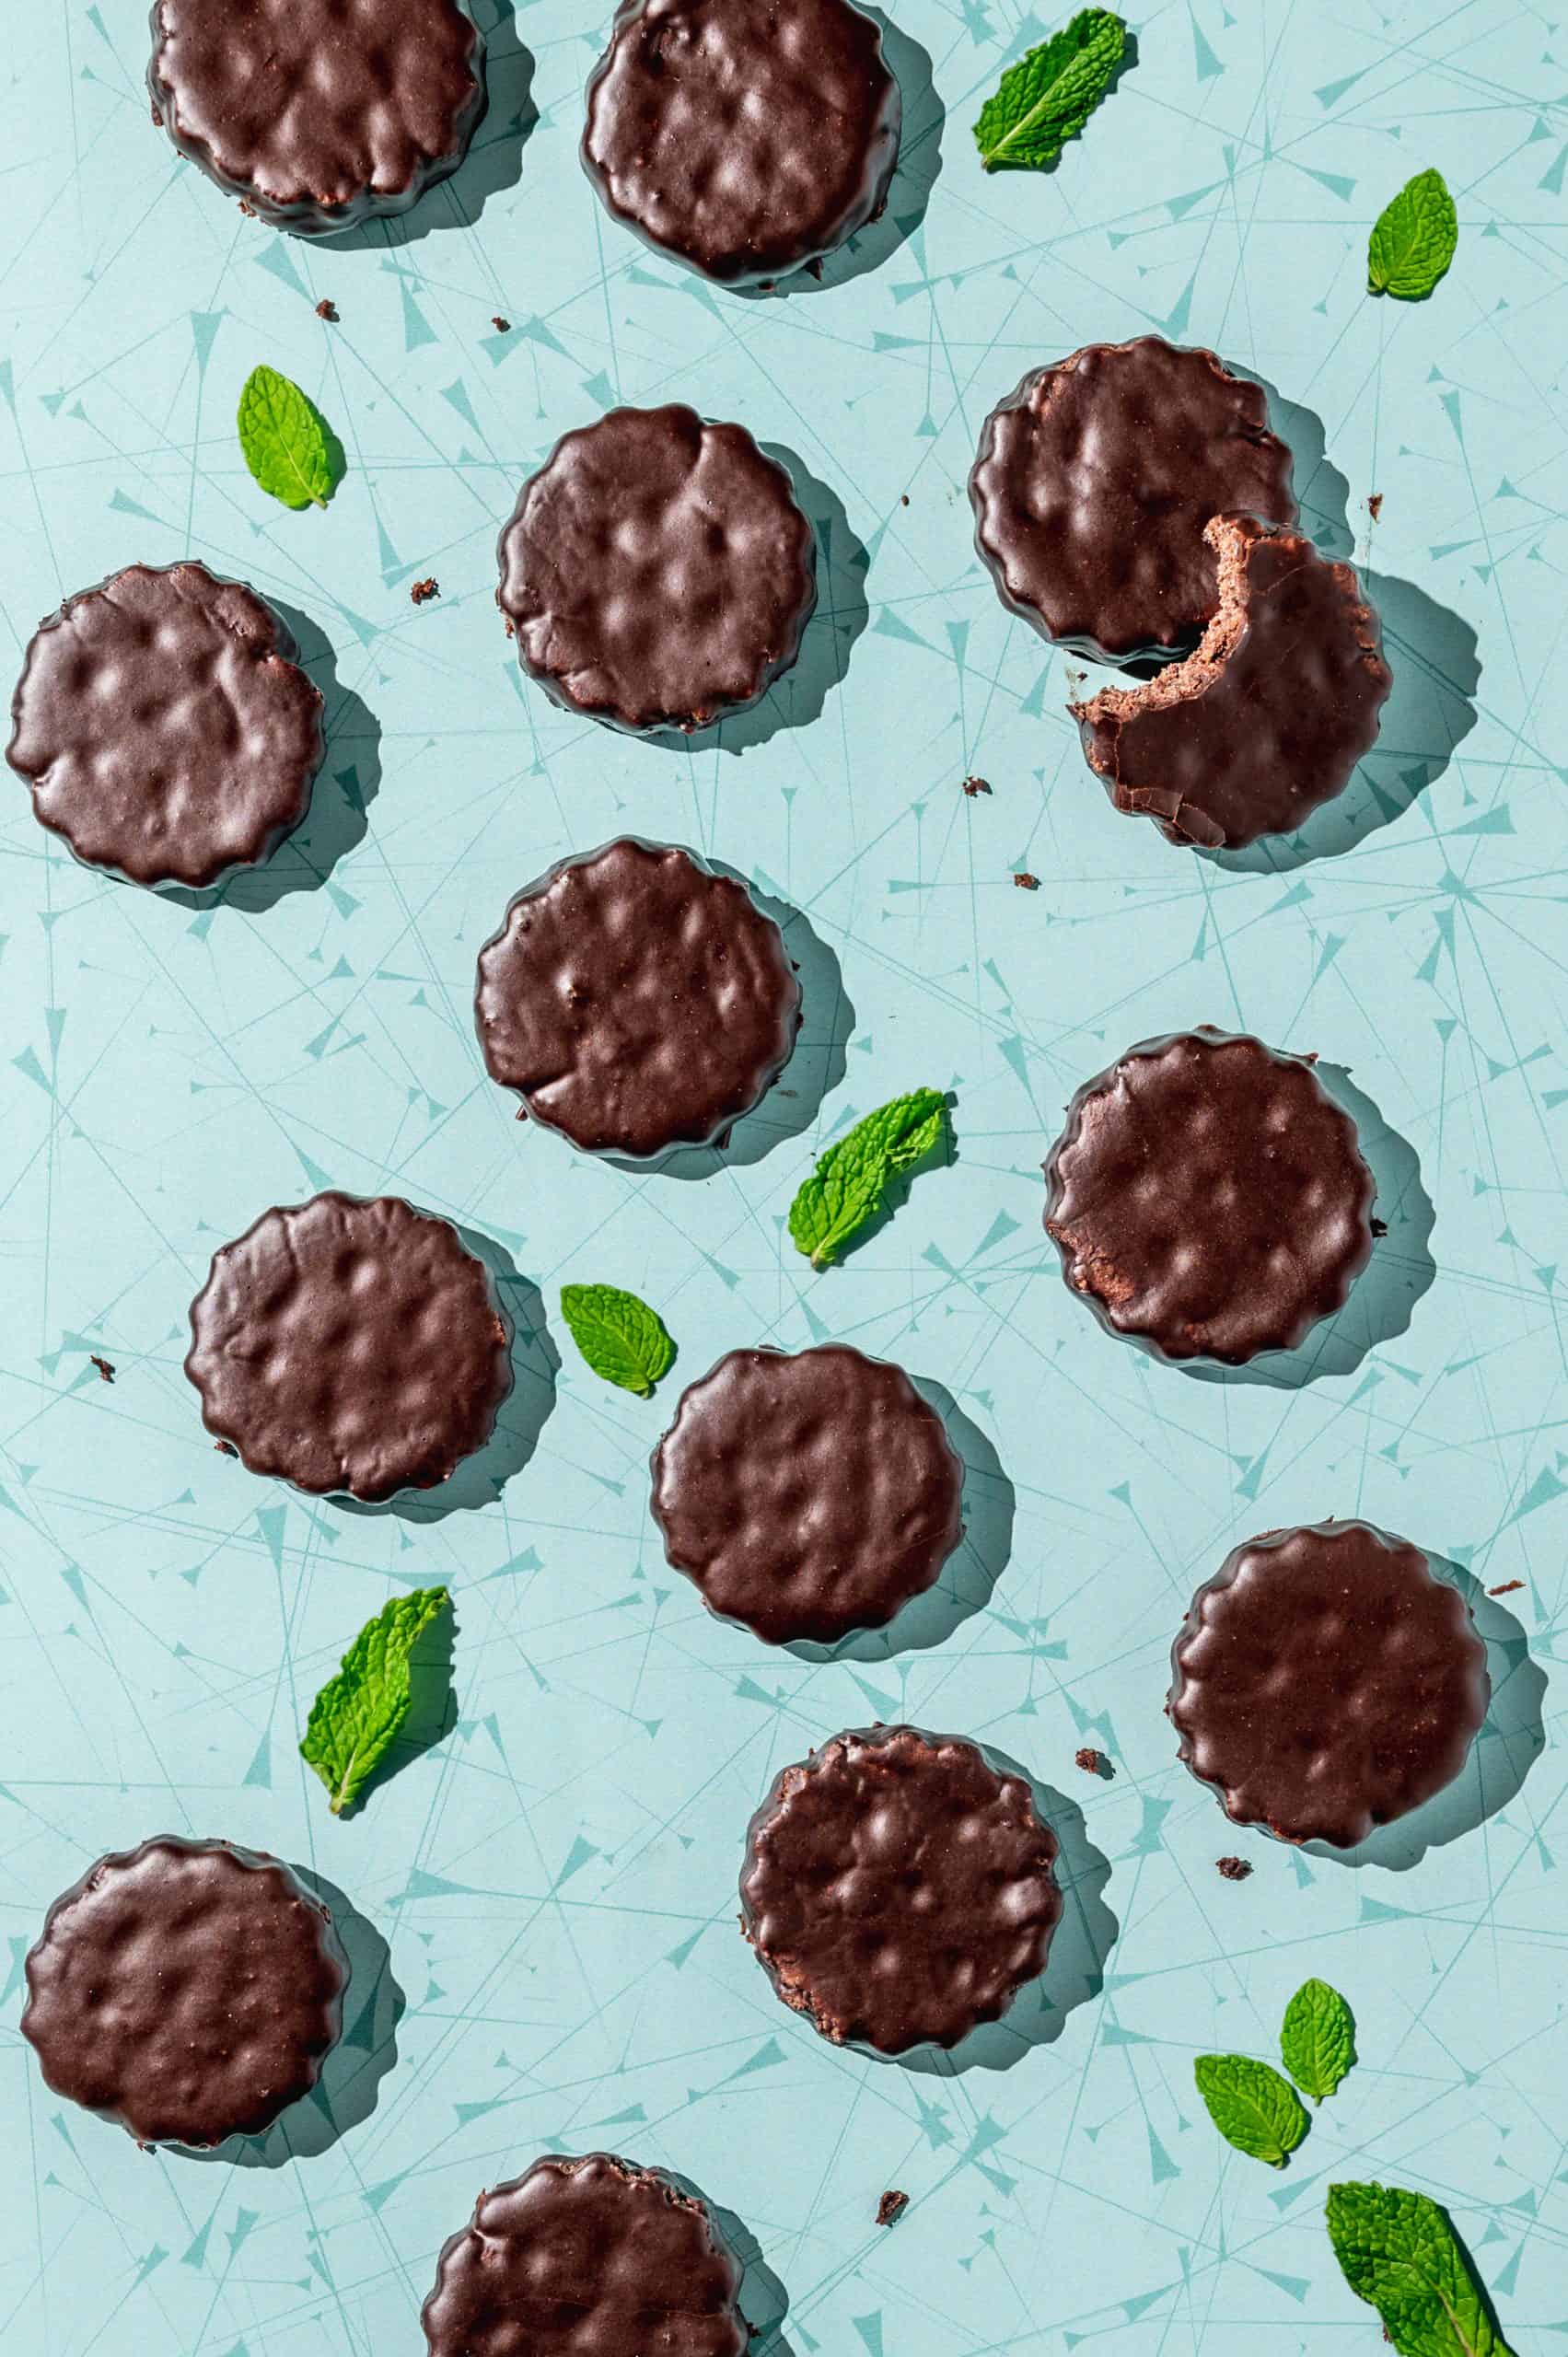
Then, dip the cookies one at a time into the chocolate glaze. Use a spoon or spatula to completely cover the cookie with chocolate and wipe off the excess back into the bowl (since you only want a very thin layer of chocolate). Then use a fork to carefully transfer the chocolate-coated thin mints onto a wire rack to dry.
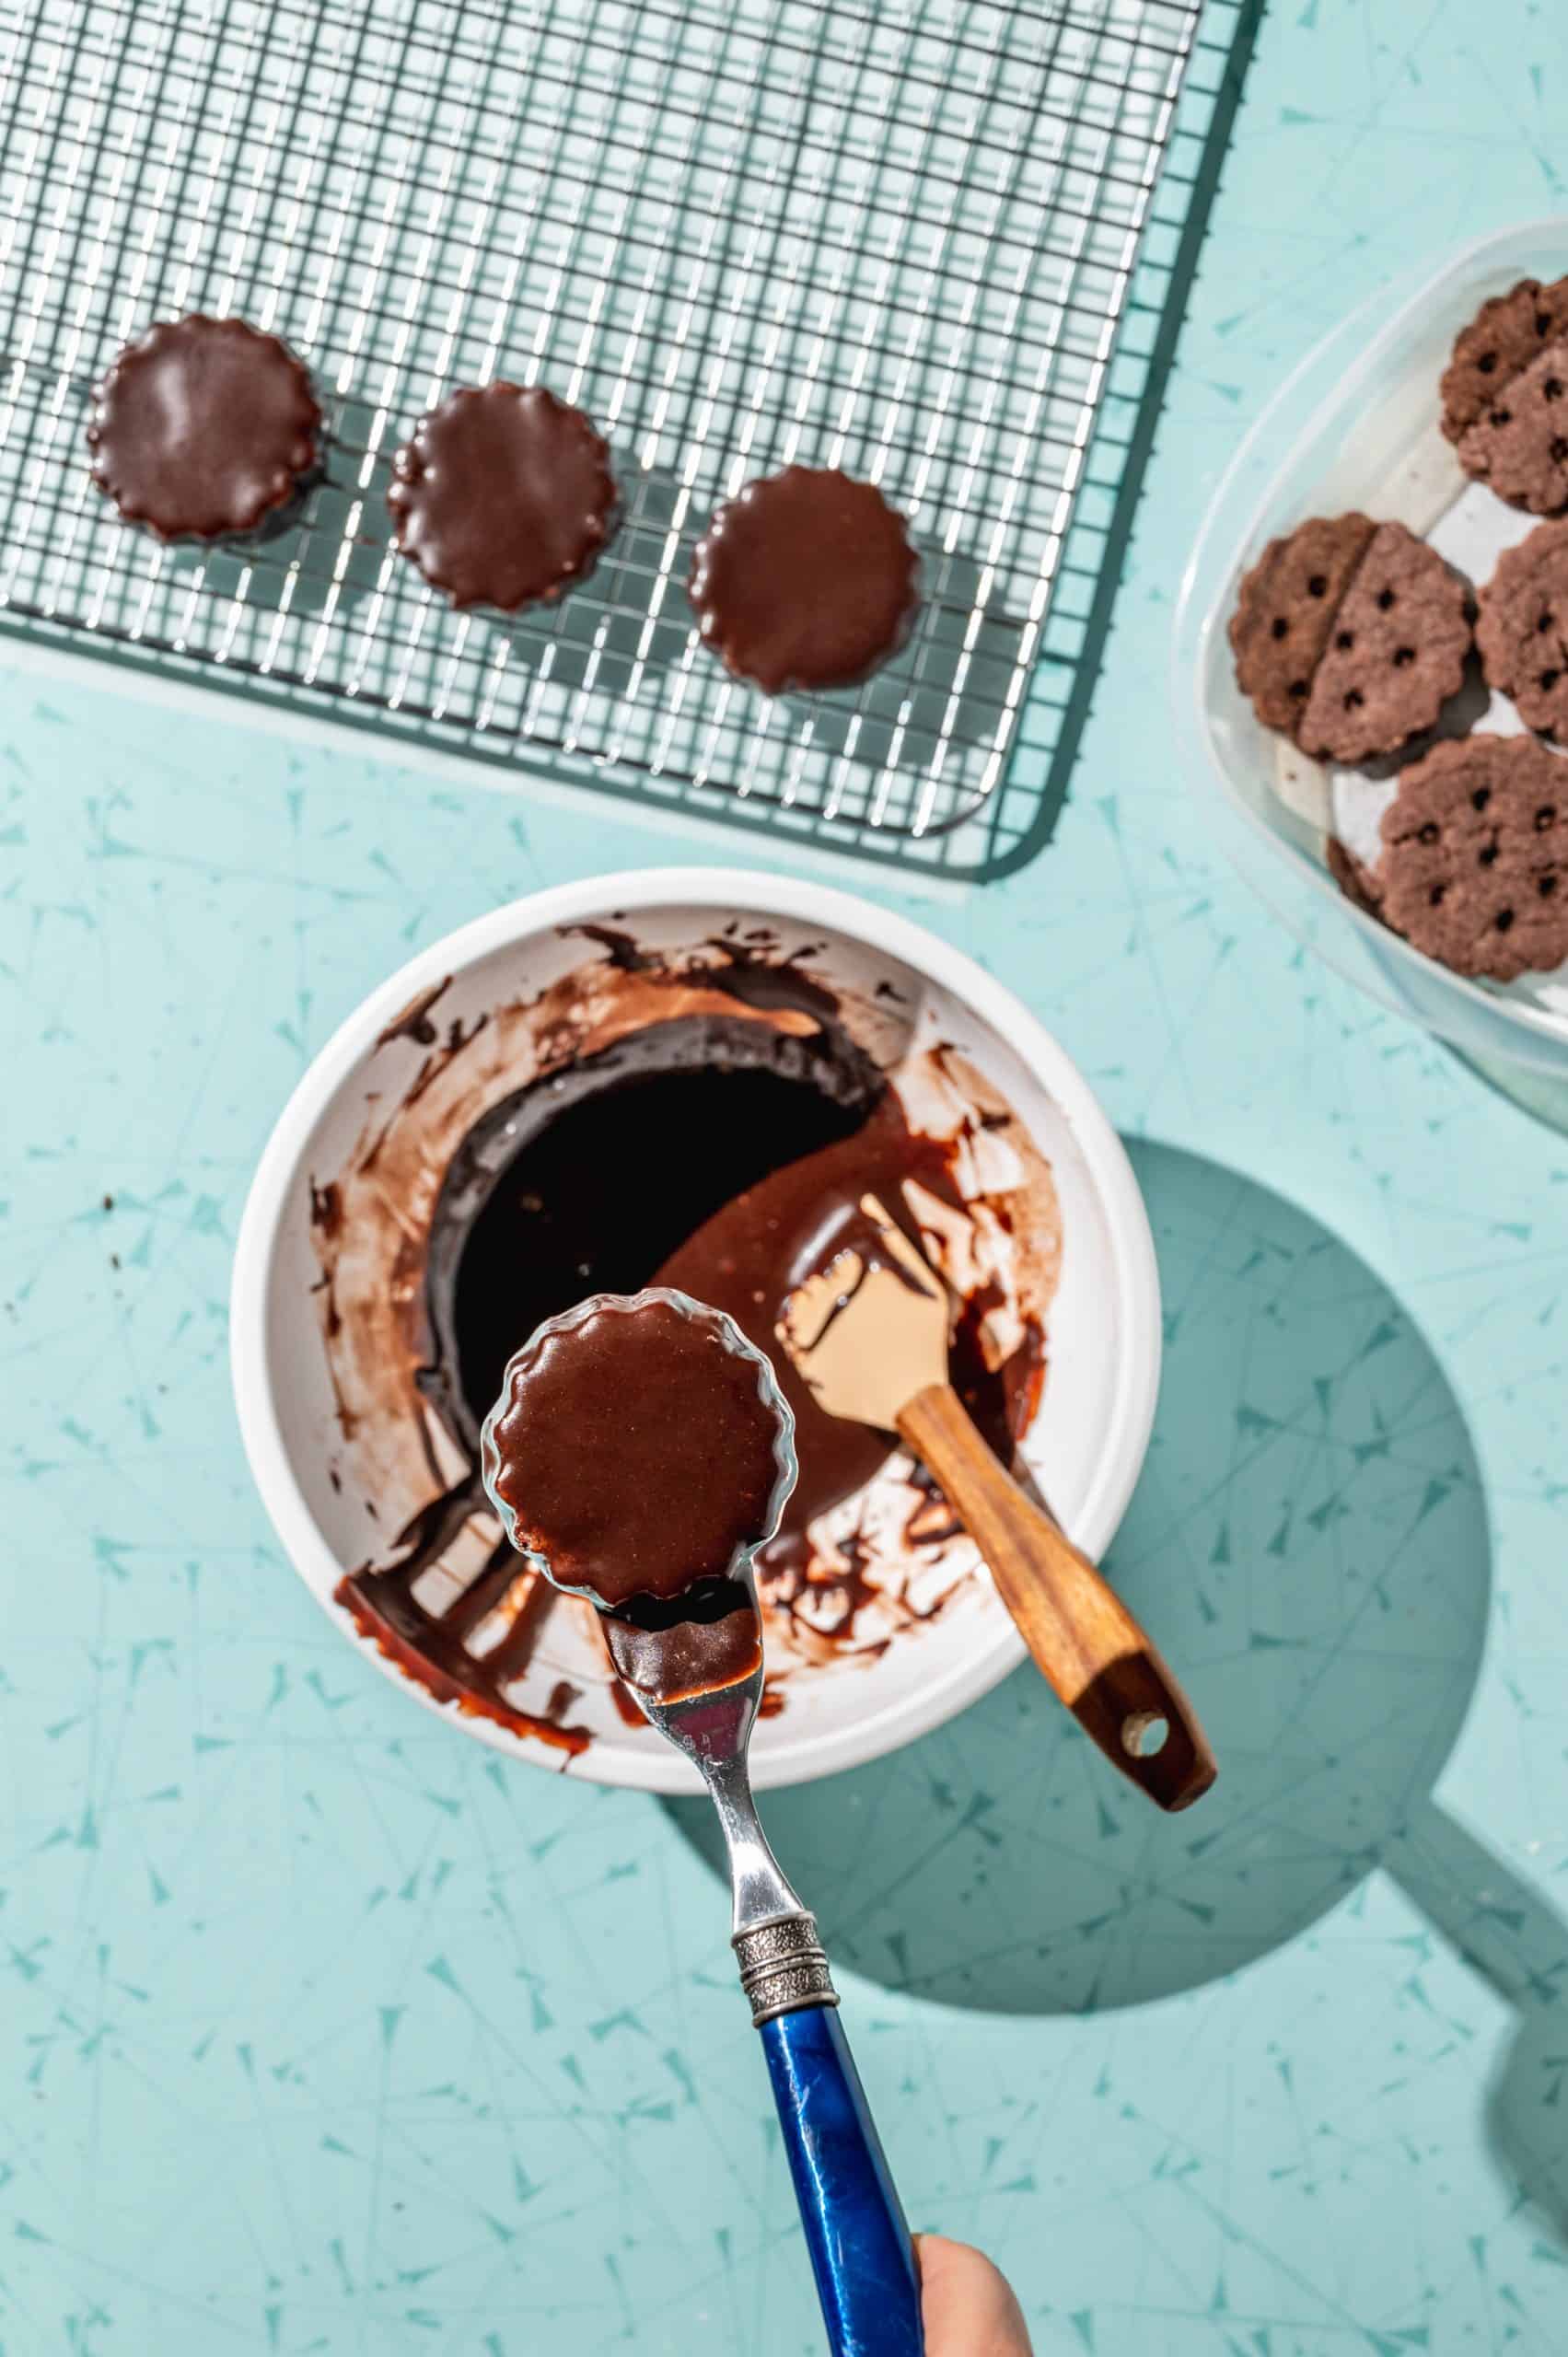
After setting the thin mints on the rack, I recommend moving them slightly with a fork when partially set, after about 10-20 minutes. This is to prevent them from sticking to the wire rack once they're fully hardened. Because they’re such delicate cookies they might break when you try to move them if you skip this step.
Be careful to touch the partially set cookies only from the bottom with a fork. Since the chocolate is still somewhat soft, it will still leave imprints at this point. I also recommend using a fork from the bottom to transfer the cookies when they're done for the same reason.
Pro tip
If the chocolate coating begins to harden in the bowl while you’re working with it, pop it in the microwave for 10-20 seconds and whisk until smooth. The glaze will be thinner the warmer it is, allowing you to create a thin coating on the cookies easily.
Substitutions & Variations
Here are a few easy substitutions you can make:
- Use butter in place of shortening. This will affect the texture and taste, so they'll taste less like the original. But I know some people are against shortening for health reasons. And they'll taste great either way!
- Dip the thin mints in melted chocolate instead of making the chocolate coating. I prefer the soft bite of the glaze for this copycat recipe, but using a properly tempered chocolate coating will make these cookies a bit more durable. Which is useful if you're planning on stacking them in a cookie box, for example.
You can also use the chocolate coating recipe to cover other types of cookies or use it as you would chocolate icing. It's similar to royal icing in the way it hardens but doesn't include any egg whites.
I also developed a copycat recipe for the new Girl Scout cookie flavor, Raspberry Rally, which is a variation of this recipe. Raspberry Rally cookies are considered the "sister cookie" to Thin Mints.
The two cookies look identical from the outside, but instead of being flavored with mint, Raspberry Rally cookies are raspberry cookies coated in chocolate. I pretty much just replaced the cocoa powder and mint extract in the cookies with freeze-dried raspberry powder and raspberry extract. The chocolate coating and preparation method are the same. They're delicious too!!
Equipment
Here's the equipment you'll need (or want) to make this recipe:
- Stand mixer (optional) - I love using my stand mixer for any cookie dough that calls for creaming butter or shortening because it's easier and I'm lazy! If you don't have a stand mixer, you can use a handheld electric mixer or mix by hand in a large mixing bowl.
- Plastic wrap - to wrap the dough before chilling.
- Rolling pin - if you don't have one, you should be able to press the dough with your hands. Or you can use a wine bottle or any cylindrical object to roll the dough into an even layer.
- Cookie cutter - I used a small round cookie cutter with scalloped edges, about 1.5 to 2 inches in diameter. You could also use a plain round cookie cutter or an upside-down shot glass.
- Parchment paper - essential for making perfect cookies! I love buying precut parchment sheets that lay flat for convenience.
- Spatulas - a rubber spatula is great for folding in flour to the cookie dough. An offset spatula (also called an icing spatula) is best for transferring stamped cookies because of its thin, flexible edge.
- Skewer (optional) - if you want to create the signature dotted pattern on the surface of the cookies. You can use the back end of a utensil or a toothpick too, whatever works!
- Mixing bowl - to make the chocolate glaze.
- Fork - for dipping the thin mints in chocolate. You can also use a fork to mix the chocolate glaze coating if you don't have a whisk.
- Wire rack - these checkered cooling racks are great for letting the cookies dry after dipping them in chocolate. They dry and harden faster since the air hits them on all sides, including the bottom. And it allows excess chocolate to drip off.

Storage Tips
I recommend storing these in the refrigerator or freezer so they'll keep longer. Plus, I feel like most people like chilled thin mints anyway! I think it's because of the mint flavor, it tastes extra refreshing when cold.
Store the thin mints in an airtight Tupperware container with parchment or wax paper in between layers to prevent them from sticking to each other. At room temp, they'll keep for about 3-5 days. In the fridge, they'll keep for about 2 weeks.
To freeze the thin mints, first, freeze them in a single layer on a parchment-lined sheet tray. Once they are frozen, you can transfer them to a ziptop bag or Tupperware container. Freezing them individually will prevent them from sticking to each other. You can also put parchment or wax paper in between layers in the freezer to further prevent sticking. You can freeze thin mint cookies for 3 months or more!
FAQ
YES! Real Girl Scout Thin Mints are vegan, and so is this copycat thin mint recipe. Many other homemade thin mint recipes contain egg and/or butter, which would make them not vegan. But this one doesn't contain either.
You guessed it, Thin Mints!! And they've been around for almost a hundred years, since 1939! The original name was Cooky Mints, then they were also called Chocolate Mints for a while, but the cookie was pretty much the same.
📖 Recipe
Copycat Thin Mints (Girl Scout Cookies)

These Copycat Thin Mints taste just like real Girl Scout Cookies! Crisp melt-in-your-mouth mint-chocolate wafer cookies are coated in a thin layer of a chocolate glaze-like coating.
- Prep Time: 15 minutes
- Inactive Time: 2 hours
- Cook Time: 10 minutes
- Total Time: 2 hours 25 minutes
- Yield: 24 cookies 1x
- Category: Cookies, Dessert
- Method: Baking
- Cuisine: American
- Diet: Vegan
Ingredients
For the Wafer Cookies
- ½ cup vegetable shortening (i.e. Crisco)
- ¾ cup sugar
- ¼ cup vegetable oil
- 3 tbsp corn syrup
- 1 tsp peppermint extract
- ⅓ cup cocoa powder, Dutch-processed
- ½ tsp baking soda
- 6 tbsp cornstarch
- ¼ tsp salt
- 1 ½ cup flour
- 2 tsp water
For the Chocolate Coating
- 4 tablespoons cocoa powder, Dutch-processed
- 4 tablespoons refined coconut oil, melted
- 1 ½ cups powdered sugar
- Pinch of salt
- 5 tablespoons hot water
Instructions
- Make the thin mint cookie dough: in the bowl of a stand mixer (or in a large mixing bowl) cream together the shortening and sugar. Add oil, corn syrup, and mint extract, and mix until combined. Then add the cocoa powder, baking soda, cornstarch, and salt. Finally, add the flour and mix on low speed until just combined, then add the water.* Form the dough into a ball, flatten it slightly into a disk shape, and wrap it in plastic wrap. Refrigerate for at least 1 hour or overnight.
- Stamp and bake cookies: preheat the oven to 325 °F. Roll out the dough on a sheet of parchment paper to ¼ inch even thickness.* Using a small scalloped cookie cutter, stamp circles out of the dough. Use an icing spatula (or similar) to carefully transfer the cookies to a sheet tray lined with parchment paper, spaced evenly apart with about 2 inches in between.* Bake for 9-10 minutes and let cookies cool on the tray before dipping.
- Make the chocolate coating: combine cocoa, coconut oil, powdered sugar, and salt in a medium mixing bowl. Then add the hot water and whisk until totally smooth. Adjust the consistency with extra water if needed (it should be pretty thin).
- Dip the cookies into the chocolate coating one at a time. Use a spoon or spatula to completely cover the cookie and wipe off excess chocolate. Then use a fork to carefully transfer the cookies to a wire rack to dry and allow the coating to harden for at least 1 hour.*
Notes
- The dough is very crumbly, like wet sand, but holds together when pressed.
- If the dough is sticking, coat the parchment, rolling pin, and cookie cutter with a little bit of flour. (The dough is pretty oily though so it shouldn’t stick, even without flour.)
- Optional tips: Poke dots in the cookies with a toothpick or skewer for lookalike! And place the tray of unbaked cookies in the freezer or refrigerator for 30 minutes before baking to help hold their shape.
- About 20 minutes after coating the cookies in chocolate (when they are partially set) use a fork to gently shift the cookies on the wire rack. This will prevent them from sticking to the rack and breaking once the chocolate is fully hardened.
Hannah says
They look great, I can't wait to make them!
Anonymous says
Missing ingredient
Kelly @ Butter and Thyme says
Oh no! I can't see anything that is missing. What ingredient do you think is missing?